Things You'll Need
Tape measure
Chalk snap line
Ceramic tile mortar
Notched trowel
Floor tiles
Tile spacers
Tile wet saw
Grout
Grout float
Sponge
The process of properly tiling around a tub begins before you set the first tile. It is important to lay out the tile pattern in advance so that you don't end up with a small or uneven sliver of tile against the tub. Generally, the tiles that are against the tub should be no smaller than a half-width of tile. Rent a wet saw, even if you're just laying easy-to-cut ceramic, because the cuts need to be cleaner than what you can get with a standard tile cutter.
Step 1
Use your chalk snapline to divide the room into four squares, with two wall-to-wall lines that intersect in the middle of the floor.
Video of the Day
Step 2
Lay floor tiles (without mortar) alongside the lines. Insert spacers between them and assess where the tile pattern will end up against the tub. Readjust your layout lines, if necessary, so that there will be no less than half a tile width against the tub.
Step 3
Spread ceramic tile mortar over a few square feet of floor at the intersection of the chalk lines. Set four tiles on the lines, in the mortar. Insert spacers between them. Spread more mortar and lay more tiles, spreading out across the floor. Lay all the full tiles that will fit in the room, leaving spaces around the edges by the walls and tub where full tiles won't fit. Let the tiles set overnight.
Step 4
Measure the space around the tub, between the base of the tub and the edge of the nearest full tile that you installed earlier. Mark the measurement on a new tile and subtract 3/8 inch. For curves or corner cuts around the tub, use a piece of cardboard and a razor knife to make a template of the contour. This will enable you to transfer the shape accurately to the tile.
Step 5
Cut the tile on your tile wet saw, getting a clean, straight edge.
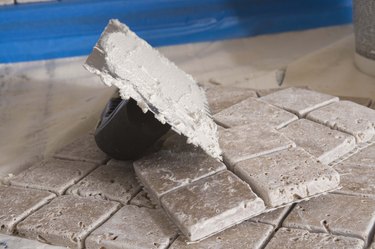
Step 6
Spread ceramic tile mortar on the back of the cut tile and set it in place next to the tub, properly spaced with the surrounding tile. Leave 1/4 inch of space between the cut side of the tile and the tub. Repeat for each tile around the tub. Let the tiles set overnight.
Step 7
Grout the floor using a grout float to set the grout into the spaces between the tiles. Don't grout between the cut sides of the tiles and the tub. Wet and wring a sponge and wipe the excess grout off the tiles. Let the grout set for 24 hours.
Step 8
Run a bead of caulk in the space between the cut edges of the tiles and the tub. Let the caulk set for 24 hours.
Warning
Wear eye goggles when using a wet saw.
Video of the Day