Things You'll Need
Tailor's chalk
Tape measure
Sharp seam ripper
Dressmaker's shears
Iron and ironing board
Needle
Heavy duty thread
Dressmakers pins
Sewing machine capable of sewing through several layers of denim
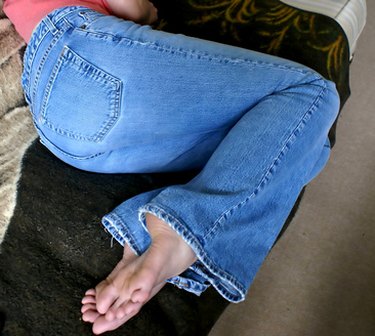
Jeans are a fashion staple, and the sturdy denim fabric and stud-reinforced seams that are trademarks of those garments make them sturdy, long-lasting clothing. However, the built-to-last construction means that it's a challenge to hem or alter a pair of jeans. The most difficult alterations involve moving or changing the waistband. You can, however, convert high-rise jeans (the waistband hits an inch or so above the natural waist) into low-rise jeans (the waistband hits about three inches below the waist) if you have the sewing skills to re-install the pockets, waistband and zipper.
Step 1
Put on the jeans. Mark the location of the top of the new waistband height on the jeans at a side seam using tailor's chalk.
Video of the Day
Step 2
Measure the distance from the seam that joins the waistband down to the chalk mark. At one-inch intervals, measure that amount down from the waistband seam and mark it on the jeans. Proceed all around the circumference of the jeans' hips area, until you've marked the new waistband height all the way around the jeans.
Step 3
Assess the placement of the new waistband marking to determine if the new waistband placement as marked is acceptable. If it is, proceed to Step 4. If not, wash away the chalk line and start again at step 1.
Step 4
Measure the width of the waistband. Add 5/8 inch to that measurement. Measure and mark a line on the hip of the jeans that is that amount lower than the chalk line you just marked. This is your cutting line.
Step 5
Assess the jeans' side, hip and back pockets, if there are any. If they fall completely above or below the cutting line, including the pocket lining, proceed to Step 7. If the cutting line intersects a pocket, go to Step 6.
Step 6
Remove pockets that intersect the cutting line by ripping out the stitching with a sharp seam ripper. Sew up the hip seam after you remove inset side pockets. Set aside the pockets.
Step 7
Remove the waistband from the jeans by ripping the stitches out with a sharp seam ripper. Tear out the stitches attaching the zipper to the fly placket to about an inch below the cutting line. Set aside the waistband.
Step 8
Starting at the fly front, cut off the excess material above the new waist by cutting along the marked cutting line using sharp dressmaker's shears. Cut through all layers of the fly placket. Set the excess fabric aside.
Step 9
Fold down a 5/8 inch flap along the new waist area of the jeans (along the area you just cut) and press the flap down. Try on the jeans. Take in or let out the side seams if the fit at the hip needs adjustment by ripping out the side-seam stitches and resewing the seams to allow more or less width for your hips.
Step 10
Measure your high hip measurement just at the folded top of the jeans. Button the removed waistband and measure the circumference. You'll need to alter the waistband circumference to match the measurement of the jeans at the folded top. To alter the waist band, rip out the stitches at the side seams and stitch new seams to match the new measurement. If you need to add more fabric to make the waistband long enough, use some of the excess fabric cut away from the jeans in Step 8 to extend the waistband. You'll then have a double seam at both sides of the waistband.
Step 11
Unzip the zipper to one inch below the flap at the top of the jeans. Create a new zipper-pull stop across the teeth 1/4 inch down from the fold, and on each side of the zipper: Stitch a series of overcast stitches over the teeth until you have a raised satin-stitch-like lump of stitches at the top at each side, which will prevent the zipper pull from advancing past that point. Cut the top of the zipper so that it only extends one inch higher than the folded flap at the top of the jeans.
Step 12
Assess the pockets you removed in Step 6. If they will fit onto or easily set into the much shorter hip area of the altered jeans, stitch them back into or onto the jeans before you reattach the waistband. For side-seam inset pockets, you will have to reopen the side seams to reinsert them.
Step 13
Unfold the flap at the top of the jeans. Unzip the zipper. Open up the waistband. Pin the waistband front to the top of the jeans, right sides together, and matching the fold crease at the top of the jeans to the seam line of the waistband. With the wrong side (inside) of the jeans facing up, stitch the waistband onto the jeans, making sure to catch the zipper top into the stitching at both sides of the fly as you stitch.
Step 14
Remove the pins. Open up the seam and press it flat with a hot iron. Then iron the seam allowances up toward the top of the waistband. Trim the zipper ends in the seam allowance. Fold the waistband back facing down over the seam allowances; then hand-stitch the waistband facing in place.
Tip
For best results, heed the carpenter's adage "Measure twice, cut once" to prevent mistakes. Set your sewing machine to stitch slowly and work deliberately. It's easy to break a needle or stitch off course when working with thick, heavy denim layers. If you prefer, you can replace the original zipper with a shorter one rather than altering the zipper already in the high-rise jeans. You may not be able to alter high-rise jeans with a front or back yoke, as the yoke design will interfere with your new waistband placement. If you are an experienced sewer, you might prefer to make a new waistband out of the excess fabric rather than alter the existing one.
Video of the Day