Things You'll Need
Photograph
Light box
Tape
Typing paper
Pencil
Art pen
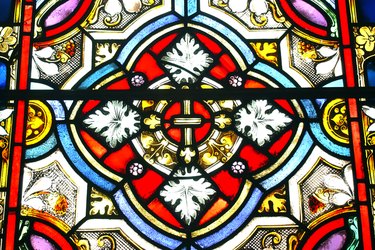
Stained glass has decorated cathedrals, mansions and mausoleums for centuries. Medieval church-goers saw ornate stained glass windows as a representation of heaven's light. Nobles and wealthy merchants decorated their homes with stained glass windows to show off their wealth. In the Middle Ages, glass, let alone colored glass, was an expensive commodity and the images portrayed in it were often religious in nature. Geometric patterns were also popular, regarded as representations of God's perfection. Today, stained glass is simply a beautiful decoration. Stained glass windows still decorate homes with images both religious and secular. Light-catchers, small circles or squares of stained glass, hang in plain windows. In fact, art lovers can design their own stained glass windows with a little patience and the right tools.
Step 1
Find a photo with lots of well-defined geometric shapes. Pictures of flowers, animals and still-life objects work best. All objects in the photo should have clearly visible edges and be made up of large shapes, like a dog with spots or an enlarged picture of a lily or shell. Print the picture out so it fills a normal sheet of paper.
Video of the Day
Step 2
Tape the picture to a light box—a drawing desk with a white plastic top and a light bulb inside. Turn on the light bulb and the light will shine through the picture. Place a piece of typing paper over the picture; you should clearly see the picture through the typing paper.
Step 3
Trace the picture, paying attention to the general shapes. Trace around the leaves and petals of flowers, or around the body parts of animals, drawing flying manes or fluffy tails as one smooth shape instead of defining small details. The shapes must be large and fit like puzzle pieces. Make your lines thick for easy tracing with solder later.
Step 4
Trace over your pencil lines with ink. Use a pen with a medium-thick tip. A thin tip would not define your shapes very well, while a very thick tip would ruin the lines of your drawing. Outline carefully, being patient and avoiding smudges. Let the ink dry and transfer it to film for a home stained-glass kit or send it to a producer to make a custom real glass window.
Video of the Day