Things You'll Need
Plastic drop cloths
Painters’ tape
220-grit sandpaper
Tack cloth
Primer-sealer
Brush
Bole color paint
Size
Gold leaf
Gilder’s brush
Gilding sealer
Applying gold leaf to a plaster object is known as gilding. Gilding architectural features such as plaster ceiling medallions and crown molding, as well as gilding furniture trim, lends a room an air of opulence. While gilding is not difficult, it takes a few tries to learn how to handle the gold leaf properly. Follow these directions as a first step in learning this art technique.
Step 1
Protect work table and floor with drop cloths taped with the painters' tape. Tape off any areas on your plaster object that will not be covered in gold leaf.
Video of the Day
Step 2
Sand out any blemishes on the plaster gently. Remove dust with tack cloth.
Step 3
Brush on a primer-sealer that is made specifically for gilding. Some primer-sealers come in various colors to enhance undertones or hide any scratches that may eventually occur in the gilding. Allow to dry according to instructions on the primer-sealer packaging.
Step 4
Paint on the bole color and allow it to dry. Historically, the bole was a pigmented clay that was rubbed onto the plaster and polished smooth. Today, however, paint is usually used instead. Note that, with some primer-sealers, bole color is not necessary. Consult the packaging of the primer-sealer to determine if you need bole color.
Step 5
Coat the plaster object with size. Size is the adhesive that the gold leaf will attach to on the plaster. Make sure the application is as even as possible. Consult the size adhesive directions for best usage practices, especially for drying times. Allow the size to dry to a tack finish. The best time to apply the gilding is just before the size is completely dry.
Step 6
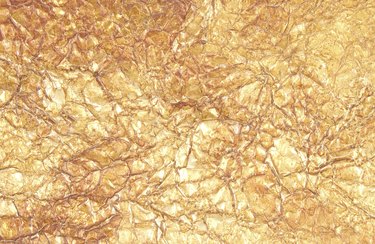
Attach a sheet of gold leaf to the tacky sized surface. If you use a book of loose gold leaf, hold the book in one hand, gently fold the protective paper back, and turn the book over. Touch the exposed gold leaf to the sized surface and carefully pull the book away, pulling the leaf out onto the plaster. Hold the leaf firmly onto the plaster.
If you are using gold leaf on transfer paper, gently place a sheet of it, leaf side down, on the plaster surface. Using the gilder's brush or your hand, rub the paper backing gently and evenly. When the leaf has attached to the sized surface, slowly remove the paper backing.
Place more gold leaf sheets adjacent to each other on the object to cover it completely.
Step 7
Burnish the leaf with the gilder's brush made of squirrel or goat hair until the gold leaf has adhered completely to the plaster. Cut small pieces of gold leaf and apply to any gaps in the gilded surface.
Step 8
Allow the object to sit overnight to cure. Spray on a protective coat of sealer. Note, however, that sealer is not necessary for 2-karat gold or higher because it will not tarnish. However, if the object will be in a high-traffic area, a sealer coat may be warranted.
Tip
Wear white cotton gloves when handling gold leaf because skin oils may cause it to stick to your hands.
Save any gold leaf that flakes off during the burnishing step for use in later projects.
Warning
When using any paint or chemical, always work in a well-ventilated area and wear appropriate protective clothing such as gloves, safety goggles, long pants, and long-sleeved shirts.
Video of the Day