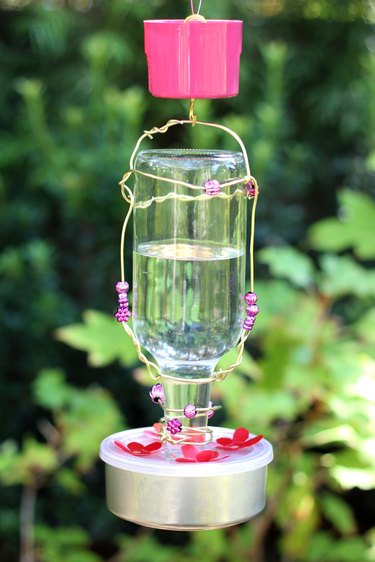
Hummingbirds are believed to bring good luck, as they are associated with beauty, joy and healing in many cultures. If you want to attract hummingbirds to your yard, entice them with a hummingbird feeder they won't be able to resist. Made with a used glass bottle and other household materials, it's easy and inexpensive to assemble. There's even an "ant moat" to keep ants away from the sugar water in the feeder reservoir.
Video of the Day
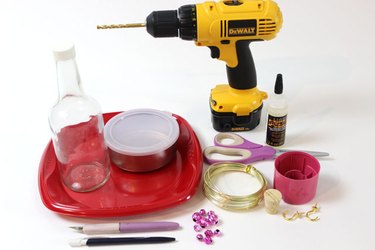
Things You'll Need
Shallow food container with plastic lid
Glass bottle with screw cap
Pen
Hobby knife
Drill with 1/4-inch and 1/2-inch bit
Red plastic plate
Scissors
Hole punch
Waterproof glue (non-toxic)
12-gauge florist wire
Beads
Plastic cap from spray paint bottle
7/8-inch cup hook
Cork
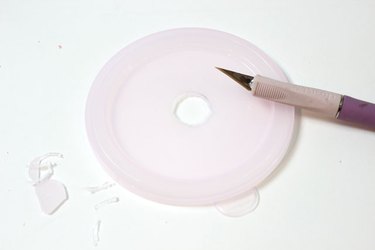
Step 1: Cut Center Hole In Plastic Lid
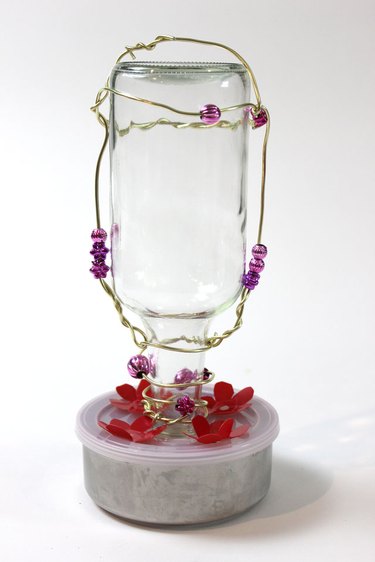
This hummingbird feeder has three main sections: (1) an ant moat to keep ants away; (2) a bottle that holds the sugar water; and (3) a shallow container that the hummingbirds feed from. For the shallow container, I used a stainless steel food container, but you can use a plastic one — as long as it has a snap-on plastic lid. Plastic tubs from delicatessens work well for this purpose. Remove the lid from the container, and trace the outline of the top rim of the bottle with a pen in the center of the lid.
Video of the Day
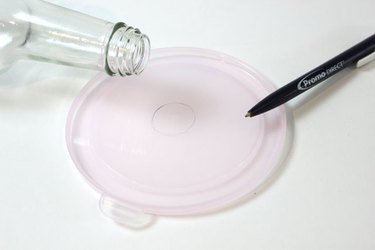
Cut a hole with a hobby knife using the circle as a guide. This hole will be where the top of the bottle is inserted.
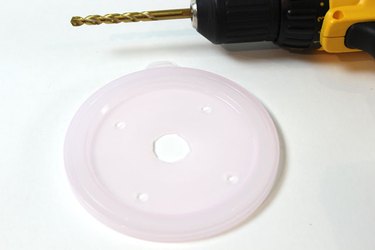
Step 2: Drill Feeding Holes
Using a drill with a 1/4-inch bit, drill four holes spaced evenly apart about one inch from the edge of the lid. These are the holes the hummingbirds will use for feeding.
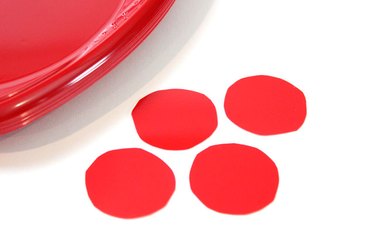
Step 3: Make Flowers
To attract the hummingbirds to the feeder, we'll make red flowers to sit on top of the feeding holes. Hummingbirds are drawn to the color red. With scissors, cut four 1 ½ -inch circles out of a red plastic plate. You can use a circular object (like the bottom of a pill bottle) to trace a circle, or you can just eyeball it.
Punch a hole in the middle of each circular piece. Choose a hole punch that is about one-quarter inch to match the holes drilled in the plastic lid.
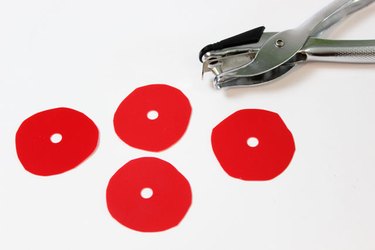
Cut six slits spaced evenly around the circle, but not cutting into the hole you've punched.
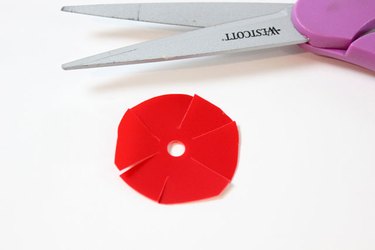
Cut petals from each of the six sections of the circle to finish the flower.
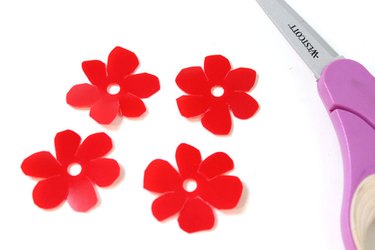
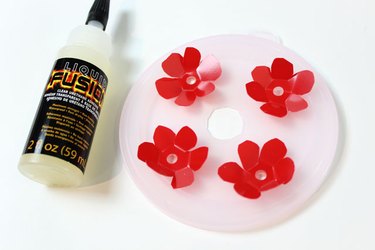
Step 4: Glue Flowers On Top of Holes
Bend the petals to give the flowers dimension, and line up the holes in the flowers with the holes in the plastic lid. Adhere the flowers with a waterproof craft glue that is formulated for both indoor and outdoor applications. Also, choose a glue that is non-toxic. Let the glue dry overnight.
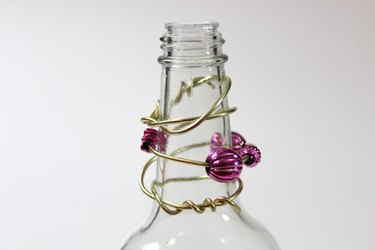
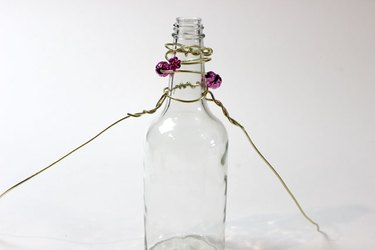
Step 5: Wire the Bottle
I used a glass bottle for this hummingbird feeder, but you can also use a plastic one. While it's necessary to wrap wire around the bottle to allow it to be hung from a tree branch, the wire also serves as a lovely decorative element. Starting at the top, which is typically narrower than the rest of the bottle, wrap 12-gauge floral wire three or four times around this section. To help attract hummingbirds, string some colorful beads in the wire as well. Secure the wire by twisting the ends.
Attach two long pieces of wire to the wire already around the bottle, securing them by twisting the ends. These pieces should extend past the bottom of the bottle by at least six inches.
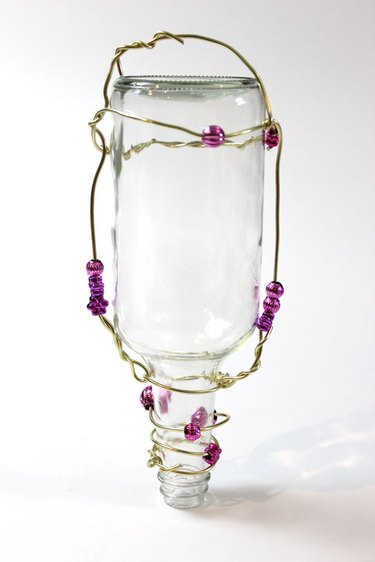
Turn the bottle upside down. Because of gravity, the wires will want to fall off the bottle, so hold up the ends of the two long pieces of wire. Wrap a piece of wire to form a loop around the bottom of the bottle (which is now at the top because it's upside down), and then hook the two long wires around this loop. Then join these two long pieces at the top, twisting them to secure them. Remember to string beads sporadically.
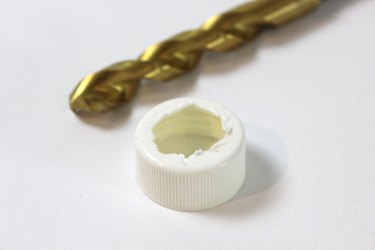
Step 6: Drill Hole in the Bottle Cap
Using a drill with a half-inch bit, drill a hole in the bottle cap. Drill a few more times to expand the hole as close to the edge as possible. It will not look pretty, but no one will see this part of the bird feeder. This cap serves to secure the bottle to the plastic lid, but we want a large hole in the cap so the sugar water flows freely from the bottle to the container below.
Step 7: Assemble the Parts
Slide the rim of the bottle into the plastic lid with the flowers, keeping the lid upside down with the flowers on the bottom. Then screw in the plastic cap with the large hole to secure the bottle to the lid.
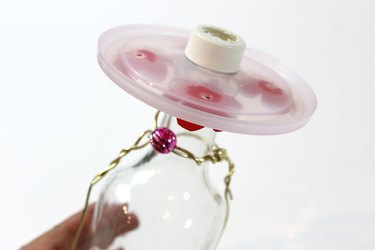
Turn the bottle upside down again, snap the plastic lid onto the container, and the hummingbird feeder is done.
Step 8: Make the Ant Moat
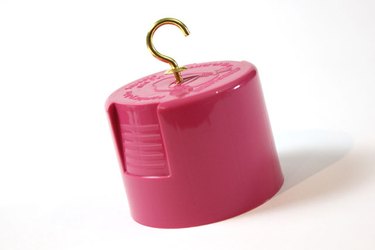
To prevent ants from invading your supply of sugar water, create an ant moat that serves as a barrier to the hummingbird feeder. The ant moat is filled with water, and the ants will drown in the water before reaching the feeder. A perfect vessel for the ant moat is a plastic cap of a spray paint can. Screw a 7/8-inch cup hook into the top of the plastic cap. There is usually a dimple in the center of the cap you can use as your guide.
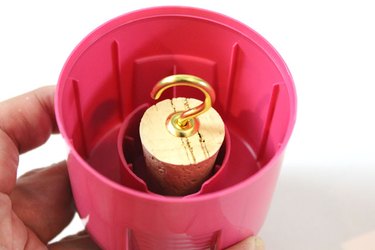
On the inside of the plastic cap, screw a cork into the cup hook you've just inserted. Then screw another cup hook on top of the cork. The plastic cap of a spray paint can works so well as an ant moat because of the inner wall that holds the cork. When filled with water, even if water leaks out of the center section because of the hole made by the cup hook screw, there is still a reservoir of water on the outer section. Just be sure to keep the moat filled with water, as it will evaporate.
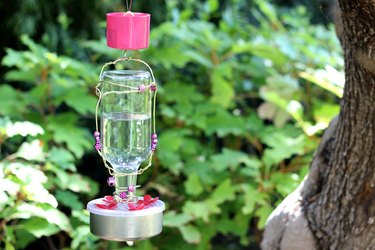
Step 9: Hang the Hummingbird Feeder
Keeping the bottle right side up, fill the bottle with a mixture of one part cane sugar and four parts water. Stir until the sugar dissolves. Assemble the feeder and turn it all upside down. The liquid from the bottle will pour into the container and stop on its own. Wrap wire around a tree branch, and hook the ant moat to the wire. Then hang the hummingbird feeder from the hook on the bottom of the ant moat.