
Merry-go-rounds have their origin as early as the 12th century and are also known as carousels and roundabouts. In medieval times, knights used a crude relative of the merry-go-round to train for jousting. The carousel evolved into a work of art in the 1800s. The ride generally has many elaborate animals and beautiful designs painted on it.
Step 1
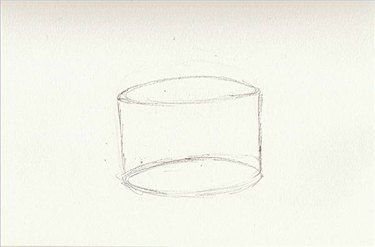
Draw a squat can shape the approximate size you want for your merry go round.
Video of the Day
Step 2
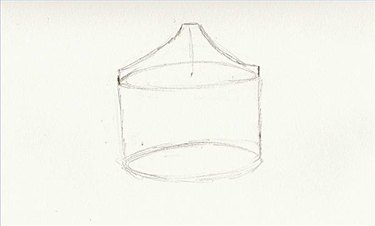
Draw a small cone shape on the top of the can.
Step 3
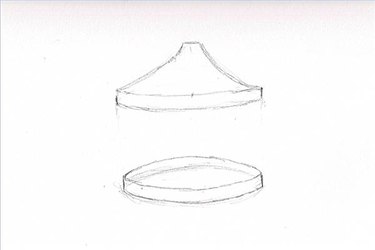
Erase the inner lines. To make the bottom look 3D, draw two small lines on either side of the oval and place another oval on top.
Step 4
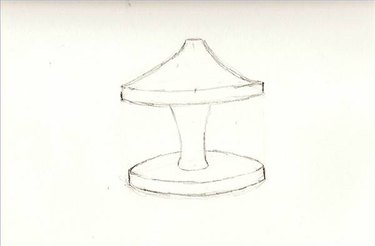
Erase the inner lines on the bottom oval platform. Find the center of the bottom and draw the column of the merry-go-round on top of that.
Step 5
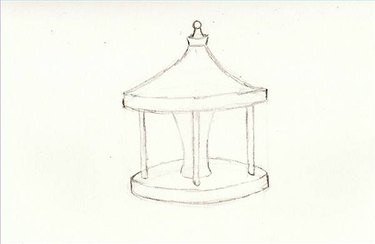
Draw three poles spaced evenly around the merry-go-round. Draw a party-hat shape for the top of the ride.
Step 6
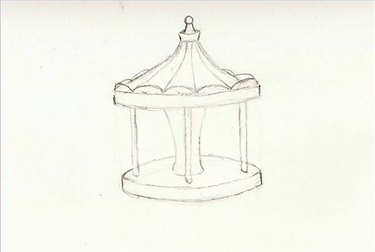
Add a scalloped edge on the top rim of the oval. Extend lines from the top cap down to the scallops to make the stripes.
Step 7
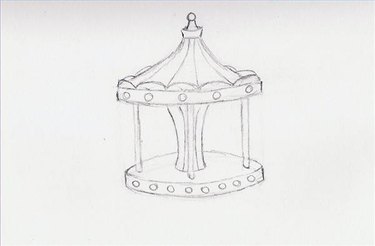
Make circles on the front edge of the top and bottom for lights.
Step 8
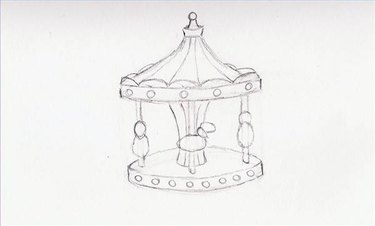
For the horses, draw oval shapes to create the bodies and the heads.
Step 9
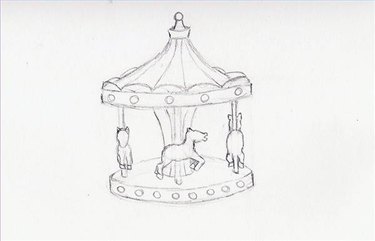
Add ears and legs to the horses.
Step 10

Draw ovals for the eyes of the horses and a puffy mane and tail. Add rectangles to make the saddles and thin lines to make the bridles.
Step 11
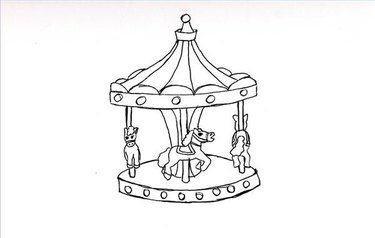
Trace the drawing with a pen to complete. Once the ink is dry, erase the pencil lines.
Tip
Experiment by drawing different designs and animals on the carousel.
Video of the Day