
When it comes to making jewelry, anything goes. You can even make beautiful pieces using easily accessible natural elements from your own backyard. Lucky for you, free rocks, stones and pebbles can all be used for jewelry projects with no two creations turning out exactly alike. Incorporating rocks into your handmade jewelry comes down to using the right techniques. Don't know where to get started? Here are three ways to make your own rock jewelry.
Version 1: Make A Rock Charm
Video of the Day
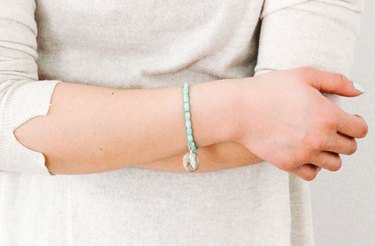
Using a rock as a charm is an easy and versatile way to make jewelry without the need for fancy equipment or expensive power tools. This first tutorial will show you how to make a rock charm to use in a beaded bracelet.
Video of the Day
Supplies
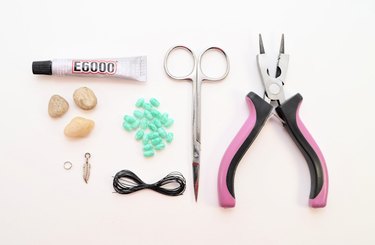
- Small rock or pebble
- Strong craft or jewelry glue
- Beads
- Small jump ring
- Flat metal charm
- Stretchy string
- Scissors
- 3-in-1 jewelry pliers
Step 1
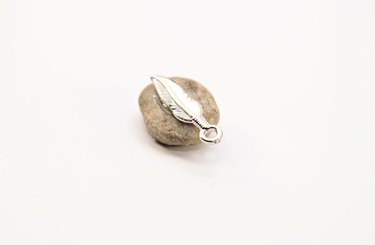
Glue the flat metal charm to the flattest side of the rock or pebble. Position the charm so that the loop extends past the edge of the rock. Let dry.
Step 2
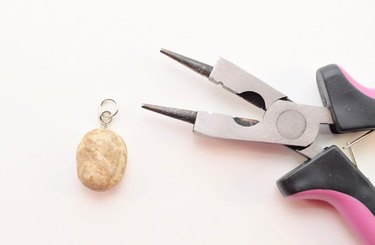
Add a jump ring to the charm, and use jewelry pliers to securely close the jump ring.
Step 3
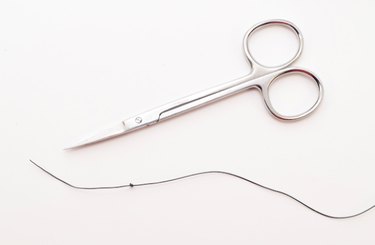
Cut a strand of stretchy string measuring 1 1/2 times your wrist. Tie a knot about 1 inch from the end -- a knot stops beads from sliding off while you work.
Step 4
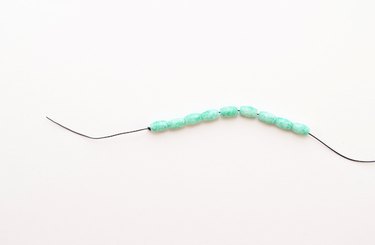
Add beads. Continue until you reach about halfway down the thread. Size and shape determines the number of beads you need.
Step 5
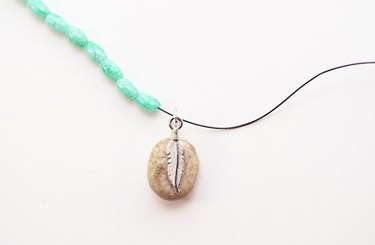
String on the charm once you've beaded half of the string. Adding the charm at this point keeps it centered.
Step 6
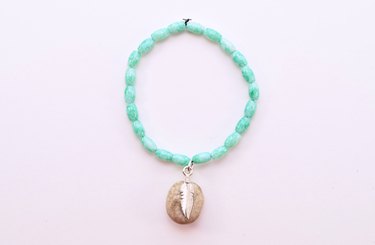
Use the same number of beads on each side of the charm. Add the remaining beads and tie the string ends together. Trim the excess string.
More Ideas for Making Charms

After you've made this bracelet, try the same technique with different kinds of jewelry. For example, a rock charm can also be used on a necklace. Or try lightweight pebbles in dangling earrings. Just add an earring hook to each one.
Version 2: Wrap a Rock in Wire
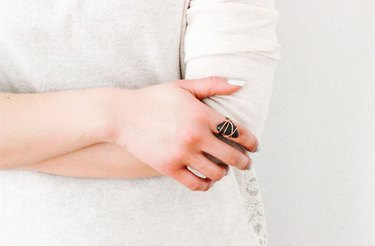
Wire wrapping is a great way to mix and match materials. Not only does it add some dimension to your project, it also creates a more polished and put-together look. Start off with this easy wire-wrapped rock ring, a perfect project for beginners.
Supplies
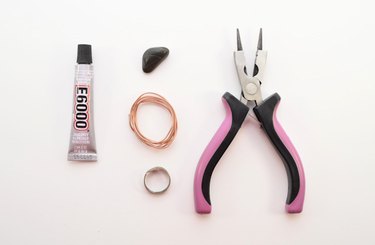
- Strong craft or jewelry glue
- Small rock or pebble
- Soft craft wire
- Flat ring blank
- 3-in-1 jewelry pliers
Step 1
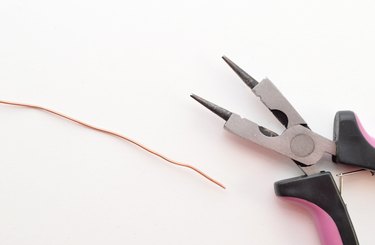
Cut a strand of wire measuring at least 10 times the widest width of the pebble. It's always better to start off with too much wire rather than too little.
Step 2
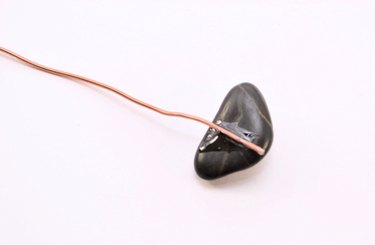
Glue the end of the wire to the flattest part of the pebble. Let it dry.
Step 3
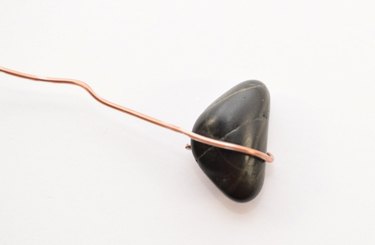
Tightly wrap the wire around the pebble.
Step 4
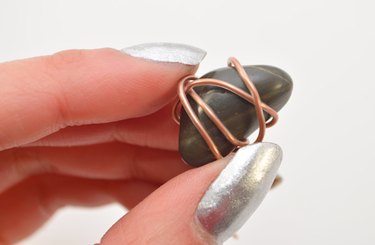
Wrap the wire in random directions - don't think too much about it! Continue wrapping until you achieve the look you want.
Step 5
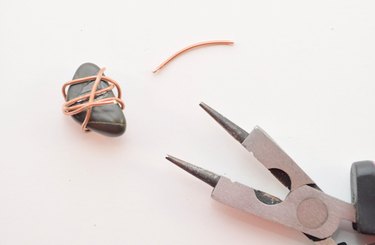
Using the cutting portion of the pliers, trim away any excess wire. After cutting the wire, push down on the end so it doesn't protrude.
Step 6
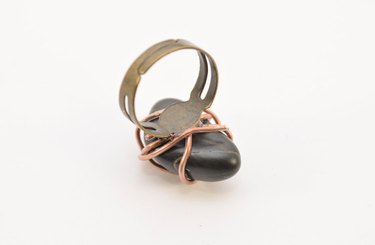
Glue the ring blank to the flattest part of the wire-wrapped pebble. Let it dry.
More Ideas for Wire Wrapping

Wrapping wire is super easy once you get the hang of it. And you can apply the method to both small and large rocks. Did you know that you can also turn wire-wrapped pebbles and stones into pendants? Just insert chain or thread directly through the gaps of the wire. You can also attach a jump ring; the possibilities are endless.
Version 3: Wrap a Rock in Leather
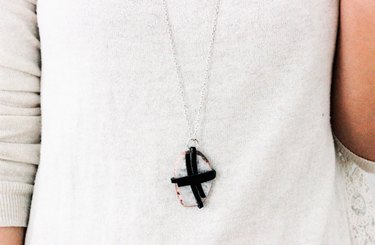
Like wire, leather-wrapped rocks creates an interesting mix of materials. From turquoise to black, leather and suede cords are available in many colors. This gives you a chance to customize your pendant to fit your style and taste. In this tutorial, you'll learn how to make a leather-wrapped rock pendant for a basic necklace.
Supplies
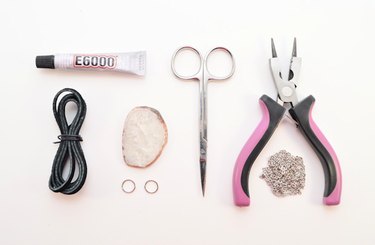
- Strong craft or jewelry glue
- Leather cord
- Flat rock or stone
- Jump rings (2)
- Scissors
- 3-in-1 jewelry pliers
- Long strand of chain
Step 1
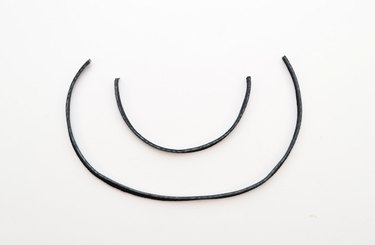
Cut two strands of leather cord. The first should measure three times the width of the rock, while the second should measure three times the length.
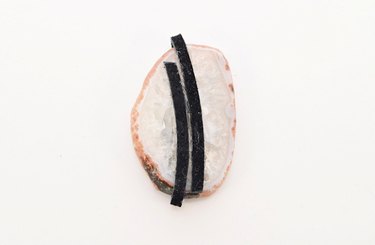
Step 2
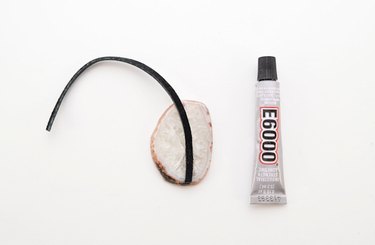
Glue the first strand straight across the rock. To keep the cord in place, press down on it for a few seconds.
Step 3
Wrap the cord around the rock and glue the other end to the first side where you started. You can also add glue to the opposite side for extra security. Place a book on the pendant to keep the leather in place while it dries. Let the glue dry completely before you continue to the next step.
Step 4
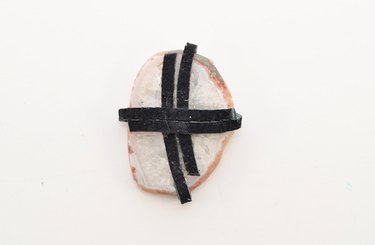
Once the first strand is completely dry, repeat the process with the second strand, crossing it over the first. Let it dry, repeating the same method of placing a book on top.
Step 5
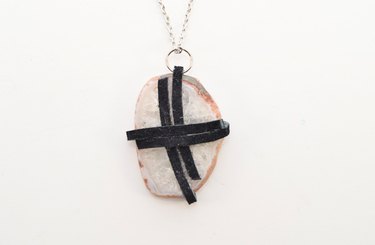
Carefully attach a jump ring to the cord at one end of the rock. String it onto the chain.
Step 6
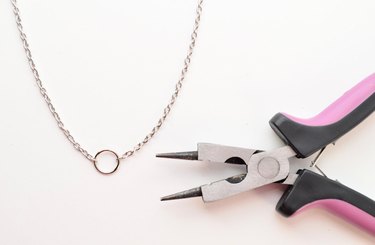
Connect the ends of the chain with a jump ring.
More Ideas for Leather Wrapping

Leather cord can be bulky and stiff, so this method usually works best for bigger rocks. Thinner, softer leather would work with smaller stones for bracelets. For another necklace variation, attach chain jump rings and chain to two opposite sides. You can also add charms and beads to your chain to embellish your rock jewelry creation.