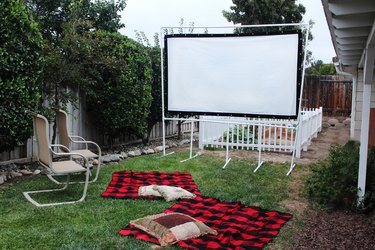
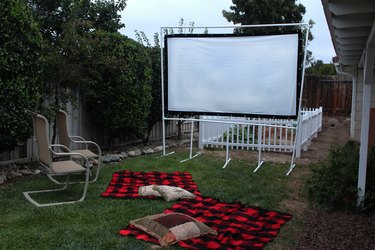
Watching a film under the stars adds a magical element to movie night. It's easy and affordable to create your own outdoor screen using PVC pipes. Once you set one up in your backyard, everyone on the block will be clamoring for an invitation to your viewing parties.
Things You'll Need
White projection screen material, 110 inches by 66 inches
3-inch black felt tape
Scissors
Grommet pliers
Grommets
Pipe cutter
1-inch PVC pipe, 60 feet
1-inch three-way PVC connectors, 10
1-inch PVC caps, 10
1-inch 90-degree PVC elbows, 2
Bungee cords measuring 10 inches, minimum of 4
Sand bags or cement mix
Movie projector
Tip
You'll need to decide if you want to place the projector behind the movie screen or in front of it when projecting films, and choose the type of screen material accordingly.
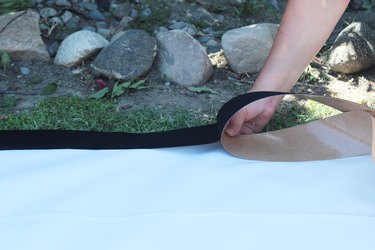
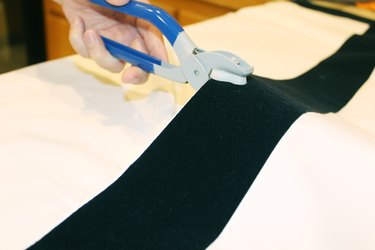
Step 1: Create a Border Around the Screen
Cut two pieces of the black felt tape measuring the length of your screen and two pieces measuring the width of your screen. Tape the four pieces into place along the edges of the projection screen, creating a border around it. When applying the tape, do not stretch the screen material.
Tip
Attaching the black felt tape can be a tricky process and may require a couple of helpers to keep the screen nice and flat when applying the tape.
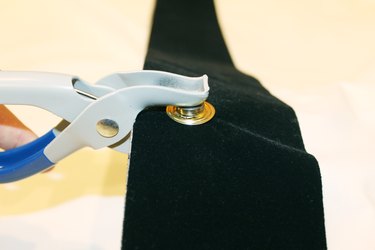
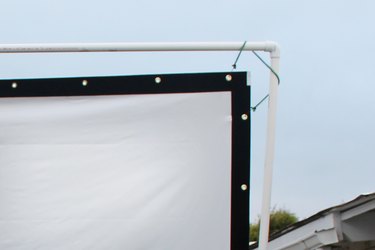
Step 2: Attach the Grommets
Use the grommet pliers to create holes through the black felt tape and screen material. Create a hole about 4 inches from each corner. Now punch a hole about every 11 inches between those initial holes. Attach a grommet in each hole using the grommet pliers.
Step 3: Cut the PVC Pipes
With the pipe cutter, cut 10 pieces of PVC pipe at 18 inches each (the feet), five pieces at 24 inches each (the legs), four pieces at 28 inches each (the base), two pieces at 75 inches each (the sides), and one piece at 115 inches (the top).
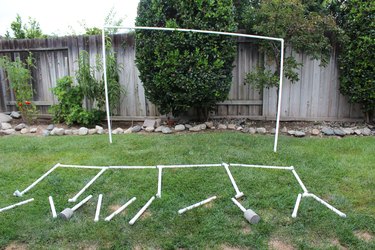
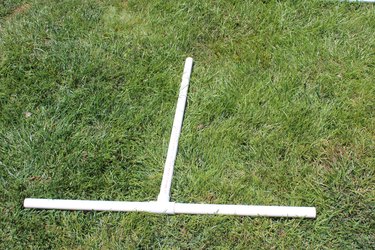
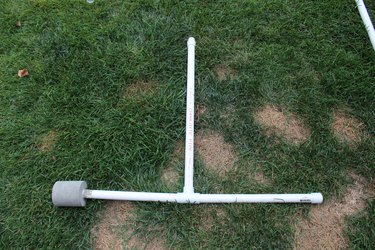
Step 4: Build the Legs and Feet
Take two 18-inch PVC pieces and connect them to a three-way connector, making sure they are horizontal with each other. In the other hole facing away from the two horizontal pieces, place a 24-inch piece to form a T-shape. Do this four more times, and you will have all of your legs and feet set. Place PVC caps on the ends of each foot.
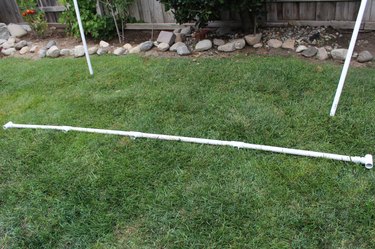
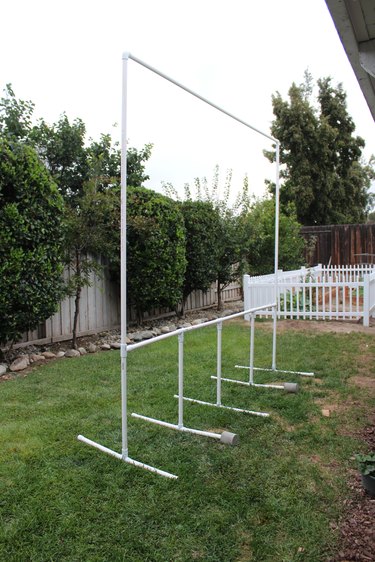
Step 5: Build the Base
Line up the four 28-inch pieces horizontally and connect them together using three of the three-way connectors. Make sure the openings in the connector pieces are all facing the same direction. This will be the base of the screen. On either end of the base, attach a three-way connector using the center hole so that the other openings on the connector pieces are vertical.
Step 6: Connect the Base and Legs
Connect the legs to each of the three-way connectors on the base so they are all facing in the same direction. This will leave two openings remaining for the sides of the screen to connect with the base.
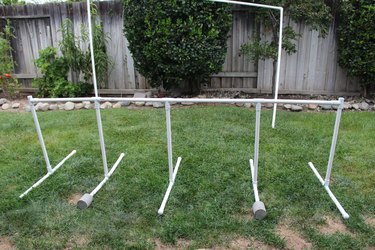
Step 7: Connect the Sides and Top With the Base
Connect a 90-degree elbow to each end of the 115-inch PVC piece. On the other ends of the 90-degree elbows you will connect the 75-inch PVC pieces. Insert the other ends of the 75-inch pieces into the two openings on the base to complete the skeleton of the screen.
Tip
Not gluing any of the pieces together makes it easier to take apart later and store when it's not in use. Be sure to mark each piece so you know where they go the next time you set up your screen.
Step 8: Hang the Screen Material
Hook a bungee cord through each corner of the screen material to hang the screen off the PVC frame. If there is some slack in the screen, use extra bungee cords to tighten the screen.
Step 9: Weigh the Screen Down
There are a few options to keep the movie screen weighed down. One option is to lay sand bags over two or three of the feet. You can also mix cement in a coffee can and stick one side of the feet in the coffee can, letting the cement dry over it. After it completely dries, you can just gently knock the sides of the can with a hammer and slide the foot and concrete out. Note: If you choose the cement method, you will want to do this after Step 4.
Step 10: Set Up the Movie Projector
Setting up the projector to view movies on the screen will take a little trial and error. You'll need to adjust the tilt of the projector to get the right angle. Be sure to follow any instructions that came with the projector you purchased, as it will note how far to place the projector from the screen. If your projector doesn't come with speakers or you just want an extra boost in sound, be sure to use compatible speakers.
Now, grab some popcorn and enjoy your very own film festival!
Video of the Day