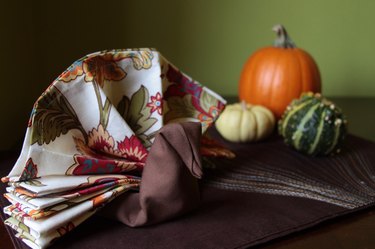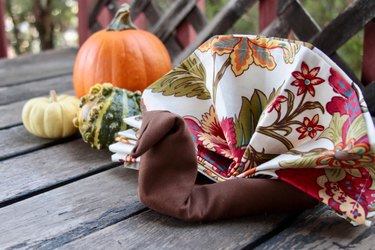
So you're hosting Thanksgiving for the extended clan this year and (secretly) want to outdo the lavish soiree your sister threw last year? Never fear. We've got just the decorative touch that'll take your Thanksgiving dinner table setting to a whole new level of awesome — turkey napkins!
This turkey napkin fold method requires two napkins per turkey, but after the gut-busting feast you're going to prepare for everyone, two napkins may very well be a necessity. We recommend using solid-color napkins for the heads and pretty printed ones for their fanned tails.
Video of the Day
Video: How to Fold a Turkey Napkin
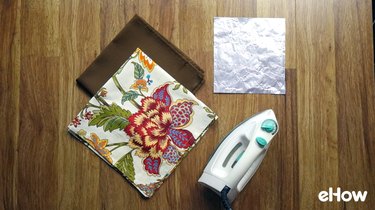
Things You'll Need
Set of solid-color cloth dinner napkins
Set of printed cloth dinner napkins
Heavy-duty aluminum foil
Clothes iron
Paper clips
1. Start the body
Take a solid-color cloth napkin and fold it into quarters to form a square.

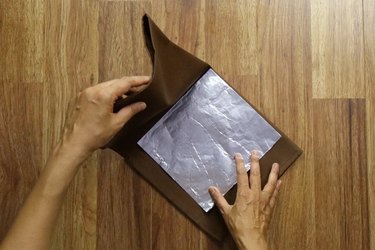
2. Add aluminum foil
Cut a piece of heavy-duty aluminum foil into a square just a bit smaller than your napkin quarter. Lift up one flap of your folded napkin and insert the foil, carefully aligning the foil with the napkin crease on one side and the napkin edge on the other, as shown here. The foil will give your bird's head and neck structure and malleability.
Tip
For best results, always use heavy-duty aluminum foil. However, if you only have lightweight foil and/or you've got an extra-thick napkin, use two layers of foil by cutting a piece twice the size and folding it in half.
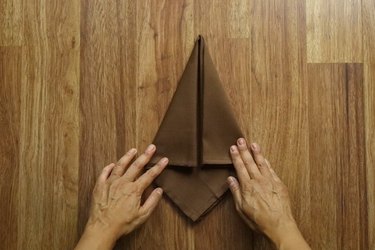
3. Fold diagonally
With the foil-reinforced corner pointing upward, fold the napkin in half diagonally to create a crease line for guidance. Unfold. Fold the right corner down so the right edge aligns with the crease line. Do the same for the other side (as if making a paper airplane).
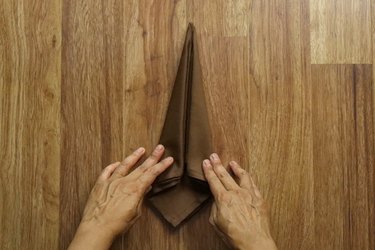
4. Form the point
Fold the corners down one more time to meet the center. The pointy tip at the top will be your turkey's beak.
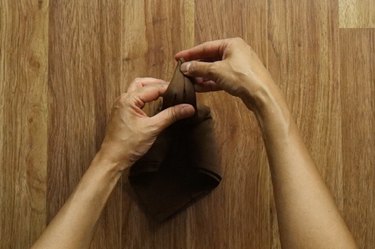
5. Make a neck
Now fold the pointy end back onto itself, about 3 inches down from the tip. This crease will be where the turkey's neck meets its body.

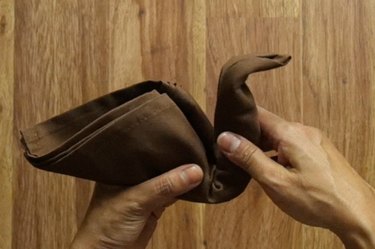
6. Make the beak
Make the beak by folding the tip forward. The foil should make it easy to mold into the desired shape.
7. Make a neck wattle
Give the entire body more dimension by pressing in the sides to slightly puff it up. Then, press in the sides of the neck to give it a wattle (you know, that dangly bit on the front of a turkey's neck). It's time to move on to the tail.
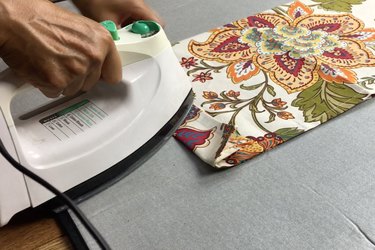
8. Start the tail
Fold your printed napkin in half lengthwise atop an ironing surface in preparation for pressing.

9. Make a napkin accordion
Fold your entire napkin accordion-style widthwise, with folds approximately 1 inch to 1 1/2 inches apart. Iron each fold as you go to set in the creases.
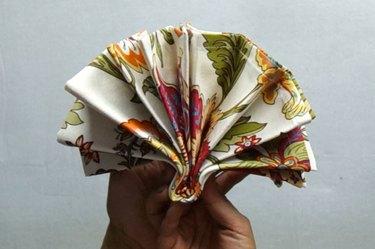
10. Create a fan
Fold the accordion-ed stack in half widthwise and pinch together at the fold to create a fan. Then use the paper clip to join the two sides so there's no gap in the middle of your turkey's fanned tail.
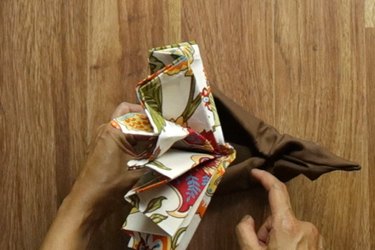
11. Give the turkey a tail
Now comes the fun part! Insert the bottom of the fan into the groove in the turkey's back; the stiff foil should hold the fan in place.
It's Show Time!
Your turkey is now ready for the tabletop! Why not make cloth turkey napkins for each adult and paper napkin turkeys in fun prints for the kids' table? Or, you could group them together in a flock (also called a rafter) to form a centerpiece for your Thanksgiving table or holiday dinner party.