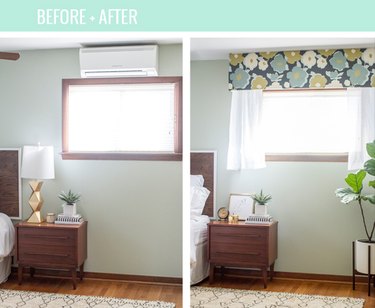
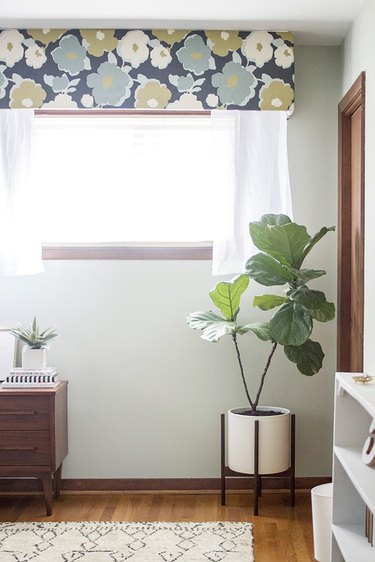
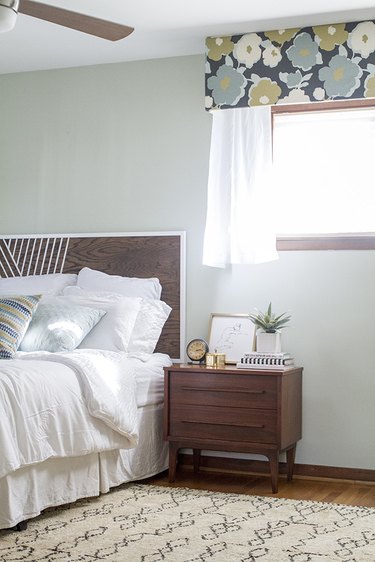
You can easily cover up an unsightly AC wall unit with a DIY fabric-wrapped cornice board. This step-by-step tutorial shows you how to properly measure your window area and your particular AC unit, and how to construct the wooden cornice board and wrap it with decorative fabric. Then, you'll learn how to securely mount the cornice board to your wall. Once complete, you'll quickly forget that your ugly AC wall unit is even there!
Video of the Day
Things You'll Need
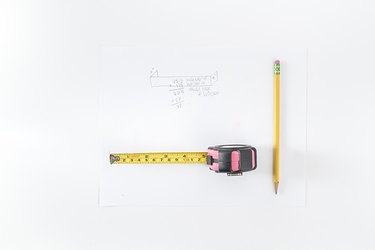
Tape measure
Pencil
Stud finder
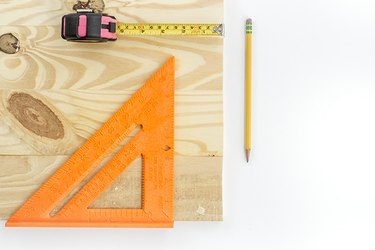
Carpenter's speed square or framing square
3/4-inch-thick dimension lumber or plywood (dimensions of pieces will depend on your particular AC wall unit)
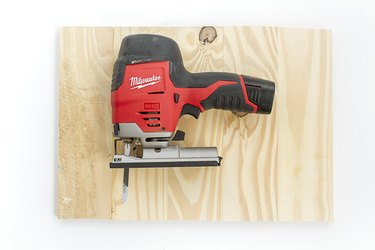
Saw (can use either a jig saw, table saw, circular saw)
Drill and drill bits
L-brackets and accompanying hardware (8)
Heavy-duty stapler
Quilting batting
Upholstery fabric of choice
Level
Screwdriver (right-angle manual screwdriver or stubby screwdriver)
Anchors (use if you aren't installing into studs)
Sheer curtain panels (optional)
Step 1: Measure and Notate the Window and AC Unit Area
Your cornice board will be a three-side box that spans the width of your window and covers the AC wall unit, providing a minimum gap of four inches between the front of the AC and the inside face of the cornice board, to allow for free air circulation.
Video of the Day
Begin by taking precise measurements of your window and AC wall unit, using a tape measure. The front face of the cornice board should be equal to, or greater than, the width of your window. If you choose to build a wider cornice board, you will center it above the window so it overhangs by an equal distance on both sides, as we've done here.
Don't forget to measure the height of the AC unit so that you purchase (or cut) a board that will cover the unit entirely from top to bottom. Ultimately, you'll need three pieces of wood: two identical side pieces to come out from the wall on either side of the window/wall unit, and one long piece of wood to go along the front of the window/wall unit.
The length of the cornice board sides should be equal to the thickness of the AC wall unit from wall to front face, plus four inches. To ensure that the AC unit has proper room for air circulation, allow for at least four inches between the front of the unit and the interior plane of the cornice board.
Note all of your measurements on a piece of paper with a pencil, and measure a second time to ensure accuracy.
Tip
Because wooden cornice boards tend to be heavy, you may want to start by finding the studs on either side of your window, using a stud finder. Use those points to determine the width of your cornice board because anchoring it to the studs will ensure a sturdy hold. Otherwise, you'll need to use wall anchors that specified to hold more than the weight of your wooden cornice board.
Step 2: Measure and Mark the Wood Pieces for the Cornice Board
Carefully transfer the measurements for the cornice board front and two sides onto the lumber.. Use a carpenter's speed square or framing square to ensure accurate lines. Check your measurements and mark a second time to ensure accuracy before cutting.
Step 3: Cut the Wood Pieces Down to Size
Using either a jig, table, or circular saw, carefully cut the cornice board front and two sides to the measured dimensions.
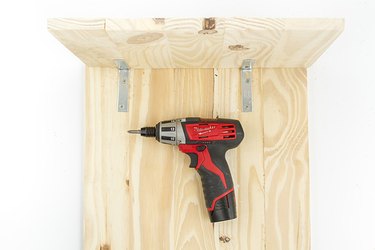
Step 4: Assemble the Cornice Board Frame Using Screws and L-Brackets
Construct the final shape of the wooden cornice board by laying the front piece down down flat and positioning the side pieces upright at the ends, perpendicular to the front piece.
Next, situate two L-brackets on each inside angle of the cornice board (four total), and mark through the holes onto the wood with a pencil. Drill pilot holes at these marks, using a power drill and a drill bit that is slightly smaller than the size of the screws included with your particular L-bracket hardware.(Drilling slightly smaller pilot holes will ensure there is enough "bite" for the screws to hold securely.) Secure the cornice board pieces together with screws driven through the L-brackets and into the pilot holes.
As mentioned before, you will ultimately use four L-brackets to connect the cornice board together—two on each inside corner.
Step 5: Wrap the Wood With Batting and Staple Into Place
Lift the constructed cornice board, and slip a sheet of quilting batting underneath. Trim the batting to match the dimensions of your cornice board, making sure to account for the perpendicular side pieces. Make sure there is enough overlap to wrap the batting around the inside face of the boards. Wrap the wood with the trimmed quilting batting, and staple it into place along the edge, using a heavy-duty stapler or a staple gun. Pull the batting taut as you staple along the cornice board to ensure a smooth finish on the front.
Tip
If you prefer a more padded look for your cornice board, try folding the batting over once or twice before stapling into place so that you have a thicker layer of batting.
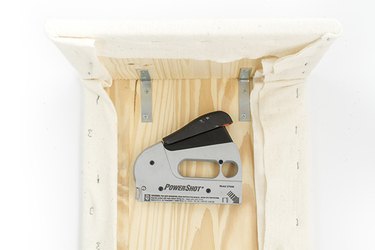
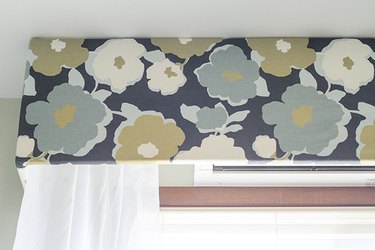
Step 6: Wrap Fabric Over the Batting and Staple Into Place
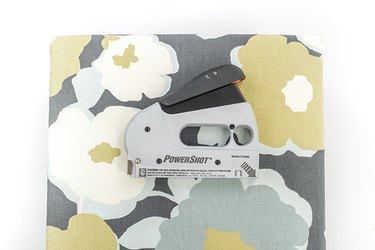
Following the same procedure used in Step 5 with the batting, cut the decorative upholstery fabric to size and staple it over the batting, again using your heavy-duty stapler or staple gun.
Tip
Coordinate your cornice board fabric to the accents in the rest of the room to ensure a cohesive finished look when the cornice board is installed in the space.
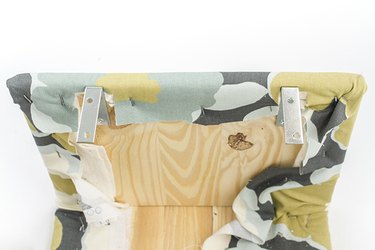
Step 7: Attach L-Brackets to the Cornice Boards
Trim a small portion of the batting and fabric away from the finished cornice board edge using scissors, and then lay four more L-brackets -- two on either end of the cornice board -- against the inner upper edges of the cornice board sides while it's laying face down on your work surface. The arms of your L-brackets need to be angled towards the inside of your cornice board to ensure they aren't visible from the outside of the box.
Line the edge of the L-brackets up so that they are flush with the upper edge of the board, which will be resting flat against the wall. Mark pilot holes the same way you did in Step 4, and then drill the pilot holes and screw the L-brackets into place. These will be used for hanging the cornice board in the next step.
Step 8: Hang the Cornice Board on the Wall
If you didn't already mark your stud locations in Step 1 while measuring, do so now, using a stud finder and pencil. If you are using wall anchors, you will make marks on the wall independently of the studs, positioning them so the cornice board will be centered when it is anchored to the wall.
To do this, hold the finished cornice board over the AC wall unit up on the wall. Use a level to make sure that it's level, and line your L-brackets up with the marks for the studs or wall anchors. Once your cornice board is lined up correctly, use a pencil to make marks through the holes in the L-brackets onto the wall.
Carefully lower the cornice board and use a power drill and drill bit to drill pilot holes. If you are anchoring to the studs, you will drill pilot holes using a bit that is just slightly smaller than the screws included with the L-brackets. If you are using wall anchors, then your bit should be appropriate for the size of the wall anchors you are using; then install the anchors.
To finish, position the cornice board against the wall, aligning it over the pilot holes or wall anchors Use a screwdriver to drive the screws through the L-brackets into the pilot holes or wall anchors.

Tip
Call in a second pair of hands to help with this step. Because of the tight quarters inside the cornice board you may need to use a right-angle manual screwdriver, or a short "stubby" screwdriver to drive the screws into place. If the screws that came with your L-brackets aren't long enough to sink into the stud or wall anchors by at least an inch, swap them out for longer screws to ensure a sturdy hold.
Step 9: Staple or Hang Sheer Curtain Panels Inside the Cornice Boards
If you have extra room on either side of your window below the installed cornice board because you installed it into studs, use a curtain rod or staple gun to attach sheer curtain panels on the inside of your cornice board to fill the space. Then, add plants and accessories to finish off the look of your new cornice board.
Warning
We advise that you check with the manufacturer of your AC wall unit before attempting this project in order to ensure all proper safety precautions have been taken into consideration.