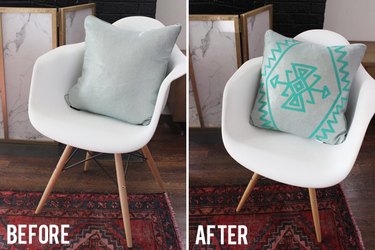
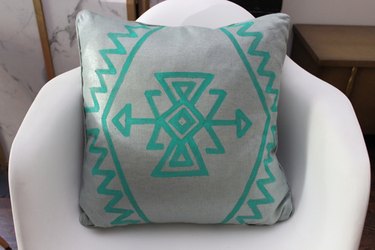
Using a little paint, you can update a solid pillow you already have to get the kilim rug look for less. Kilim rugs and patterns are of Turkish origin and are characterized by their graphic, geometric patterns. Because these patterns are made up of straight lines, this design is easy to replicate with a measuring tape and straightedge.
Video of the Day
Things You'll Need
Solid-color 18-inch pillow
Acrylic paint
Textile medium
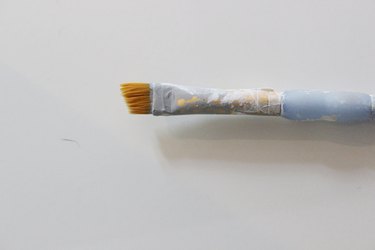
Small angled brush
Measuring tape
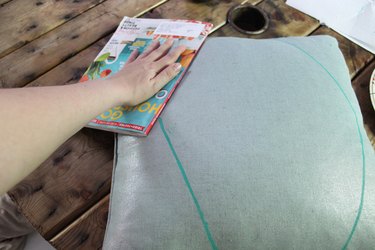
Straightedge (a magazine works well because it bends to fit the form of your pillow)
Protractor
Pen
Tip
Use an angled brush for this project. It will make painting the lines much easier. For a subtle design, paint with the thin side of the brush. For a more bold finished product, turn the brush sideways, creating thicker paint strokes.
Tip
If your pillow has a pillow cover, remove the cover and it lay flat for painting. The pillow in this tutorial did not have a removable cover. If yours does not, press the pillow flat as you paint the lines.
Mix Your Paint
Mix your paint and textile medium together. Your mixture should be made up of 2 parts paint and 1 part textile medium. You will not need much paint for this project. Two tablespoons of paint and one tablespoon of textile medium should be enough, depending on how thick you want your lines to be.
Video of the Day
Warning
This project was done with an 18-inch pillow. For a different size pillow, you'll need to alter the provided measurements accordingly.
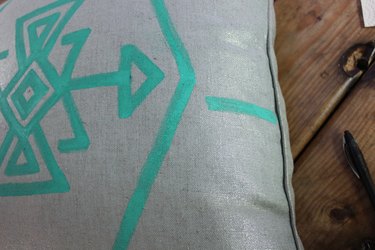
Paint the Frame
Painting the frame is crucial in this project because it will dictate the rest of the shapes.
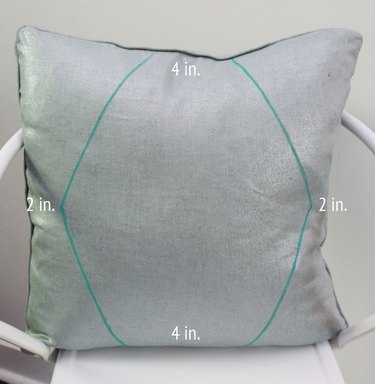
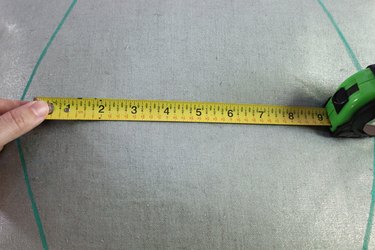
Lightly mark the center point of the pillow on the top and bottom of the pillow and at the center (9 inches from the top for an 18-inch pillow).
Measure 2 inches in from each side along the center horizon and draw a dot.
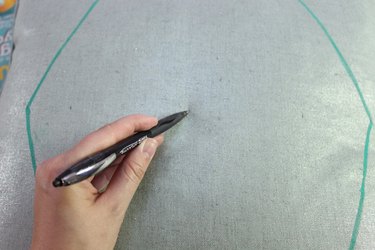
Draw lines connecting the dots on the left and right using your straightedge and your paintbrush.
Place a dot 2 inches to the left and right of the center point at the top and bottom of the pillow.
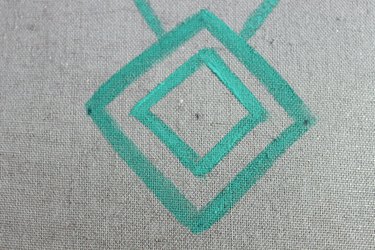
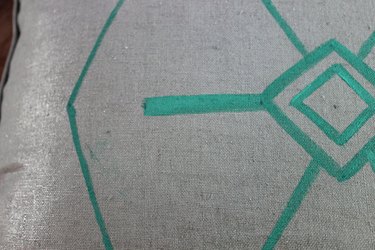
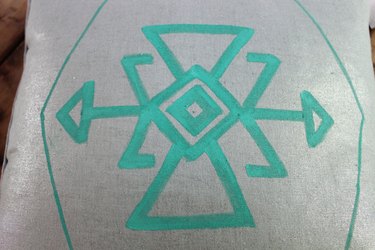
Create the Center Kilim Shape
Now that you have your frame, you want to create the center shape that will be the focal point of your design.
Measure out 8 inches in the center of the frame and draw a dot at each end.
Reinforce the dot in the center on the same line (at 4 inches).
Draw a dot 2 inches above, to the left, below, and to the right of the center dot.
Use your straightedge and paintbrush to connect those dots, creating a diamond shape.

Draw four dots 1/2 inch from the outer dots.
Connect those dots using your straightedge and paintbrush, creating a smaller diamond shape inside the larger one.
Draw a dot 2 inches above the uppermost and lowermost diamond points.
Draw dots 2 inches on either side of those dots.
Using your straightedge, connect those dots to form a triangle above and below the center diamond.
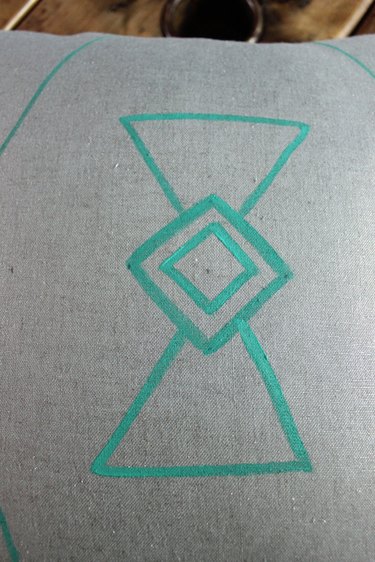
Draw a dot 2 inches from each side point of the outer diamond.
Connect those dots to the diamond using your straightedge and paintbrush.
Form a triangle on the end of the line by drawing dots 1 inch from the end dot horizontally to the left and 1 inch above and below.
Connect those three dots using your straightedge and paintbrush.
Repeat this on the other side.
Finish your center shape by drawing a 2-inch line on a 45-degree angle (using a protractor) going away from the outer diamond.
Draw a 1/2-inch horizontal line from it toward the center design.
Repeat this on top and bottom of both sides.
Finish Design With Zigzag Edge Pattern
Draw a 2-inch horizontal line just under the center point of the frame from the edge of the pillow.
Draw a 2-inch line at a 45-degree angle coming down from the edge of your new line.
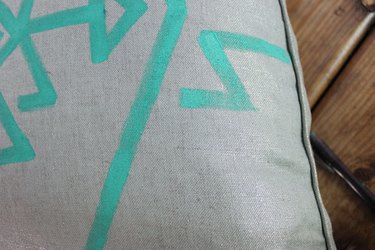
Draw a 2-inch horizontal line from the angled line going toward the frame line.
Tip
Each horizontal line should go farther toward the center than the one above it. Each point should be the same distance from the frame.
Continue the pattern until you have six points. For an 18-inch pillow, that will span the entire corner as shown in the picture.
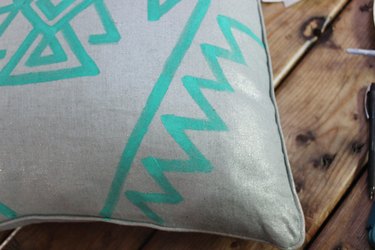
Do the same thing on all four corners of the frame.
Then, your kilim outline pillow is complete.
Tip
The pillow can be washed according to the original pillow's care instructions. Textile medium turns acrylic paint into fabric paint and will not be affected by the washer, though you may experience fading over time, just as fabric would fade.