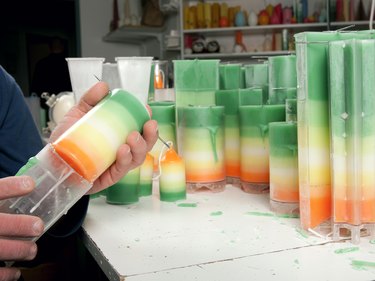
Making your own candles is a simple way to coordinate your home decor with your need to craft. Start with plain wax, and add your own style with your favorite fragrances and colors. According to many candle-making instructions, you use solid or liquid candle dyes to add color, but you can substitute a crayon for the dyes to create solid colors. When opting for liquid dyes, liquid food color is not a good choice for coloring candles. Because it is water-based, it doesn't mix well with the wax. On the other hand, gel food coloring, often used for cake decorating, blends well with the wax for beautifully hued candles.
Things You'll Need
Candle wax
Double-boiler
Putty knife or paring knife
Essential or fragrance oil (optional)
Gel food coloring
Glass containers
Candle wicks or cotton cord
Paper clips (optional)
Pencil, dowel, chopstick or craft stick
Video of the Day
Step 1
Wash and dry the containers thoroughly. Place them in the oven, which is set on warm, or about 150 degrees Fahrenheit. This warms the containers so they don't shatter when you pour hot wax into them. Leave them until you are ready to pour the wax.
Video of the Day
Step 2
Shave the wax with the knife. These flakes melt faster than chunks.
Step 3
Put the wax into the top of the double-boiler. If you don't have a double-boiler, improvise with a metal coffee can in a larger saucepan, or set a glass or metal mixing bowl over the saucepan.
Step 4
Melt the wax, and heat it to about 170 degrees Fahrenheit before adding the fragrance and the gel food coloring. Stir it well to thoroughly mix everything . Remember that the color will be lighter than it appears in the bottle.
Warning
Do not leave the wax unattended while it is heating to avoid the risk of fire.
Step 5
While the wax is melting, set the wick in place at the bottom of the glass container, and secure it with a glue dot. If you are using cord, tie the wick to the paper clip and attach that to the bottom of the container with the glue dots or hot-glue gun.
Step 6
Wrap the other end of the wick around the pencil until your wick holder rests flat on the top of the container.
Step 7
Test the color by dropping a small bit on a paper plate or folded sheet of paper. Add a few more drops of gel food coloring if you want a darker wax color, and stir it thoroughly.
Step 8
Slowly pour the hot wax to fill the container about three-fourths full. Allow the wax to cool completely, which usually takes about six to eight hours.
Step 9
Fill any shrinkage around the wick with a second pour of wax after the first pour has cooled thoroughly. Trim the wick to approximately 1/4 inch in length.
Tip
The process for making molded pillar candles is the same, except you need to spray the inside of your mold with a mold-release spray or nonstick cooking spray. In addition to commercial molds, you can use old soup or vegetable cans, cardboard milk cartons, or similar containers.