Things You'll Need
2-by-4 lumber
Circular saw
Measuring tape
Screws, 3 inches long
Screws, 2 inches long
Drywall screws, 1 1/4 inches long
Stud finder
Drill
Drywall
Drywall tape
Spackle
180 grit sandpaper
Primer
Finish paint
Trim
Crown molding
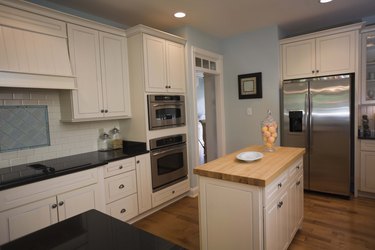
Many homeowners have wondered about that somewhat useless space that exists between the top of their upper kitchen cabinets and the ceiling. This space is good for basket collections or rarely used plates, but in most homes it mainly collects dust. For commercial cabinet installers, this space is useful because it saves them the trouble of custom-fitting a set of cabinets to a ceiling that probably isn't perfectly level. If you don't like this gap in your kitchen, it isn't difficult to hide it behind a new wall above the cabinets.
Step 1
Measure the vertical distance between the top of the cabinets and the ceiling.
Video of the Day
Step 2
Subtract 3 inches from this measurement and cut the studs to that length.
Step 3
Cut a top and bottom plate to the same length as the length of your cabinets, to fill the space above them precisely.
Step 4
Screw the studs into the top and bottom plate, using two 3-inch long screws on each end of each stud. Arrange the studs so they are 16 inches on center, so that you know where to put the screws when you screw on the drywall.
Step 5
Place the wall frame in the space between the cabinets and the ceiling so that its face is 1/2 inch back from the fronts of the cabinets.
Step 6
Locate the ceiling joists behind the drywall in the ceiling using a stud finder.
Step 7
Attach the wall frame by driving 3-inch long screws through the top plate and into the ceiling joists. Drive in pairs of screws spaced every 32 inches along the top plate.
Step 8
Screw 2-inch long screws through the bottom plate and into the tops of the cabinets. Put in pairs of screws spaced every 32 inches.
Step 9
Cut a piece of 1/2-inch thick drywall to fit the area of the wall frame. Screw the drywall to the face of the wall frame with 1 1/4-inch long drywall screws, creating a wall surface that is flush with the fronts of the cabinets. Put a screw every 12 vertical inches along the length of each stud in the wall frame.
Step 10
Put spackle onto the screw holes with a drywall knife by smearing it across the area, leaving a flat surface that is feathered off at the edges. Apply spackle and drywall tape to the joints between drywall pieces if you used more than one piece of drywall, making it as smooth as possible to minimize sanding. Allow the spackle to dry for 24 hours.
Step 11
Sand the spackle smooth with 180 grit sandpaper, prime the drywall with one coat of primer and finish paint it to match the rest of the kitchen with two coats of finish paint for a rich, colorful finish.
Step 12
Apply a piece of finish trim to the joint between the top of the cabinets and the bottom of the drywall. Apply a crown molding to the joint between the top of the drywall and the ceiling.
Video of the Day