Things You'll Need
Plumber's tape or pipe dope
Replacement sprinkler valves
Shovel
Pipe repair clamp
Screwdriver
Replacement sprinkler heads
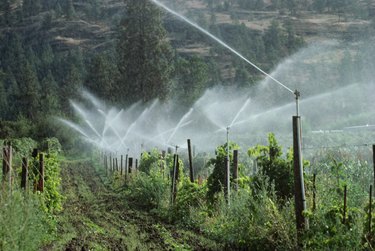
Freezing temperatures are one of the most common causes of damage to sprinkler systems. Frozen water expands, which can create tremendous pressure on pipes, manifolds and sprinkler heads. This pressure can cause serious damage to your irrigation system. If your system freezes, you can take several steps to repair the key components. Understanding more about these steps will help get your sprinklers back in working order.
Manifold Repair
Step 1
Open the lid on the sprinkler manifold box. The box is partially buried and usually has a colored lid and is along the outside of the house. The box contains all of the valves that operate the individual zones on your sprinkler system.
Video of the Day
Step 2
Inspect each of the valves for signs of cracks or broken plastic. Any valves that show signs of damage must be replaced.
Step 3
Turn the damaged valves counterclockwise to remove them from the manifold assembly.
Step 4
Unscrew the black or gray solenoids from the top of the damaged valves, as these will be reused and prevent you from having to install new wiring.
Step 5
Place the new valves in the threaded holes on the manifold and turn them clockwise until tight. If the instructions with the valves specifically call for it, apply a thin layer of plumber's tape or pipe dope to the plastic threads on the valves before tightening them.
Step 6
Place the old solenoids on top of the new valves and screw them into place until tight. Make sure the solenoids are connected in the same positions as the old valves.
Pipe Repair
Step 1
Set the sprinkler timer to the "manual run" or "test" position to begin the sprinkler cycle. Allow the sprinklers to run for at least 30 minutes. This will give water from any broken pipes time to saturate the ground.
Step 2
Turn the sprinkler timer to the "off" position and walk around the yard looking for signs of pooled water on the surface. Pooled water is a sign of a nearby broken sprinkler pipe.
Step 3
Dig up the area around the leak until you expose the sprinkler pipe. Remove the dirt in both directions along the exposed pipe until you spot the crack or break that's causing the leak. Be careful not to cut the pipe with the shovel as you work.
Step 4
Place a pipe repair clamp over the area of the break, with the rubber gasket facing the break. The rubber gasket must completely cover the break area for the clamp to be an effective repair.
Step 5
Turn the screws on the ends of the clamp with a screwdriver to tighten the gasket over the crack or break. The pressure will force the gasket to seal the leak. Cover the pipe back up with dirt and replace any sod or rocks on the surface.
Sprinkler Head Repair
Video of the Day
Step 1
Set the sprinkler timer to the "manual run" or "test" position to begin the sprinkler cycle. Allow the sprinklers to run for at least 5 minutes.
Step 2
Inspect each sprinkler head on the system as the sprinklers run for signs of errant spraying, gushing water or leaks around the base. These are all signs of damaged sprinkler heads. Turn the sprinkler timer to the "off" position when done.
Step 3
Remove the dirt from around the bottom of any damaged sprinklers to expose the plastic bases.
Step 4
Turn the sprinklers counterclockwise several times to release them from the supply risers. The sprinklers will pull free when loose.
Step 5
Place new sprinkler heads on the exposed risers and turn them clockwise until tight. Turn the nozzle in the direction that you want the water to spray before replacing the dirt around the bases. Turn the sprinkler timer back to the test position to check the performance of each new sprinkler.