Things You'll Need
Tape measure
Paper
Compass
Scissors
Black felt
Sewing pins
Fabric glue
Black or gray ribbon

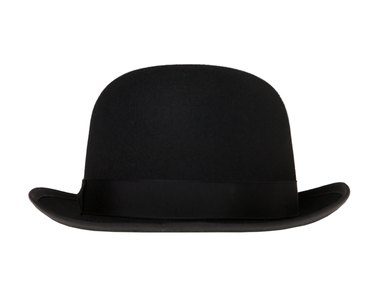
The bowler is the same type of hat as the derby, according to Hat Shapers. "Derby" is an American term for the bowler hat, which was regularly worn by the Earl of Derby at the Epsom Derby horse race in London. However, the first bowler was made for Edward Coke, brother of the second Earl of Leicester in 1849. In the 1950s and 1960s, this hat became a city uniform for businessmen of London. You can make the historical bowler hat for a doll, using craft-store felt.
Step 1
Measure the diameter of your doll's head with the tape measure.
Video of the Day
Step 2
Draw a circle on a sheet of paper with the same diameter as the doll's head, using a compass. Draw another circle around the first circle with a diameter that is about one-third larger than the first circle. You should now have a ring that will be the pattern for the brim of the hat.
Step 3
Draw another circle with a diameter about two-thirds larger than the first circle to make the pattern for the top part of the hat.
Step 4
Cut out the two patterns. The brim pattern will look like an open ring and the top pattern will look like a full circle.
Step 5
Lay your patterns flat on a sheet of black felt. Pin each pattern firmly to the felt with several sewing pins.
Step 6
Trace the patterns onto the felt using a pencil. You should be able to see the pencil lead on the black felt.
Step 7
Remove the paper patterns and cut out the felt pieces.
Step 8
Line the inner ring of the brim pattern with fabric glue. Push upward on the center of the top of the hat piece, rolling the outer circumference downward to create a rounded bowl shape. Stick the outer circumference of the bowl piece evenly into the glue of the brim piece. Allow the glue to dry.
Step 9
Push out the top part of the hat to round it like a bowler by pressing gently on the inside with your thumbs.
Step 10
Cut a strip of black or gray ribbon the length of the circumference of the hat. Use fabric glue to glue the ribbon along the base of the hat where the top meets the brim. Allow the glue to dry.
Step 11
Line the base of the hat with fabric glue. Roll the brim of the bowler hat into the glue. Allow the glue to dry. This will give the brim the up-folded look of a bowler. Place the hat on your doll's head.
Video of the Day