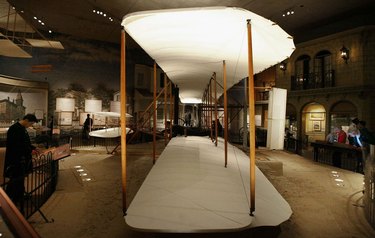
During the early years of the 20th century, Orville and Wilbur Wright experimented with a series of large aircraft designs, early models of which were flown as kites or piloted gliders. The breakthrough in aeronautics, however, came in 1903, when the Wright brothers created the first airplane that could take off and fly with the help of its propellers. The design of the plane was uncomplicated and, therefore, it is not difficult to create a model of the first heavier-than-air airplane using construction paper and other easy-to-find materials.
Step 1
Draw two 15- by 2-inch rectangles on a sheet of white construction paper. Cut out the rectangles and use scissors to give them rounded corners.
Video of the Day
Step 2
Divide two long sides of each rectangle into nine equal 1.6-inch parts. Mark the spots with a pencil. Pierce each spot with the pointed edge of a toothpick.
Step 3
Pierce the spots of the second rectangle with the other pointed edge of the toothpicks to complete the flyer's wings. Apply a drop of glue on each spot and allow to dry to consolidate the shape.
Step 4
Draw two 5- by 1-inch rectangles on white construction paper and cut them out. Design a right triangle on each of the rectangles' four corners, with their legs measuring 1/2 inch. Cut out the triangles and round the corners of the new shape.
Step 5
Divide the shapes' sides into four equal parts and mark the spots. Cut four toothpicks in half and use a razor to sharpen their edges. Pierce through the spots on the paper with the toothpicks' edges to create "Part 1."
Step 6
Design two more rectangles measuring 2.5-by-3/4 inches. Cut two toothpicks into three equal parts and sharpen their edges. Pierce through the corners and the middle point of the rectangles' long sides with the toothpicks to complete "Part 2."
Step 7
Glue the propeller mounts between the third and fourth, and between the sixth and seventh toothpicks on the wings.
Step 8
Draw two round propellers on a sheet of white construction paper, measuring 2 inches in diameter. Pierce the center through the pointed edge of the propeller mounts and apply a drop of glue on the spots.
Step 9
Glue three toothpicks as cross-braces across the skids. Pierce through the lower paper of Part 1 with the long upright toothpicks, through the lower paper of the wings with the other upright toothpicks and through the upper paper of the wings with the diagonal skewer.
Step 10
Form a V-shape with two toothpicks to connect the two long skewers of the skids with the bottom toothpick of Part 2, which now stands upward. Apply a drop of glue on every pierced spot and on the V's edges to complete the 1903 Flyer model.
Tip
Use a skids template provided by NASA to create the flyer's skeleton and the propeller mounts, using toothpicks and wooden skewers.
Video of the Day