Things You'll Need
Phillips-head screwdriver
Hex wrench
Thermometer
Kohler shower faucets have an anti-scald valve that prevents the water from reaching temperatures that will burn skin. This helps prevent accidentally turning the hot water on too high at any time. This is beneficial, especially for families with small children. Sometimes it is necessary to adjust the scald valve on a Kohler shower to keep it at a safer level of no more than 120 degrees Fahrenheit. Changes in hot water temperature from the water heaters might make the current settings too cold or too hot.
Even at 120 F, third-degree burns can occur in just five minutes. At 127 F, burns occur in one minute and if the hot water temperature reaches 155 F, individuals can be burned in one second. Check the water temperature before entering the water or bathing your children, and if it seems too hot, be sure to check the exact temperature and adjust the anti-scald valve. Making adjustments depends upon how much of a temperature change is necessary.
Video of the Day
Video of the Day
Step 1: Remove Shower Handle
Remove the screw securing the shower handle to the faucet stem with a Phillips-head screwdriver or hex wrench depending upon the set screw head. The set screw is under the curve of Kohler lever handles. Pull the handle away from the faucet stem.
Step 2: Remove Faceplate and Stem Sleeve
Locate the screws securing the faceplate to the shower wall. Depending upon your model, the screws either are clearly visible on the front of the plate or hidden along the outside edges of the plate. Remove the screws with a Phillips-head screwdriver. Pull the faceplate and stem sleeve away from the faucet stem.
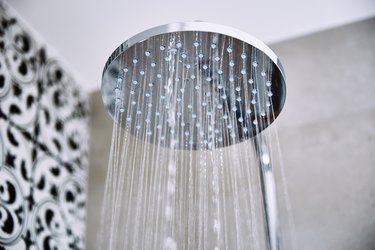
Step 3: Test the Water Temperature
Locate the anti-scald collar on the valve stem near the base of the shower wall. There is a small set screw on the left side of the collar for making adjustments. Turn the stem clockwise as far as possible and allow the hot water to run for several minutes. Hold a thermometer under the running water and observe the temperature. The water temperature should never be set above 120 degree Fahrenheit.
Step 4: Adjust the Maximum Temperature
Turn the anti-scald collar set screw counterclockwise with a hex wrench to raise the temperature, or clockwise to decrease the temperature. This is a minor adjustment for temperature ranges within five degrees.
Step 5: Make Larger Temperature Adjustments
Pull the o-ring off the faucet stem, and slide off the anti-scald collar if a major temperature change over five degrees is necessary. Turn the faucet stem to the desired temperature setting, checking the temperature under the running water with the thermometer.
Step 6: Replace the Anti-Scald Colar
Slide the anti-scald collar back over the stem with the end of the set screw against the left side of the valve tab, once the desired temperature is set. Position the O-ring back over the stem to secure the collar. Turn the stem counterclockwise to shut off the water.
Step 7: Replace the Shower Faceplate
Place the faceplate back over the stem and against the wall. Secure the faceplate with the retaining screws. Push the shower handle over the stem and secure it with the set screw.