Things You'll Need
Tuxedo pants
Scissors
Seam ripper
Straight pins
Ruler
Dressmaker's chalk
Thread
Needle or sewing machine
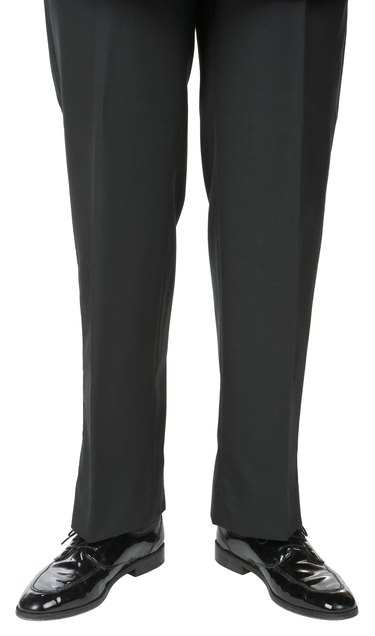
Hemming a pair of tuxedo trousers is no trouble as long as you know where the hems of each pant leg should break. Break, in apparel terminology, refers to the slanted, loose crease that occurs a couple of inches above the hem. It is the result of the hem grazing the top of the wearer's foot. You should hem a leg so that it has only one one break. Once you pin the fabric in place at the appropriate length, you are only two creases and one straight seam from hemmed pants.
Step 1
Remove the original leg hems with a small, pointed pair of scissors or a seam ripper. Remove the stitches gently, so you do not damage the fabric.
Video of the Day
Step 2
Put the slacks on. Pinning an accurate hem on yourself will be easier if you have an assistant helping you. Bending down will only pull the fabric, making it difficult to secure an accurate length.
Step 3
Fold the hem under, to create a cuff. Raise and lower the cuff until the pant leg gently grazes the top of your foot, causing the coveted break several inches above the hem. Repeat the process with the other leg.
Step 4
Insert one straight pin into the front of each pant leg and one in the back, to hold the cuffs in place at the correct length.
Step 5
Remove the pants. Turn them inside out. The excess pant leg material should be visible on the inside.
Step 6
Mark a straight line in dressmaker's chalk where the straight pins indicate the new hem. Measure 1 inch from the edge of the pinned hem down, closer to the raw edge of the fabric. Mark a line with the chalk chalk. Measure 1 inch from the chalk line down, even closer to the edge. Mark this line as well. Mark until you have marked four lines. If you have less than 3 inches between the new hem and raw edge of the fabric, mark as many 1-inch increments as you can. However, to create the hem, you must have a minimum of 1 inch.
Step 7
Trim material that is more than 3 inches, or lines, away from the new hem.
Step 8
Fold 1 inch of the pant leg. Iron it in place, so you do not lose the line. Repeat the process until you have a three-layer, 1-inch cuff at the bottom of each pant leg. Pin the cuffs in place with a horizontal ring of straight pins.
Step 9
Stitch along the straight pins by hand or with a sewing machine. Once you sew around the entire cuff, tie-off the thread, and trim the excess.
Step 10
Turn the pants right side out.
Video of the Day