Cooking rice is an adventure for many cooks and not always a good one. An appliance like the Aroma rice cooker makes the job easy. By adding the proper amounts of rice and water and then selecting the type of rice on a digital model or simply depressing the start switch on the manual model, the rice will be ready for dinner without any further effort by the cook.
Types of Rice
Video of the Day
Each type of rice requires a different ratio of rice and water to ensure a fluffy or sticky cooked rice appropriate for the dish or cuisine. Rice cooker measurements may vary according to the model, so check the manual. In general, long-grain brown rice requires more water than short-grain white rice.
Video of the Day
Both white and brown rice are available as long, medium and short grain. Long-grain rice produces a light and dry cooked rice. Short-grain rice is starchier and sticky, while medium-grain rice produces fluffy rice that may be dry or sticky depending on the variety and amount of water added for cooking.
Basmati rice is a long-grain rice that should be soaked for 1/2 hour before starting the rice cooker. Jasmine rice is also a long-grain rice that produces a stickier rice than regular white or brown long-grain rice. Another long-grain rice is the dark tan Wehani, which is a hybrid of basmati and long-grain brown rice. Chinese black rice is a medium-grain rice that cooks into a tender but not sticky side dish.
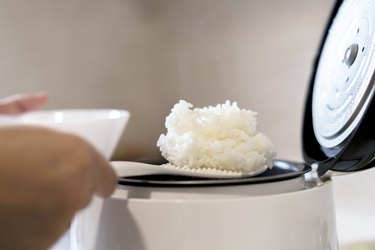
Before You Start
Measure the rice into the inner pan and cover it with water. Rice is dusty and may contain bits of husk and other green matter. Swirl the rice to release the debris and excess starch and then pour off the water. Repeat this several times until the water is clear.
Aroma Rice Cooker Essentials
Carefully read the rice cooker instructions first. Measure the rice before washing it. After washing and draining the rice, add the appropriate amount of water. Wipe the exterior of the inner pan dry before putting it into the rice cooker base. Close the lid and plug in the rice cooker. Be sure to place the rice cooker on a flat surface.
Rice-to-Water Ratios
When using the Aroma rice cooker, use the measuring cup included with the cooker. Remember, the cup is actually 2/3 cup, so if you misplace it, use a 2/3-cup measuring cup.
The Basic Rice Cooker
When using a basic Aroma rice cooker, add the rice and water to the inner pot. Depending on the model, a basic rice cooker can make up to 8 cups of cooked rice.
White rice:
- 1 cup rice + 1 1/2 cups water or fill to water line 1 = 2 cups cooked rice
- 2 cups rice + 2 1/2 cups water or fill to water line 2 = 4 cups cooked rice
Brown rice:
- 1 cup brown rice + 1 3/4 cups water = 2 cups cooked rice
- 2 cups brown rice + 3 cups water = 4 cups cooked rice
The Digital Rice Cooker
When using an Aroma digital rice cooker, match the cups of rice to the water line inside the pot. Select "white rice" or "brown rice." The rice cooker will automatically increase the cooking time for brown rice.
You can also steam vegetables or meats in the rice cooker. Place 2 cups of water in the inner pot. Put the items on the steam tray and then put it in the inner pot. Close the rice cooker and plug it in. Press the "steam" button; each press of the button adds one minute to the total time up to 30 minutes.
Rice and steamed foods may be cooked at the same time. Start with the rice. Do not put more than 2 cups of uncooked rice in the pot. Near the end of the cook cycle, carefully open the lid and add the steam tray. Use caution. Keep your hands and face away from the open lid until the steam dissipates.
- ManualsLib: Aroma ARC-914SBD Instruction Manual Page 10
- ManualsLib: Aroma ARC-914SB Instruction Manual Page 9
- Auguste Escoffier School of Culinary Arts: Rice 101
- University of Nebraska-Lincoln Institute of Agriculture and Natural Resources: Now, You're Cooking With Brown Rice!
- Penn State University Department of Entomology: Cereal and Pantry Pests