How to Embroider a Tennis Racket: Step-by-Step Guide
Learning how to embroider a tennis racket starts with a simple realization: the string bed is already a giant embroidery grid, no fabric required. That old racket gathering dust in the garage has a woven surface that functions almost exactly like Aida fabric, the gridded cloth used in cross-stitch. Thread weaves in and out of the strings the same way it would weave through fabric squares, and because the spacing between strings is wide, a needle is optional. Many crafters just use their fingers, according to Prima.
This embroidered tennis racket DIY isn't limited to tennis equipment, either. One crafter at Wild Tribe picked up a thrifted wooden badminton racquet for the same effect, which says something about how little the technique cares which sport is stamped on the frame.
One thing worth settling before starting: treat a decorated racket as wall art, not sports equipment. Once thread is woven through the strings, the tension that made it playable is gone for good, so pick a racket you're happy to retire permanently.
This guide walks through the complete beginner project, a woven heart, then covers two variations built on the same skill: a monogram guided by a paper template, and a more advanced floral design built partly off the racket. Pick whichever matches how much patience you're bringing to the project.
Choosing a design: heart, monogram, or floral
Video of the Day
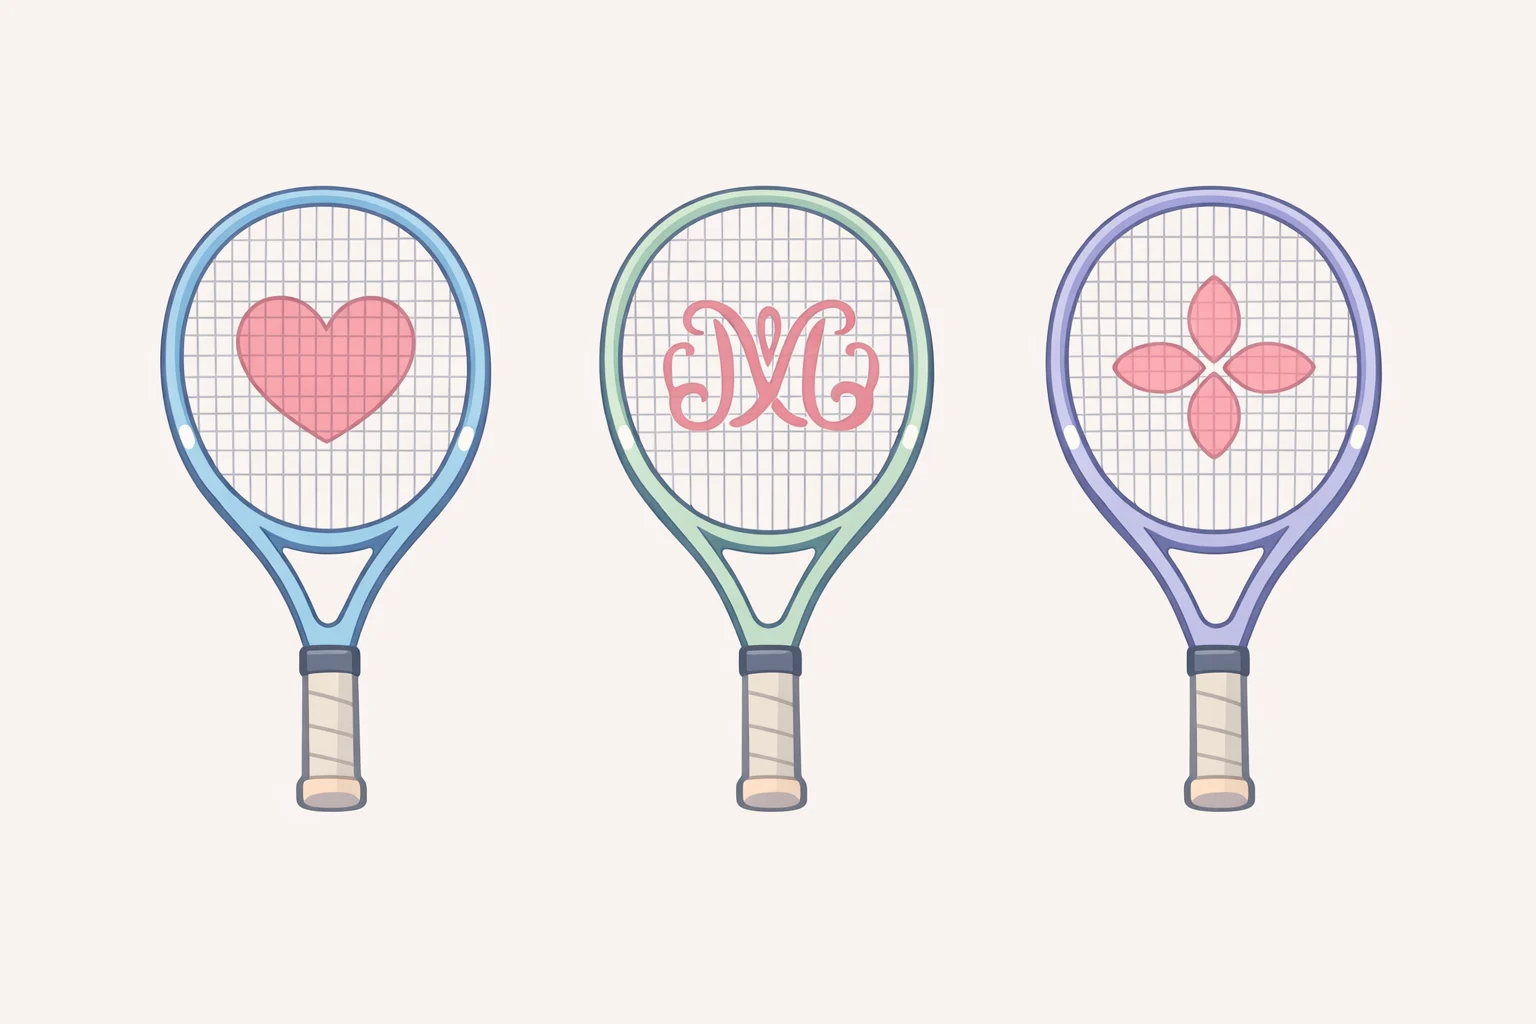
Decide which of the three documented projects to build before buying anything, because the tool list changes depending on the answer.
A heart is the standard starting point. Its straight-line silhouette maps cleanly onto the racket's geometric grid, which is why both Prima and Wild Tribe point to it as the entry-level project. It's drawn freehand and marked directly onto the strings with permanent marker, no template needed.
A monogram uses a different setup: a printed paper letter, sized to the racket, glued in place as a guide before any weaving starts, per The Handmade Home.
A floral design is the most involved of the three. Petals get built separately, some of them off the racket entirely, then sewn onto the string bed once finished, also documented by The Handmade Home.
Every version shares a baseline: an old racket, thread, and scissors (The Handmade Home; Wild Tribe). Everything past that, marker, hot glue, a printer and cardstock, a needle, depends on which of the three projects gets chosen. Buying a glue gun for a heart project is wasted money. Skipping the printer for a monogram means starting over.
Video of the Day
How to embroider a tennis racket: the basic weaving method
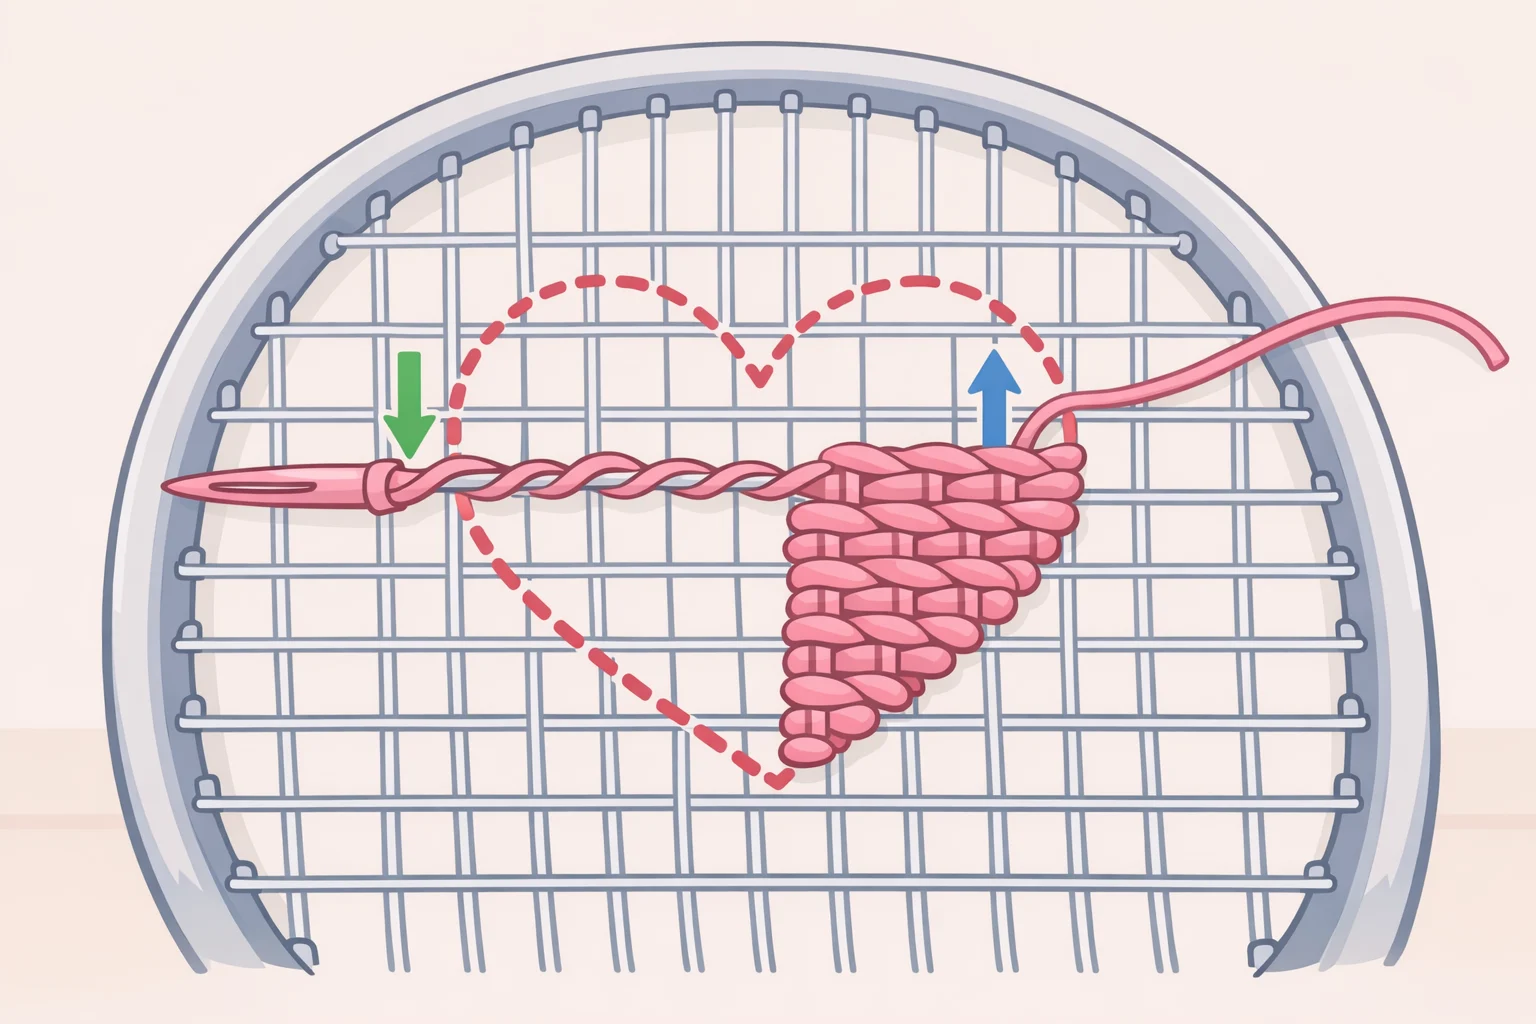
The heart is the project to learn the mechanics on. Here's the full sequence.
- Wipe down the racket. Clear off dust and grime before starting so thread doesn't pick up dirt as it's pulled through (The Handmade Home).
- Sketch the design, then mark it on the strings. Decide on a heart shape and use a permanent marker to trace it directly onto the racket's string bed (Wild Tribe).
- Cut a working length of thread. About a yard at a time is the documented amount, long enough to make real progress, short enough that it won't tangle on itself (Wild Tribe).
- Anchor the thread. Tie a knot directly onto the strings somewhere the design will eventually cover, leaving a two-inch tail to tie off against later (Wild Tribe).
- Weave the marked area solid. This is the same in-and-out motion used on Aida fabric: thread passes over one string and under the next, back and forth, until the whole marked shape is filled (Prima). Work in from the edges of the marker outline so the finished shape matches what was traced. It takes longer than it looks like it should on the first pass. That's normal.
- Switch colors whenever you want. Change thread colors as often as suits the design while the shape fills in (Wild Tribe).
- Tie off and trim. Knot the working thread to the tail left in step four, then trim the excess close to the knot.
A heart works so well as a first project because its silhouette is made of straight lines that sit naturally on a geometric grid (Prima). This is the project to get comfortable on, not the one to obsess over.
Weaving mechanics: fingers, needles, and keeping thread under control
Learning how to weave yarn through tennis racket strings comes down to a handful of small decisions that separate a clean finish from a frustrating afternoon.
Fingers work fine for broad fill-in work, since the gap between strings is wide enough to push thread through without a tool (Prima). The Wild Tribe author found that a needle wasn't strictly necessary, but it made the wrapping go faster for her (Wild Tribe), which is a reasonable rule of thumb once fingers alone start to feel slow.
Cutting thread in yard-length pieces, as documented for the heart, keeps a manageable amount of slack in hand at any given time (Wild Tribe). Colors can change as often as the design calls for, per the same tutorial (Wild Tribe).
Keep knots and glued edges on the back of the racket, where the frame hides them from the front. The Handmade Home tucked the final piece of the monogram template against the back with hot glue for exactly this reason (The Handmade Home).
Monogram tennis racket craft: personalizing with a paper template
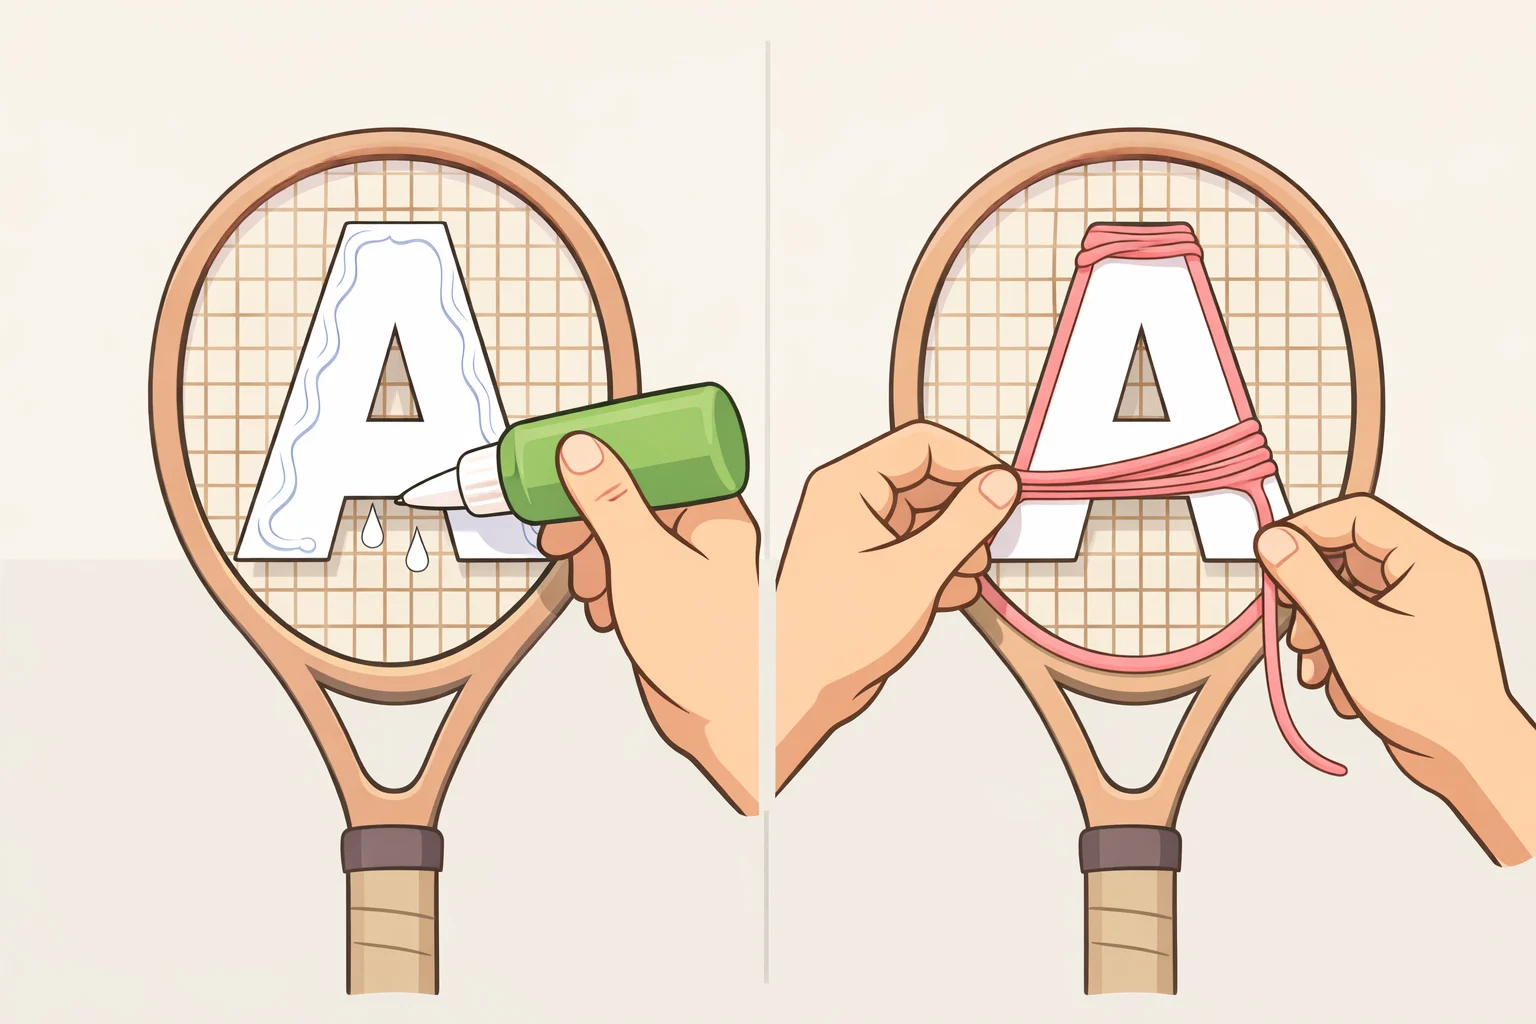
A monogram tennis racket craft swaps the freehand marker step for a printed guide, which makes it a natural second project once the heart feels routine.
- Wipe down the racket, the same starting point as the heart project (The Handmade Home).
- Print a letter sized to fit the racket's string bed (The Handmade Home).
- Cut out the letter and glue it to the back of the racket, using it purely as a placement guide (The Handmade Home). A toothpick, listed among the project's tools, is small enough to apply glue precisely without excess squeezing out the sides.
- Anchor yarn in a discreet spot and weave around the template, following the letter's outline the way the heart's marker line was followed (The Handmade Home).
- Secure the final piece to the back with hot glue, tucked out of sight (The Handmade Home).
- Attach a ribbon once the letter is finished, ready for hanging (The Handmade Home).
The Handmade Home's tutorial, published earlier this week, favors polyester yarn for this project because it resists fuzzing while being pulled repeatedly through the strings (The Handmade Home). That's a preference from one crafter's experience, not a hard rule. Any yarn that survives repeated pulling through the string bed without shredding will do the job.
Dimensional floral rackets: a mixed-media variation
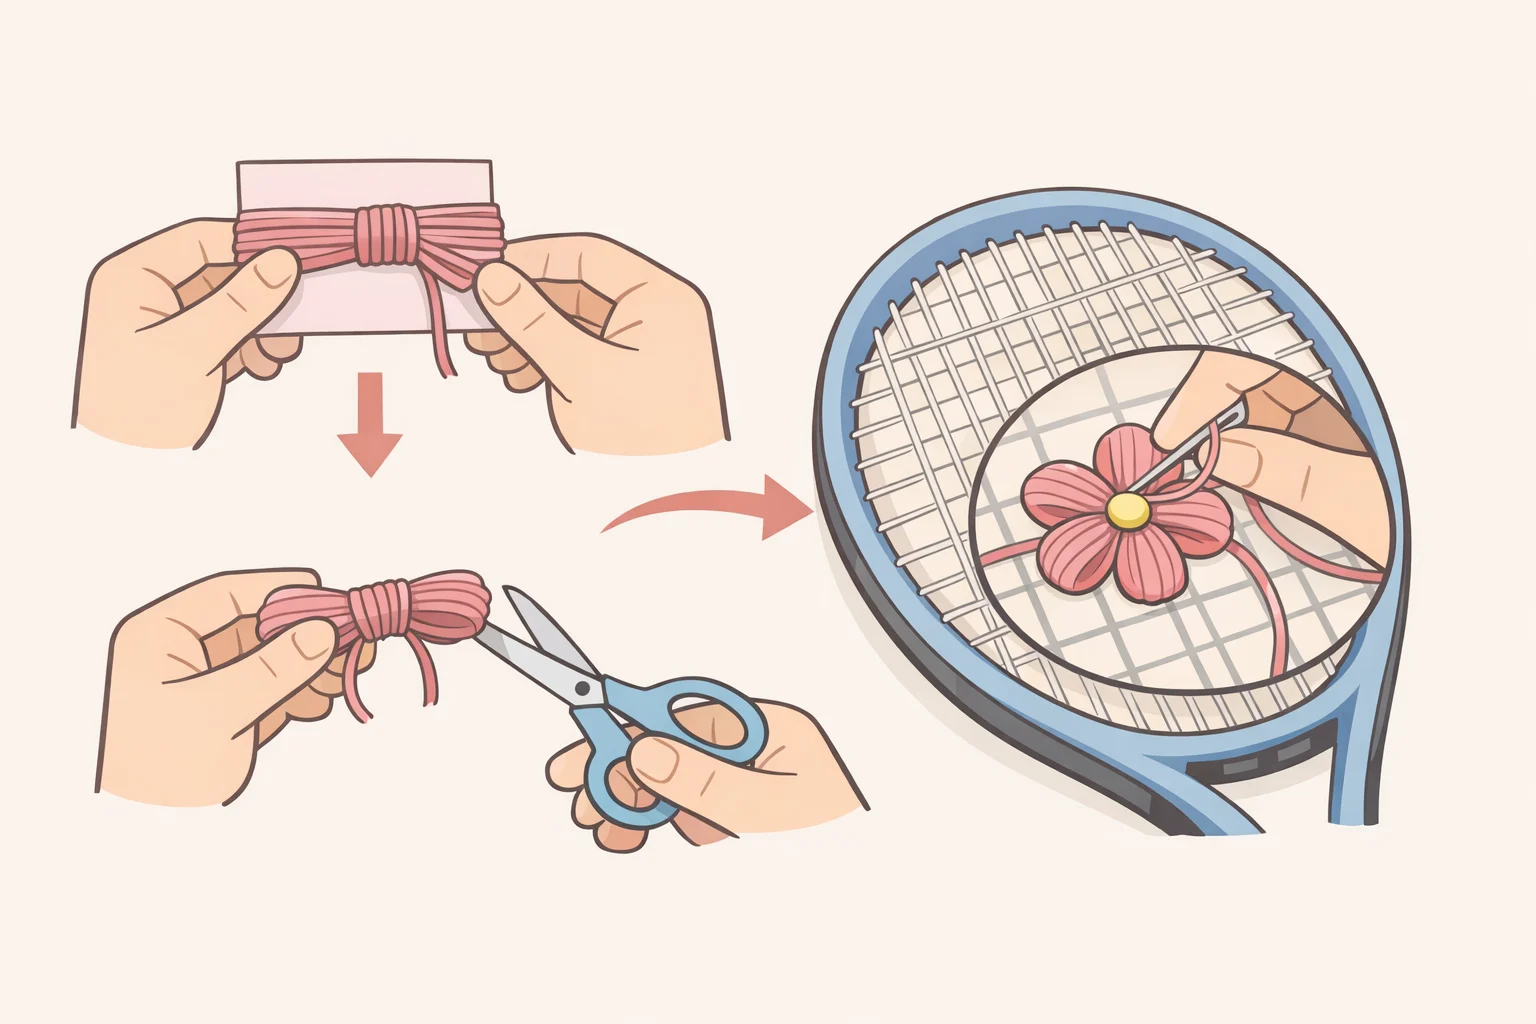
The floral racket treats the string bed as a mounting surface rather than the entire canvas, since several petals get built away from the racket completely and sewn on once finished.
The Handmade Home switched from the thick polyester yarn used in the monogram to standard embroidery thread here, after deciding the yarn wasn't going to work for what she had planned (The Handmade Home). Sketching the flowers out ahead of time, rather than improvising directly on the racket, was part of the process this time (The Handmade Home).
Larger petals get built off the racket entirely. Thread wraps around a piece of thick paper, and gluing one side while the paper is still detached speeds up the wrapping considerably. Once the wrap looks right, the finished petal gets placed and sewn onto the string bed so it reads as though it grew there naturally (The Handmade Home).
Smaller flowers skip most of that setup. They're sewn straight onto the strings in sections, and paper gets added into some petals depending on where they sit in the design, not as a fixed rule (The Handmade Home). Petals get added one at a time, building the flower directly on the racket until it's full (The Handmade Home).
This particular tennis racket string art project is documented by a single source, so treat the sequence as a starting template rather than a formula to follow exactly. Expect the first petal or two to take longer than the rest while the wrapping technique clicks.
Finishing and where the technique can go
Both Handmade Home projects end with ribbon. The monogram gets a ribbon attached once the letter is finished; the floral piece went a step further, with leftover ric-rac glued together with ribbon and attached to the top for hanging (The Handmade Home). Either approach turns a finished racket into upcycled tennis racket wall decor, ready to hang without any additional hardware.
Once the heart and monogram feel manageable, the same weaving principle stretches to whatever design fits inside the frame. Crafters featured by Prima have taken it well past hearts and letters: sailboats and seashells, an ice cream cone, even a strawberries-and-cream design timed to Wimbledon.
At the far end of that range sits Danielle Clough, a South African textile artist who combines yarn embroidery with vintage tennis and squash rackets, turning the string bed into a colorful canvas rather than a single symbol (Dishfunctional Designs). Her finished pieces sell for around $500, a reminder that the grid strung inside a thrifted racket is worth more as art supply than as landfill.