Trader Joe's Sheet Cake Hack: Turn 2 Cakes Into a Party Dessert
Trader Joe's mini sheet cakes are a legitimately good grocery store find. The only real problem is scale: the store only sells one size, and one 18-ounce rectangle isn't built for a crowd. This guide covers the Trader Joe's sheet cake hack in three moves choosing your build, stacking and frosting the exterior, and picking toppings that suit your timeline. No baking, no special equipment, no meaningful prep time.
All four current flavors come in under $6. Food & Wine lists them as Chantilly Cream Vanilla Bean ($5.49), Dark Chocolate Ganache ($5.49), Yellow Mini Sheet Cake ($5.99), and the limited-edition Strawberry Mini Sheet Cake ($5.99). Two cakes run just under $11, as The Kitchn noted earlier this year. Each is 18 ounces and rectangular a shape that, as Food & Wine points out, makes them straightforward to cut and portion evenly.
What you'll need
Video of the Day
An icing spatula, a small bowl, and a plate or cake stand. That's the full equipment list.
The spatula is the one item worth tracking down if you don't already own one. A butter knife will technically work, but an offset spatula has the flex and reach to smooth frosting without dragging up the cake surface underneath. The cake stand is optional it gives you better access to the sides during the exterior frosting step, but a dinner plate works fine.
Video of the Day
Step 1: Choose your build two layers or three
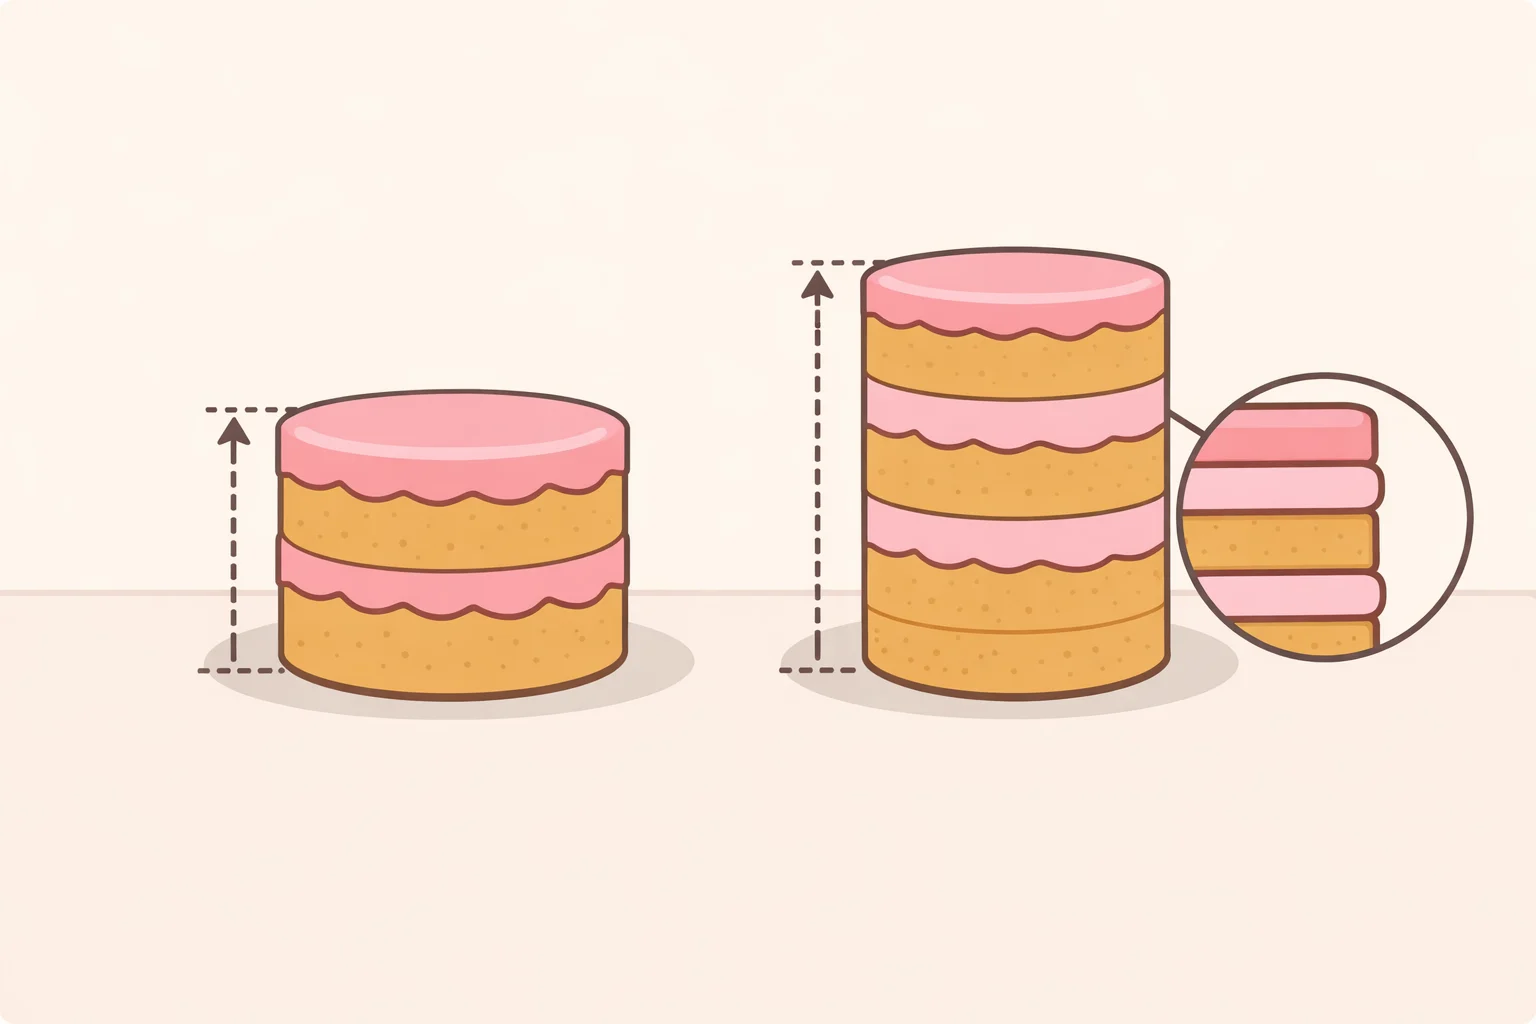
Make this decision before opening any packaging. It determines how much you buy, and it frames everything else.
The two-layer build is where most people should start. The Kitchn arrived at the stacking approach precisely because Trader Joe's doesn't sell larger sizes stacking one mini sheet cake on top of another doubles the servings. Two layers are easier to align and more forgiving if anything goes sideways.
Three layers add height and a level of presence that reads differently when a cake arrives at the table. The version that circulated widely online used three Chantilly Cream Vanilla Bean cakes topped with dried orange slices Food & Wine reported that the result looked like a high-end dessert despite the modest cost. The technique is identical to two layers; alignment just requires a bit more attention with each added cake.
On flavor: The viral three-layer build used one flavor throughout, which keeps the stack visually and texturally consistent. The Kitchn leaves the flavor choice open, so mixing is an option though if you're combining the Dark Chocolate Ganache (the densest of the four) with a lighter flavor, put the ganache on the bottom.
Which flavor for which occasion:
- Chantilly Cream Vanilla Bean ($5.49): The most neutral base and the one used in the viral version. Works with nearly any topping.
- Dark Chocolate Ganache ($5.49): Richer and denser than the others. Pairs well with tart or citrus-forward toppings that cut through the sweetness.
- Yellow Mini Sheet Cake ($5.99): The most flexible of the four. Takes well to any fruit topping.
- Strawberry Mini Sheet Cake ($5.99, limited edition): Best with fruit that stays in the same lane fresh or freeze-dried strawberries, or nothing at all.
If the goal is a first attempt, vanilla bean is the most forgiving pick.
Step 2: Stack and frost the Trader Joe's sheet cake hack
Step 1: Let the cakes come to room temperature.
Set them out before doing anything else. The Kitchn specifically flags this step: room-temperature frosting spreads more easily and grips better between layers. It's also the step most people skip, and skipping it makes every step after it harder. Give the cakes 20 to 30 minutes to lose the refrigerator chill before picking up the spatula.
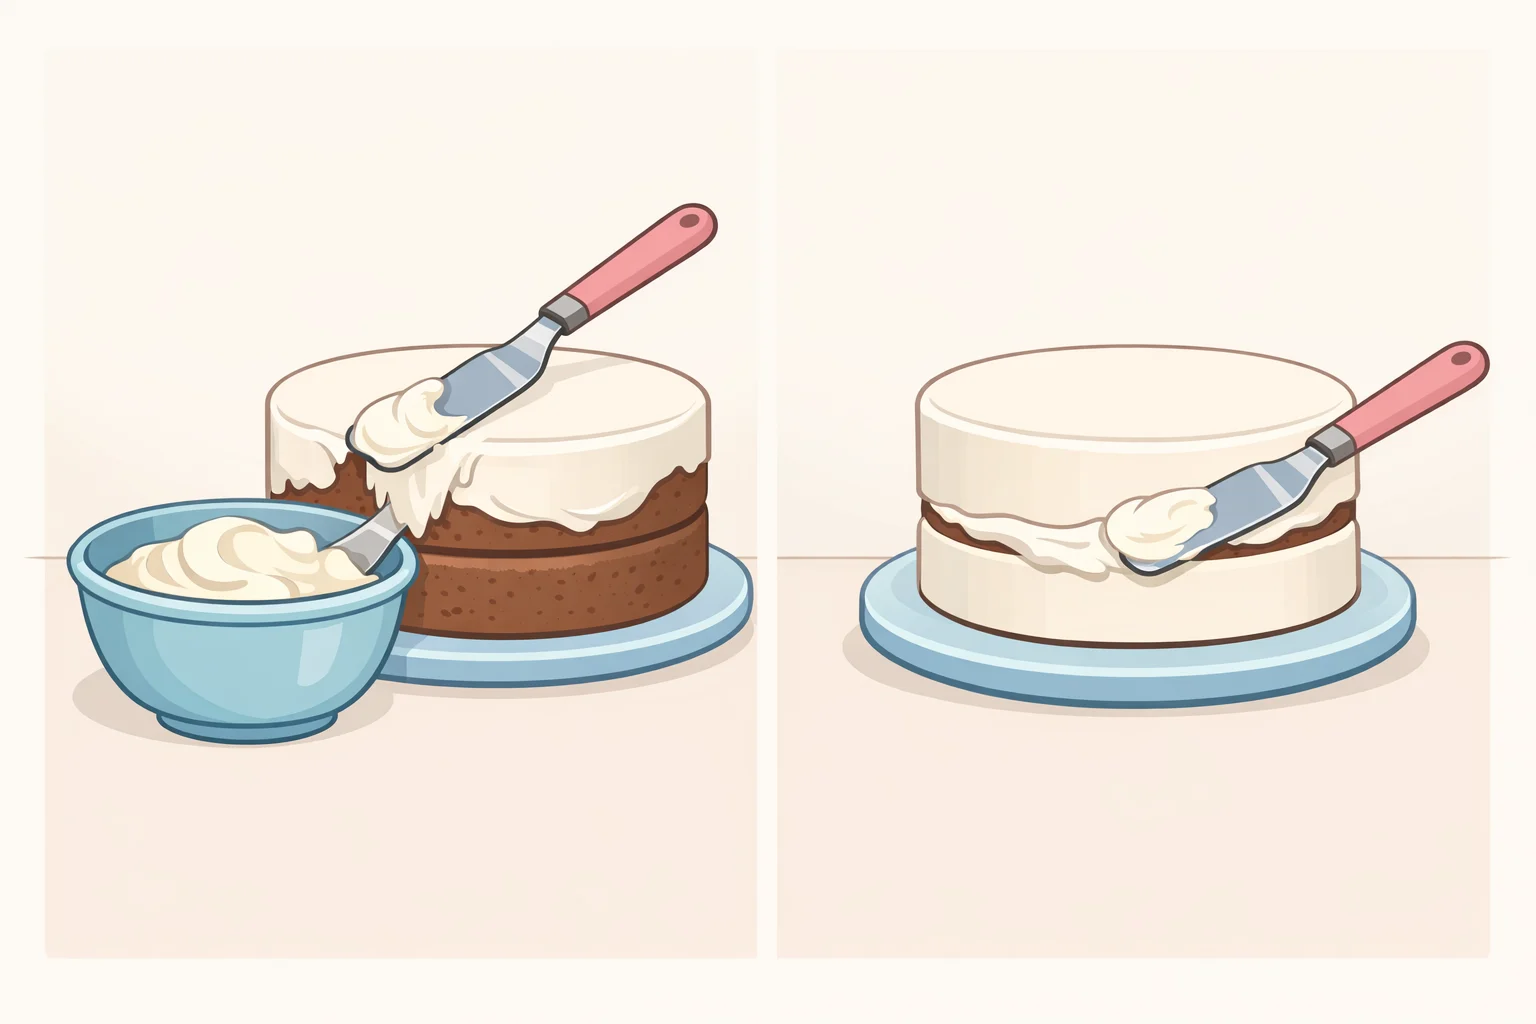
Step 2: Scrape half the frosting off each cake and reserve it.
Use the icing spatula to lift roughly half the frosting from the top of each cake and transfer it to the small bowl, per The Kitchn. The frosting you remove becomes the exterior finish. What stays on the cake acts as the adhesive between layers. Don't skip this it's the step most responsible for whether the finished result looks assembled on purpose or just stacked.
Step 3: Place the first cake on a plate or cake stand.
Center it, per The Kitchn, with long edges oriented consistently so slices come out even. If one cake sits flatter than the other, that one goes on the bottom.
Step 4: Set the second cake on top and press it into place.
Align the edges before the cake touches down. Lower it deliberately, then press gently and evenly across the top. Adding a third layer? Same process. Let the full stack settle for a couple of minutes before reaching for the spatula.
Step 5: Frost the exterior with the reserved frosting.
Spread the frosting from the bowl across the sides and over any visible seams between layers, per The Kitchn. Long, even horizontal strokes. A thin coat that unifies the exterior and covers the seams is the goal not a perfect bakery finish. The reserved frosting from two cakes is enough to cover the outside without running short.
One timing note: Frosting softens in heat. If this cake is going outdoors, assemble it close to serving time, or build it in advance and refrigerate until guests arrive. Fresh fruit toppings go on last, after the cake is already positioned where it will be served.
Step 3: Choose toppings based on how long the cake needs to hold
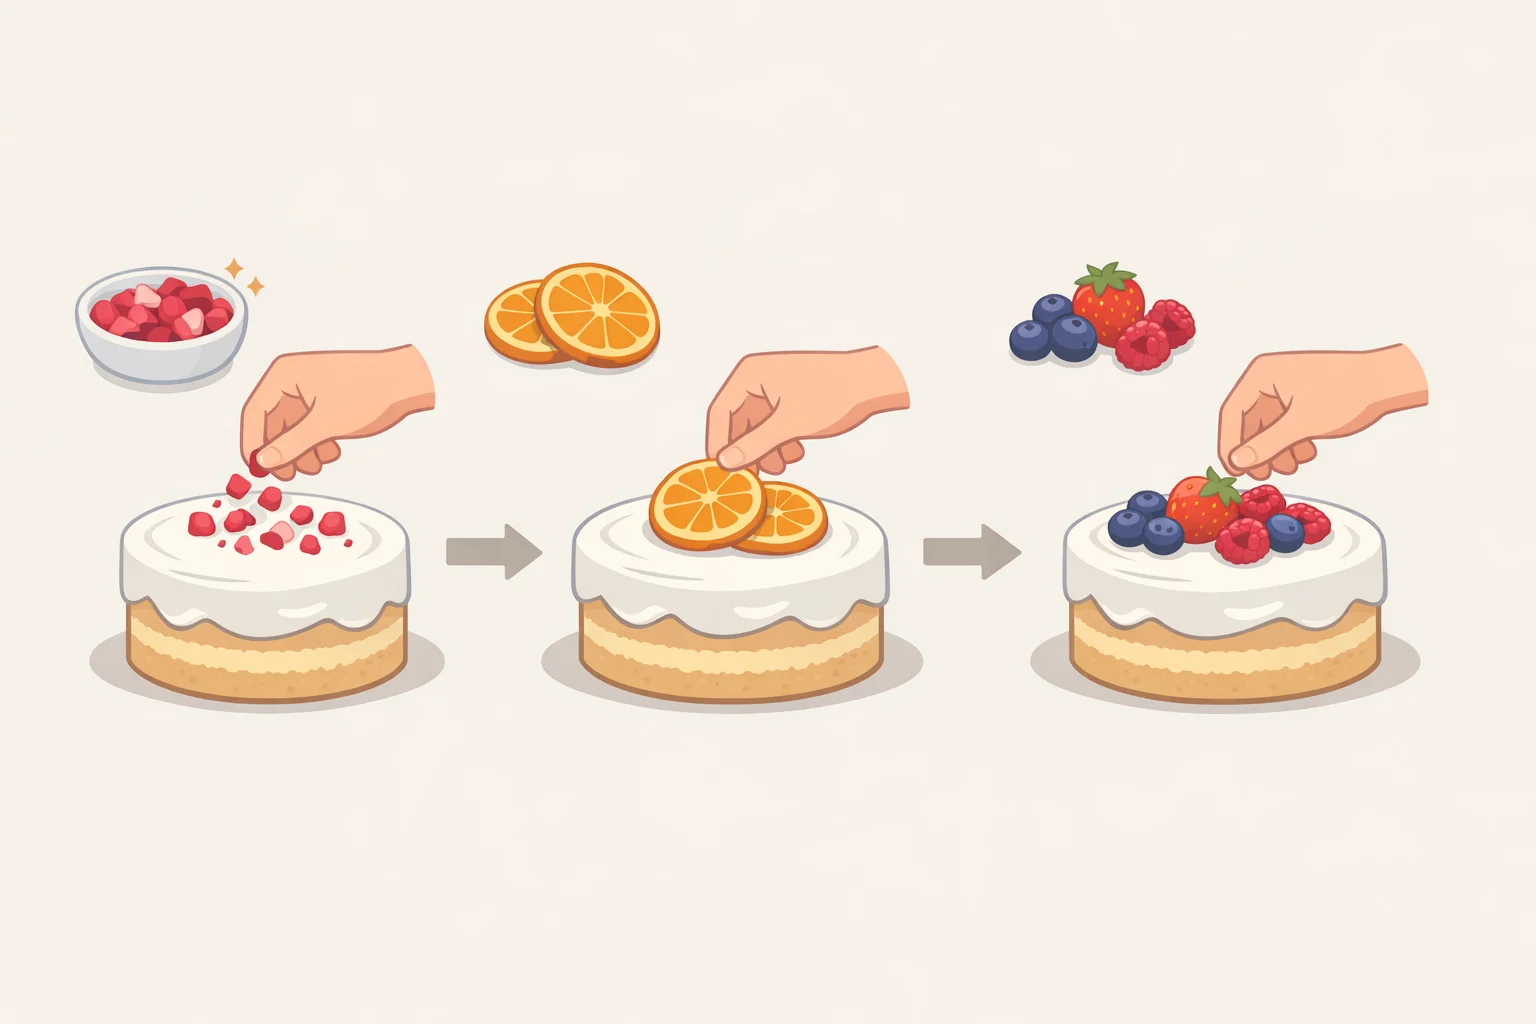
The practical question isn't which fruit looks best on its own. It's how long the cake will sit before it's eaten. The Kitchn notes that Trader Joe's carries fresh, freeze-dried, and dried fruits, making the whole build a single-store trip.
Freeze-dried fruit is the low-pressure choice when timing is uncertain. The Kitchn uses freeze-dried raspberries ($2.99 for 1.2 ounces) as a garnish. They can be arranged ahead of serving without releasing moisture onto the frosting surface which means no pooling, no weeping, no last-minute repairs.
Dried orange slices were the topping in the three-layer viral version, as Food & Wine reported. They add a citrus-forward finish that reads as more considered than fruit scattered across the top. Like freeze-dried options, they hold well without releasing moisture, so timing pressure is minimal.
Fresh berries are the fastest finish. The Kitchn describes slicing berries, arranging them on top, and having a finished dessert within minutes. The tradeoff is the window: fresh fruit releases liquid fairly quickly, so add it last, after the cake is already in place. Food & Wine notes that topping choices are flexible use whatever works for the occasion.
Pairing guide by base flavor:
- Chantilly Cream Vanilla Bean: dried orange slices or freeze-dried raspberries tartness against a neutral base
- Dark Chocolate Ganache: dried citrus or fresh berries cuts richness without adding sweetness
- Strawberry Mini Sheet Cake: fresh or freeze-dried strawberries, staying in the same flavor lane
- Yellow Mini Sheet Cake: most flexible; works with any of the above
What to make, and when
No preheating, no measuring The Kitchn confirms it. The active work is quick. What requires actual planning is timing: whether the cakes are at room temperature before assembly, and whether the topping choice suits the serving window.
For a first attempt, or any situation where reliability matters more than visual drama, two layers with freeze-dried fruit is the combination that leaves the least to chance. The alignment is simpler, the fruit holds without affecting the frosting, the result is stable.
Three layers with dried citrus is the version to make when the dessert needs to make an impression on arrival. The three-cake vanilla build that went viral showed what this method looks like near its ceiling something that costs well under $20 including toppings, per Food & Wine, and needs no explanation when it lands on the table.
The method isn't summer-specific. Pumpkin spice versions hit Trader Joe's stores in September, per The Kitchn, and the stacking technique carries across every flavor in the lineup. The fruit changes with the season. The five steps don't.