How to Repair a Rusted Dishwasher Rack: A Step-by-Step Guide
Vinyl tine caps are the right fix for a rusted dishwasher rack and this guide walks through how to use them, from identifying which tines need work to seating the caps correctly. The repair takes under an hour and costs a fraction of a replacement rack.
Before getting into the steps, a note on sourcing: the cap-versus-coating comparison below draws from a single appliance repair demonstration (YouTube: How to Repair a Rusted Dishwasher Rack), not independent testing. The practical reasoning holds up, but treat the durability claims as field-tested experience rather than controlled evidence.
Is your rack worth fixing first?
Video of the Day
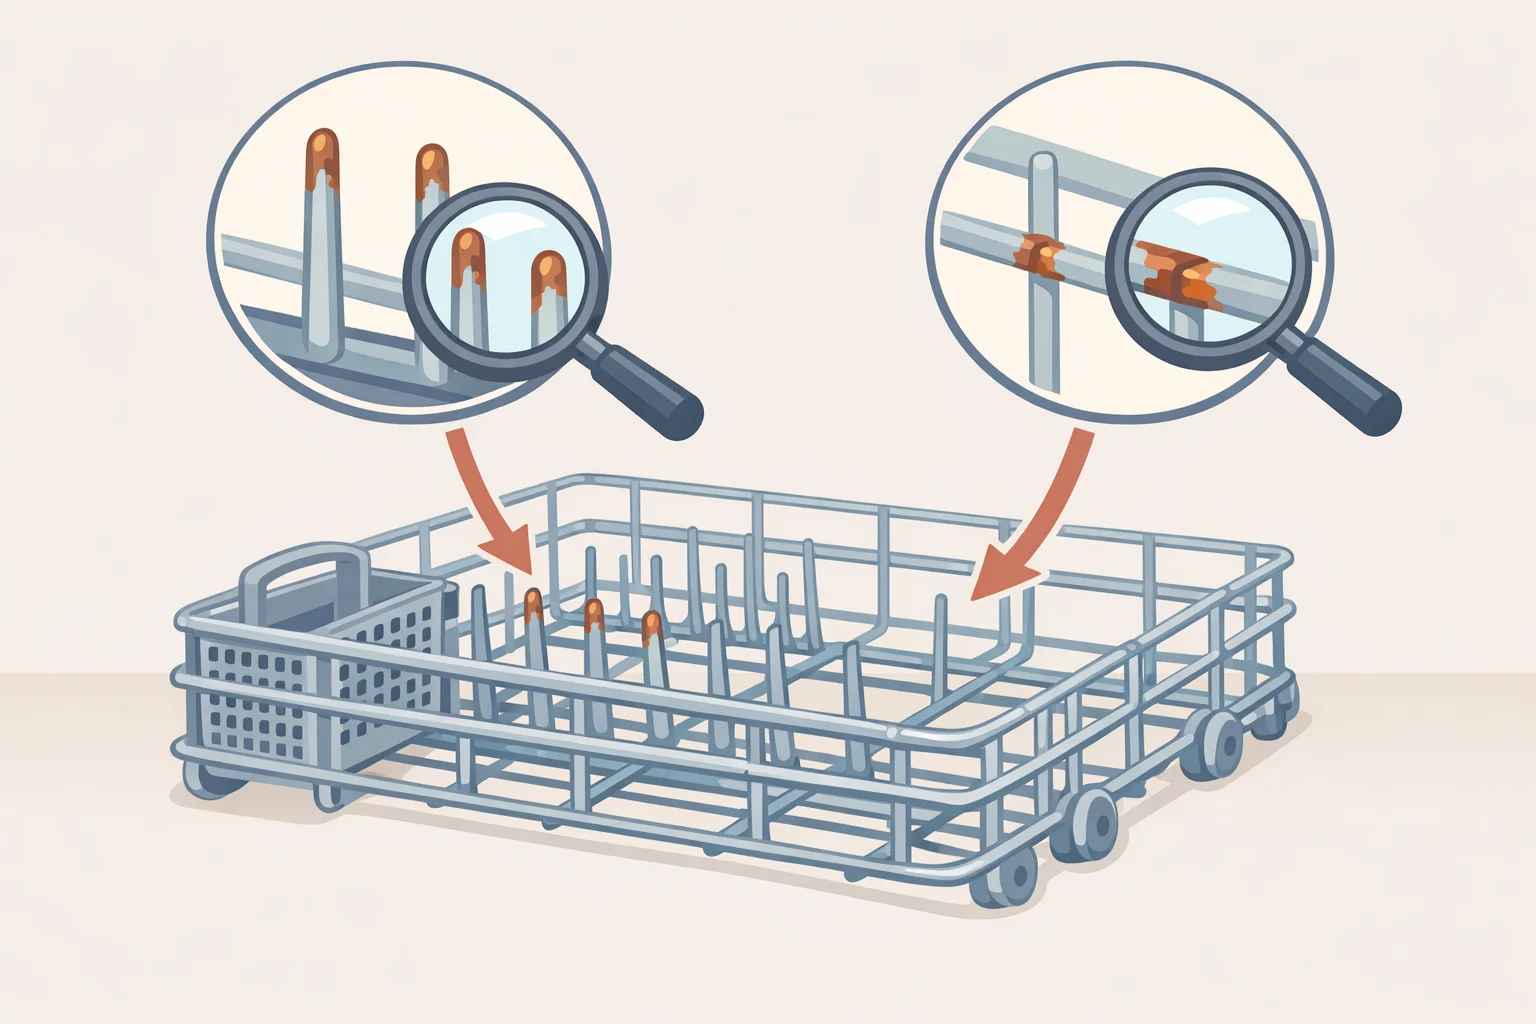
Pull the rack out and spend a couple of minutes on a real inspection before buying anything.
Apply light pressure to a few tines. If the wire bends easily or snaps, corrosion has gone structural and no cap will hold it. Look at the rack frame too: warping or cracking there means the whole rack needs replacing, not just the tines. Replacement racks run $100 to $200 apiece, per the appliance repair demonstration (YouTube).
Surface corrosion looks different. The rust appears at the tine tips and bases those are the normal wear points, per the demonstration, where the factory vinyl coating takes the most mechanical stress from loading and unloading. The wire underneath still feels rigid. That's the situation this repair is built for.
The caps demonstrated here fit standard straight tines. Angled, oddly shaped, or heavily corroded tines may not accept them cleanly, and if a tine is rusted through, a cap won't restore it. Confirm your rack's tine configuration before purchasing.
One more check: if the machine isn't cleaning well, the rack probably isn't the cause. Clogged filters and mineral buildup are, as Consumer Reports puts it, "easy problems to fix, no tools required." Sort those out separately.
Video of the Day
Why brush-on coating fails
Brush-on vinyl products are widely available and look like a sensible shortcut. The appliance repair presenter won't recommend them: in his experience, they won't last more than a year before they start peeling and flaking (YouTube). The coating depends on adhesion to bare metal in a high-heat, high-humidity environment that gets hit with detergent chemistry every cycle. That bond breaks down.
Once it does, the flakes circulate inside the machine. Consumer Reports has noted that debris moving through a dishwasher can end up clogging internal components a secondary problem created by the attempted fix.
Vinyl caps sidestep the adhesion issue entirely. They grip the tine through friction. Once seated, they don't rely on any surface chemistry to stay in place, which is why the presenter calls them "a really good fix" and says they'll last significantly longer than brush-on application (YouTube).
What you need before starting
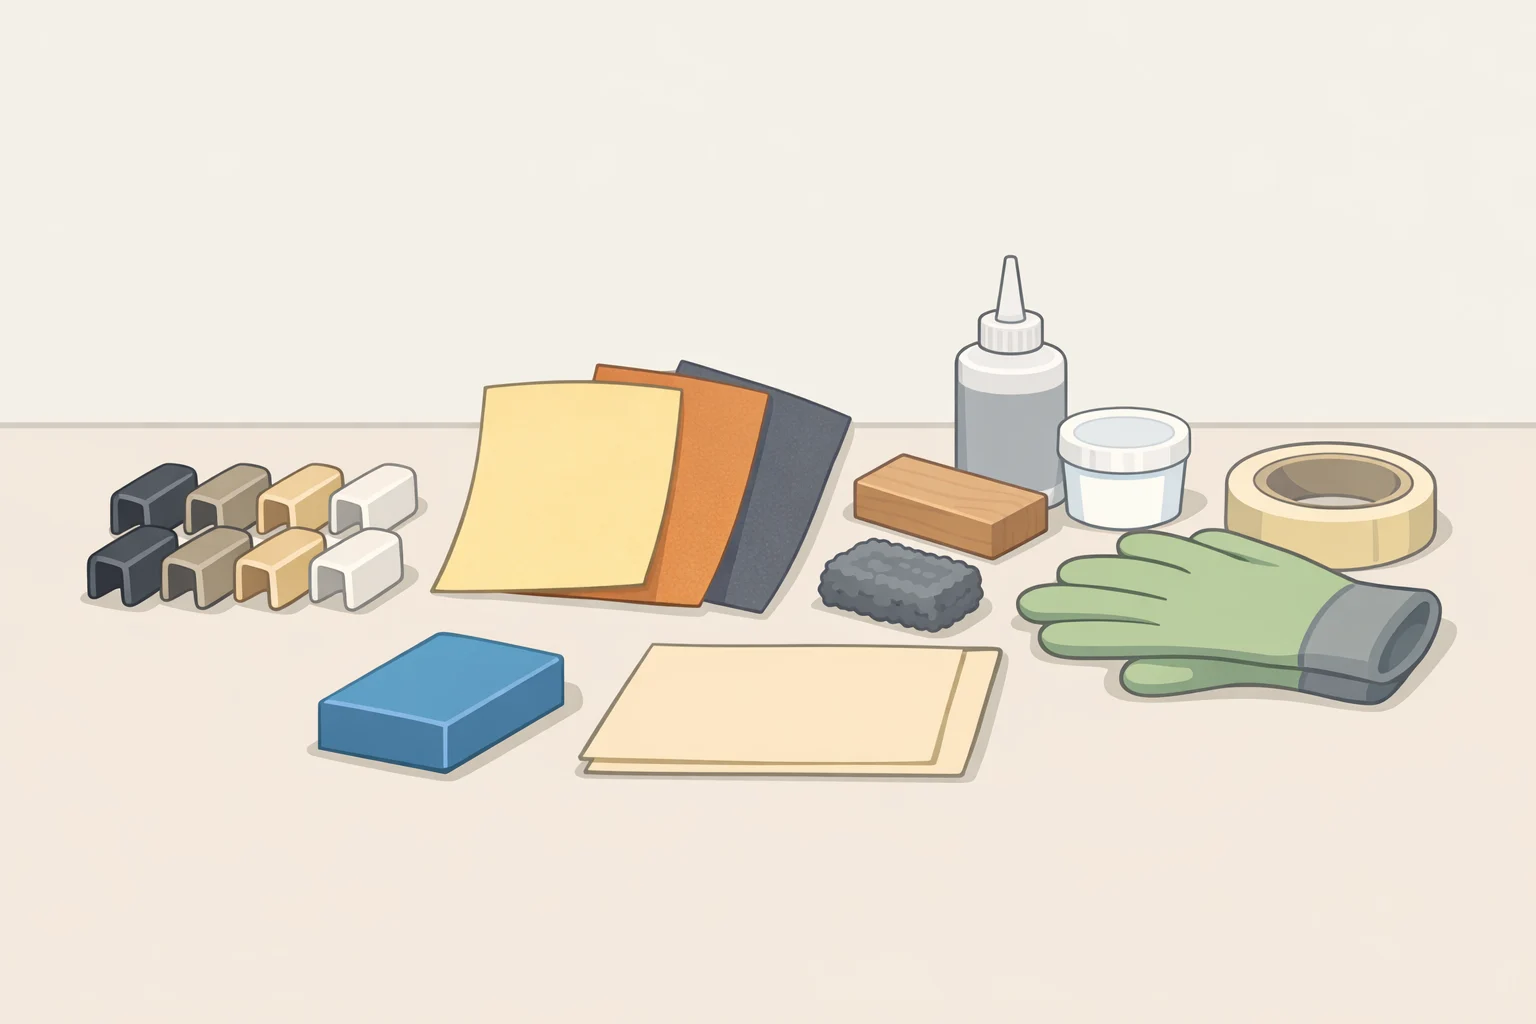
- Vinyl tine caps in gray or white. Count your tines before ordering the presenter bought a pack of 100 and it wasn't enough to cover every tine on a single rack (YouTube). Count first, then buy a few extra.
- 100-grit sandpaper for removing bulk rust
- 220-grit sandpaper for smoothing
- A wire brush drill attachment (optional, useful for heavy corrosion)
- A dry cloth
- A flat workspace away from the dishwasher
How to fix dishwasher rack rust with vinyl caps
Step 1: Pull the rack out completely.
Bring it to a workbench or clear floor space. Sanding inside the machine deposits metal dust directly into the filter and spray arms (YouTube). Work outside the machine.
Step 2: Inspect each tine.
Tines with intact coating need no prep work you can cap them as-is. Focus on tines where rust shows at the tip or base, or where the original vinyl is already lifting. Check both ends of each tine; rust at the base is easy to miss when scanning from above (YouTube).
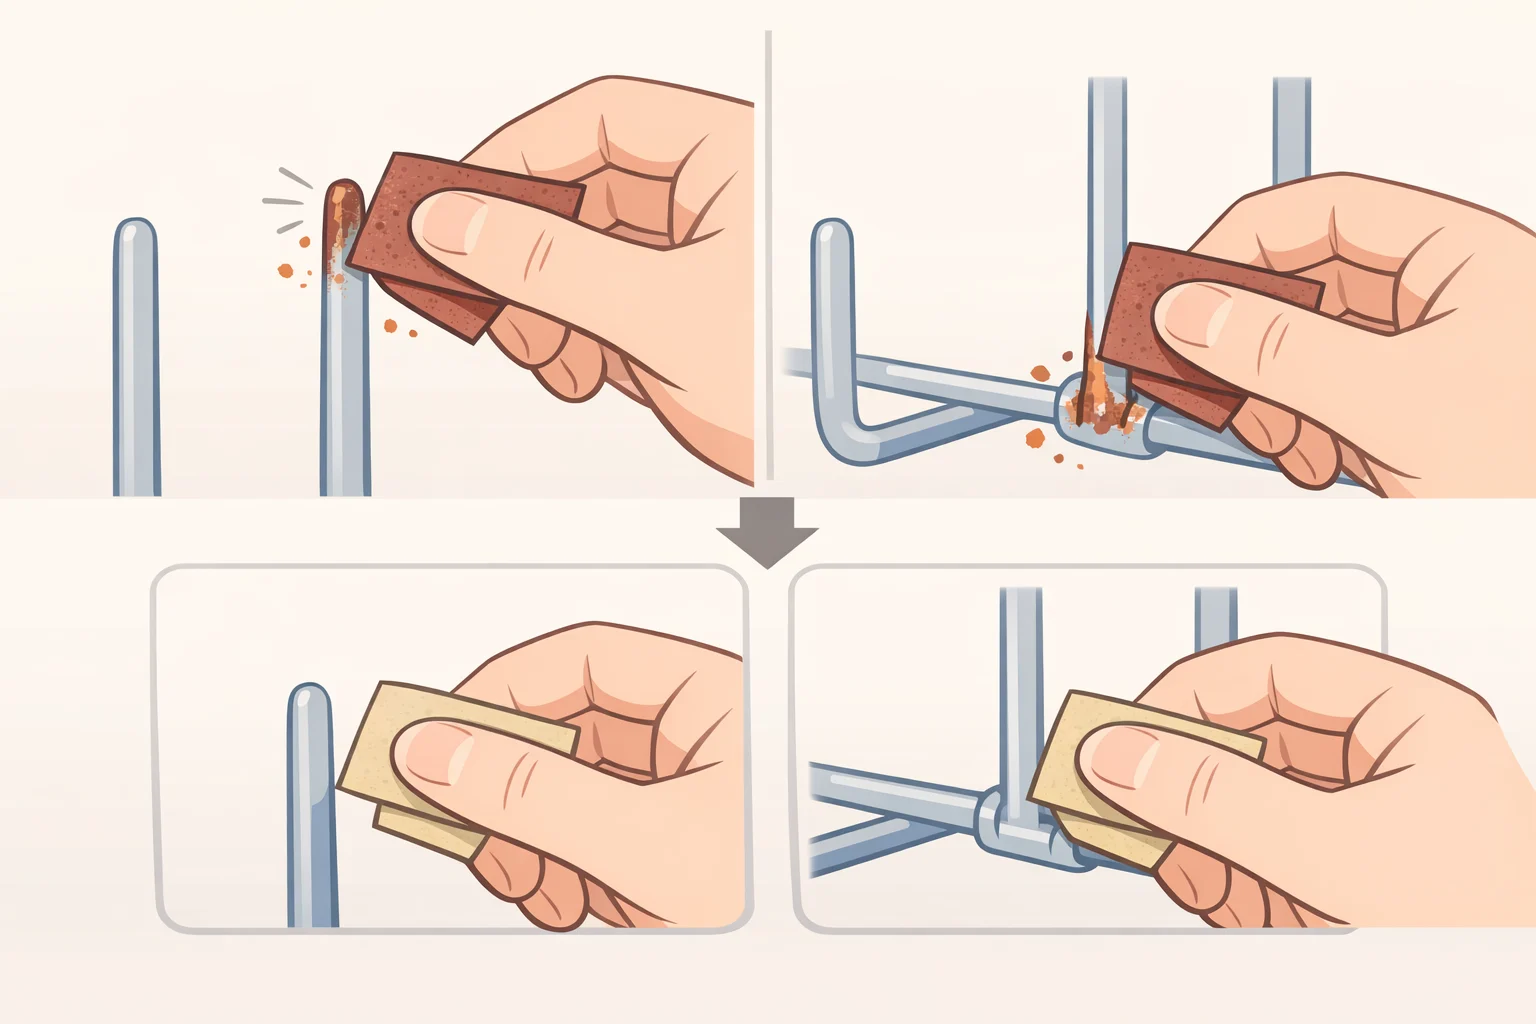
Step 3: Sand the rusted tines.
Start with 100-grit sandpaper to clear the bulk of the rust it comes off easily, per the demonstration. Switch to 220-grit to smooth the surface. For heavily corroded tines, a wire brush on a drill speeds the work considerably. The goal isn't a polished finish; it's removing loose rust and sharp edges so the cap seats flush without creating a new scratch hazard through the vinyl (YouTube).
Step 4: Wipe down before capping.
Use a dry cloth to clear rust dust and metal particles from the sanded tines (YouTube). Sending that debris back into the dishwasher defeats the repair.
Step 5: Slide the vinyl caps onto each tine.
The caps fit snugly by design that tightness is what keeps them in place through wash cycles. If a cap resists going all the way down, cut it lengthwise in half first. This shortens the distance it needs to travel and, per the demonstration, it seats fully with much less resistance once cut (YouTube). Don't force an uncut cap that's only making it halfway it'll look seated but won't grip reliably.
Step 6: Cap all the tines, not just the rusted ones.
On tines that aren't yet rusted, the caps slip on with almost no resistance (YouTube). Covering the whole rack now means the same job won't come back around in two years. This is also why the count happens before you buy.
Step 7: Reinstall the rack.
Slide it back into the dishwasher. The presenter completed the full job sanding, wiping, and capping an entire rack in under an hour (YouTube). Time will vary depending on how many tines need prep work.
When capping isn't enough
Tine caps handle surface corrosion. They don't fix structural failure, and they're not the right tool for every rack problem.
Cap the tines if rust is confined to the tips and bases, the wire underneath feels solid, and the frame holds its shape. Tine rust becomes more common after about a decade of use, per the demonstration (YouTube), but the repair works on any age machine as long as the rack is structurally intact.
Replace the rack if tines bend or snap under light pressure, or the frame has warped. At $100 to $200 per rack (YouTube), it's real money but it's a problem you can diagnose yourself before spending anything on a service call.
Call a technician if cleaning performance has dropped sharply and the rack looks fine. Pump problems and electronic control failures are a different category from rack rust. CR's head of dishwasher testing recommends leaving those to professionals, per Consumer Reports.
On the broader repair math: the median professional dishwasher repair runs around $142, based on a Consumer Reports survey of more than 125,000 members. Of those who attempted a DIY repair, 73 percent fixed it on the first try; another 18 percent succeeded on a follow-up. Those figures cover mechanical failures generally rack rust is a simpler and more predictable problem, with lower stakes if the first attempt doesn't go perfectly.
The tine-cap repair solves one specific problem: rusted tines scratching dishes. If the rack frame is sound, the corrosion is surface-level, and the tines are standard straight wire, it's worth doing before spending anything else.