Potato Crust Quiche Recipe: Crispy Shell, Silky Custard
At a glance
- Prep time: 25 minutes
- Par-bake: 20 to 25 minutes
- Final bake: 30 to 35 minutes
- Rest: 10 minutes minimum
- Yield: 6 main-dish wedges or 8 side portions
- Three things that make it work: dry shreds, dry fillings, pull while the center wobbles
Skip the pastry. This guide walks through building a quiche using shredded russet potatoes as the shell, from grating and pressing the crust to pulling the finished quiche at exactly the right moment. By the end, you'll have a complete baseline recipe to run once and adapt from there.
The potato crust earns its place for specific reasons: no pie weights, no pastry cutter, no chilling time, no real pastry skill required. The shell is hearty, with crisp edges closer to rösti than shortcrust. It holds clean slices and handles hot service well. What it doesn't do is flake, and it loses something eaten cold. If you're planning a room-temperature spread where leftovers will sit out for hours, traditional pastry performs better.
One principle runs through every step: moisture management. Water can wreck the result at three specific points in the raw potato shreds, in wet fillings, and in an overcooked custard. Control those three, and the method is reliable.
Why potato crust fails: the three failure modes
Understanding these up front makes every step below click into place.
Steaming instead of crisping. Undried potato shreds release moisture the moment they hit heat. Instead of crisping against the dish, they steam from the inside. The crust looks set, but it collapses under a knife.
Custard seepage. Gaps in the pressed shell, or a shell that wasn't fully par-baked before filling, let liquid custard migrate underneath. The base goes soggy and the quiche doesn't slice cleanly.
Overbaking. Pull too late and carryover heat takes the custard from silky to grainy. The wobble test in Step 4 is there for this reason it's easy to talk yourself into five more minutes and overshoot.
Before you begin, what you need:
- One standard 9-inch pie dish or well-seasoned cast iron skillet
- A box grater (large-hole side)
- A clean kitchen towel for moisture removal
- 1 pound (450g) russet potatoes, roughly 2 medium
- 4 large eggs, 1 cup heavy cream or half-and-half, salt, pepper, and your choice of filling
Step 1: Grate and dry the potatoes, then dry them again
Video of the Day
Russets are the tested default here. Their high starch content causes shreds to grip and bond under heat in ways that waxy varieties don't. Red potatoes and fingerlings tend to stay soft and resist forming a coherent shell. Yukon Golds work as a substitute, but expect a slightly softer result.
Use grated shreds, not sliced rounds. Rounds don't bond the same way, gaps are harder to close, and custard seeps through more easily. If sliced rounds interest you, treat it as a separate technique with its own testing. This guide covers shreds.
The moisture removal process:
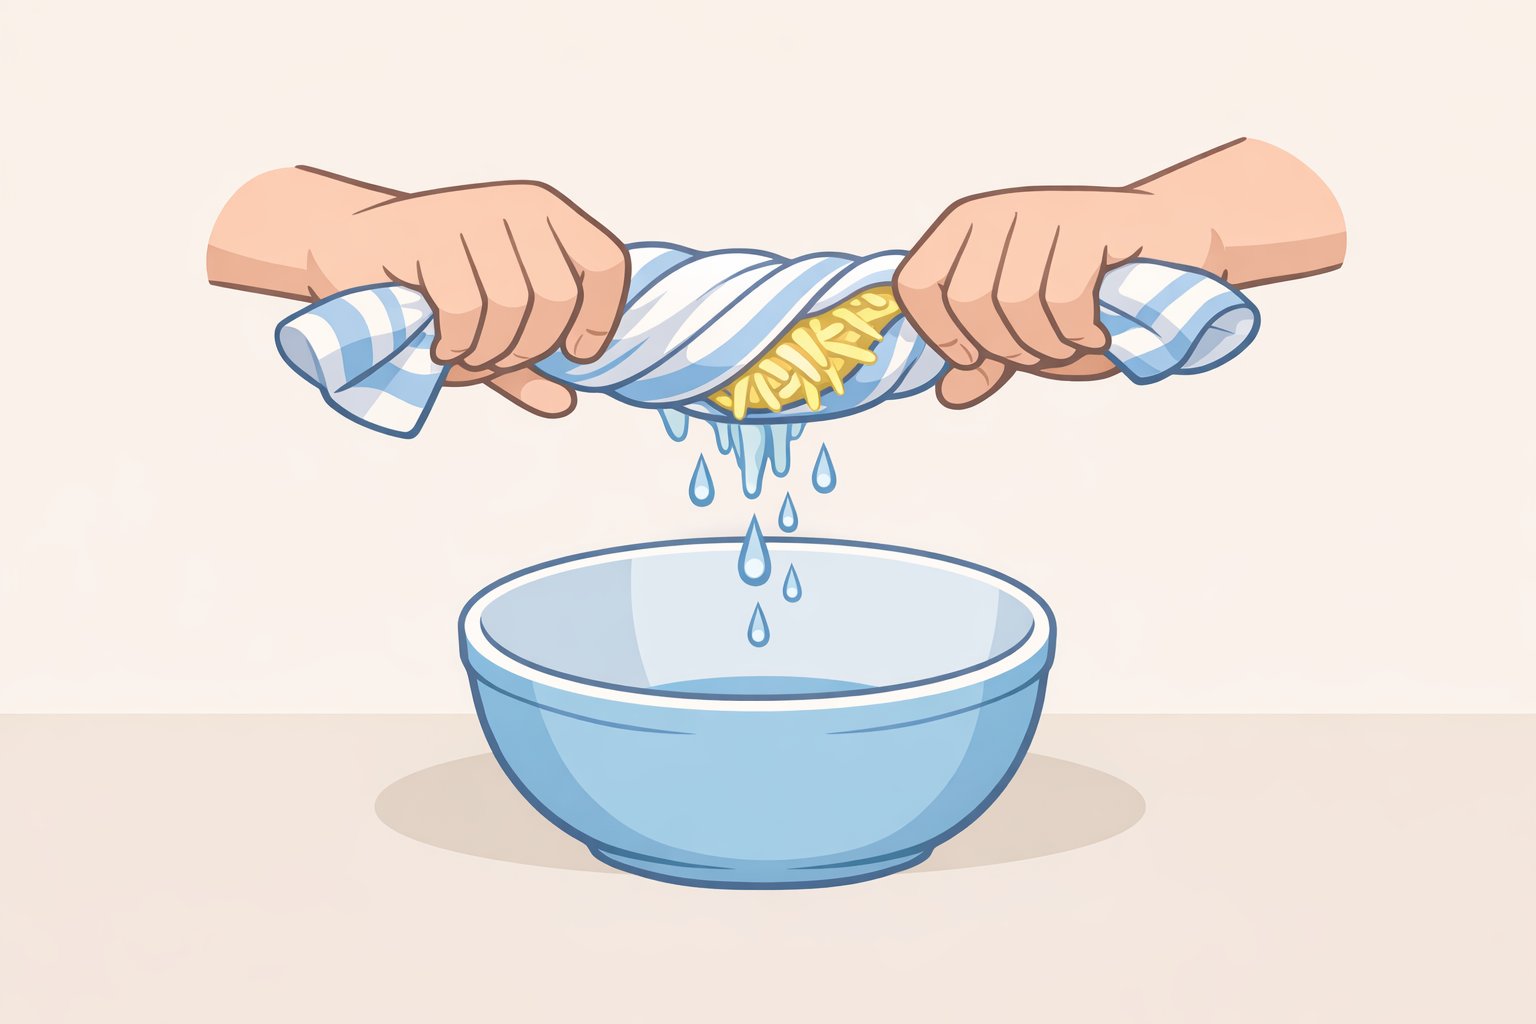
- Grate 1 pound of russets on the large-hole side of a box grater directly onto a clean kitchen towel. Leaving the skin on is fine; it adds texture and saves a step. Avoid fine shreds, which turn to paste.
- Gather the towel into a bundle and wring firmly over the sink. Extract as much liquid as possible, more than looks reasonable. Wring a second time.
- Transfer the dried shreds to a bowl. Add ½ teaspoon salt, black pepper, and 1 tablespoon melted butter or olive oil. Toss to coat. The fat encourages browning and helps the crust release cleanly after baking.
Visual check before moving on: The shreds should look almost fluffy and dry to the touch not glistening, not clumping with visible moisture. A good sign is when the shreds separate easily when you pinch them rather than sticking together in a damp mass. If they still look damp after the second wring, go again. A crust that looks set in the oven can still collapse under the knife if moisture wasn't fully removed at this stage.
Video of the Day
Step 2: Press and par-bake the shell
- Preheat the oven to 400°F (205°C).
- Grease the pie dish or skillet thoroughly, bottom and sides, with butter or neutral oil. Use a brush or paper towel to ensure full coverage, including up the walls. Thin spots in the fat layer cause sticking.
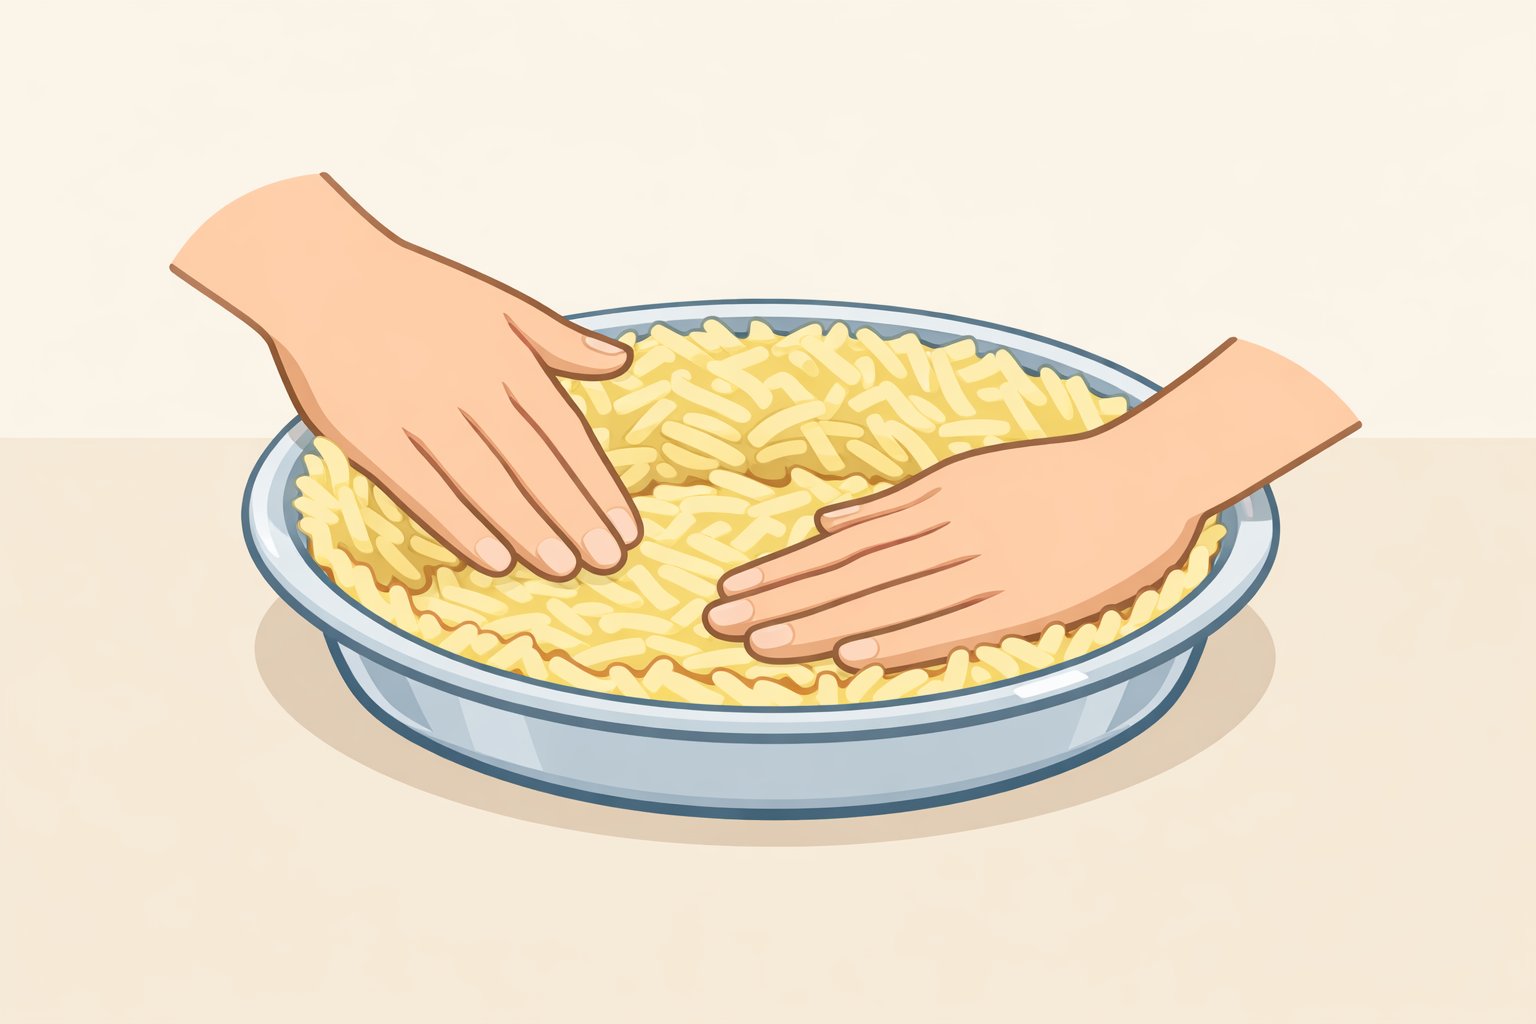
- Transfer the seasoned shreds into the dish. Press firmly and evenly across the bottom and up the sides to a consistent ¼-inch thickness. Apply more pressure than feels necessary; this is a packed shell, not a loose layer. Aim for walls roughly the thickness of two stacked quarters. Thin spots bake unevenly, and gaps let custard seep through.
- Bake on the center rack for 20 to 25 minutes. Check at the 20-minute mark.
- Remove from the oven and rest 5 minutes before adding filling.
What a successful par-baked crust looks like: Light amber at the edges, not pale yellow. The surface should appear dry and matte rather than glistening if it still shines, give it a few more minutes. Press a spoon lightly against the side wall; it should hold its shape without the shreds shifting. It won't be fully crispy yet. The second bake handles that.
Cast iron note: Cast iron conducts heat more aggressively from the bottom than glass or ceramic, which in testing tends to produce a crispier base and fewer soft-bottom problems. Check at 18 to 20 minutes rather than 25.
Step 3: Build the custard and filling
For a 9-inch dish, 4 eggs to 1 cup of dairy is a reliable baseline for custard that sets cleanly. It's worth measuring rather than eyeballing, since the ratio affects how the custard firms up.
Baseline custard:
- 4 large eggs
- 1 cup heavy cream. Half-and-half produces a lighter, slightly less rich set. In testing, lower-fat milks tend to produce a thinner custard that doesn't firm up as cleanly, with skim milk giving the least reliable results.
- ½ teaspoon salt
- White or black pepper to taste
Whisk until fully combined with no visible streaks of egg white.
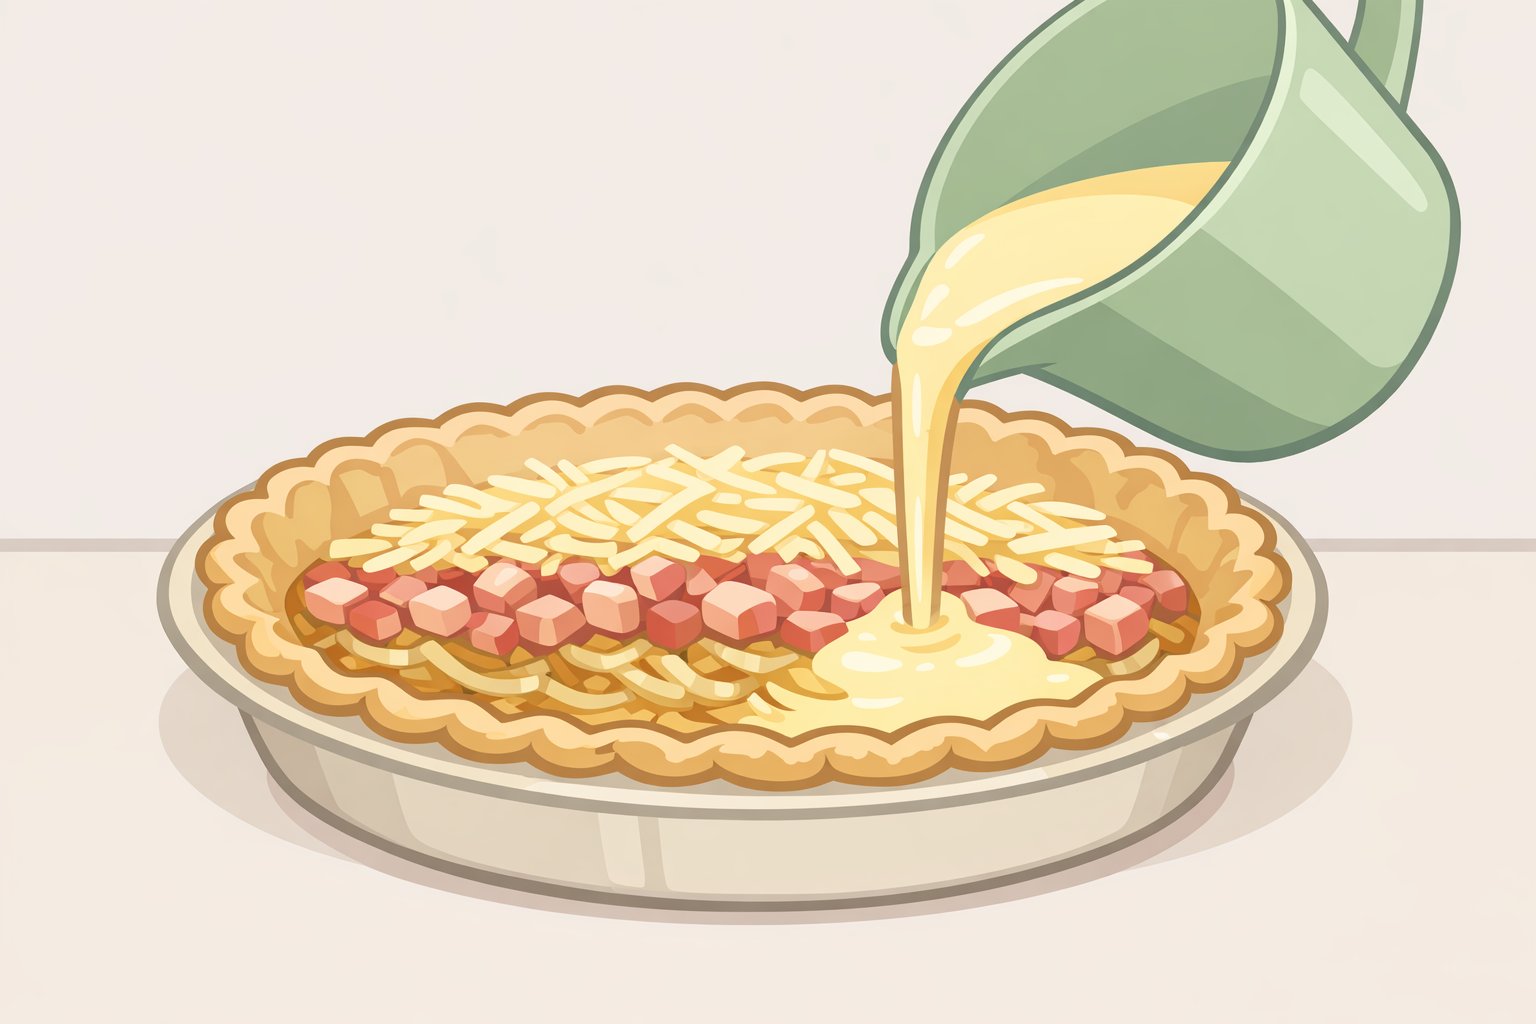
A filling combination that works: Caramelized onions, crispy pancetta, and Gruyère. Thinly slice one large onion and cook in butter over medium-low heat for 20 to 25 minutes until deeply golden. Separately, cook 3 oz diced pancetta until crisp and drain on paper towels. Scatter both across the par-baked crust, add 2 oz (about ½ cup loosely packed) grated Gruyère, then pour the custard over everything.
The rule for all fillings: Cook them first, and cook them dry. Mushrooms, spinach, leeks, zucchini anything holding significant moisture needs to be sautéed until no more liquid releases into the pan before it goes into the crust. You'll know a filling is ready when the pan stays dry between stirs; a pool of liquid still forming means it needs more time. Total cooked add-ins should sit around ¾ cup for a 9-inch quiche. Past that, the custard starts losing structure. Don't fill the custard past three-quarters of the way up the crust's sides, either it puffs slightly as it sets and will overflow if filled too high.
Quick filling reference:
| Works well | Avoid | |---|---| | Caramelized onions (fully cooked down) | Raw spinach or mushrooms | | Sautéed leeks, drained | Watery tomatoes without draining | | Crispy pancetta or bacon | Anything still holding visible liquid | | Cooked sausage, crumbled | Frozen vegetables, not thawed and pressed | | Hard cheeses: Gruyère, sharp cheddar, Comté | Fresh mozzarella (releases water as it melts) |
Step 4: Bake to visual doneness, not to time
- Reduce oven temperature to 375°F (190°C).
- Place the filled quiche on the center rack. Bake for 30 to 35 minutes, checking at 28 minutes if your oven runs hot.
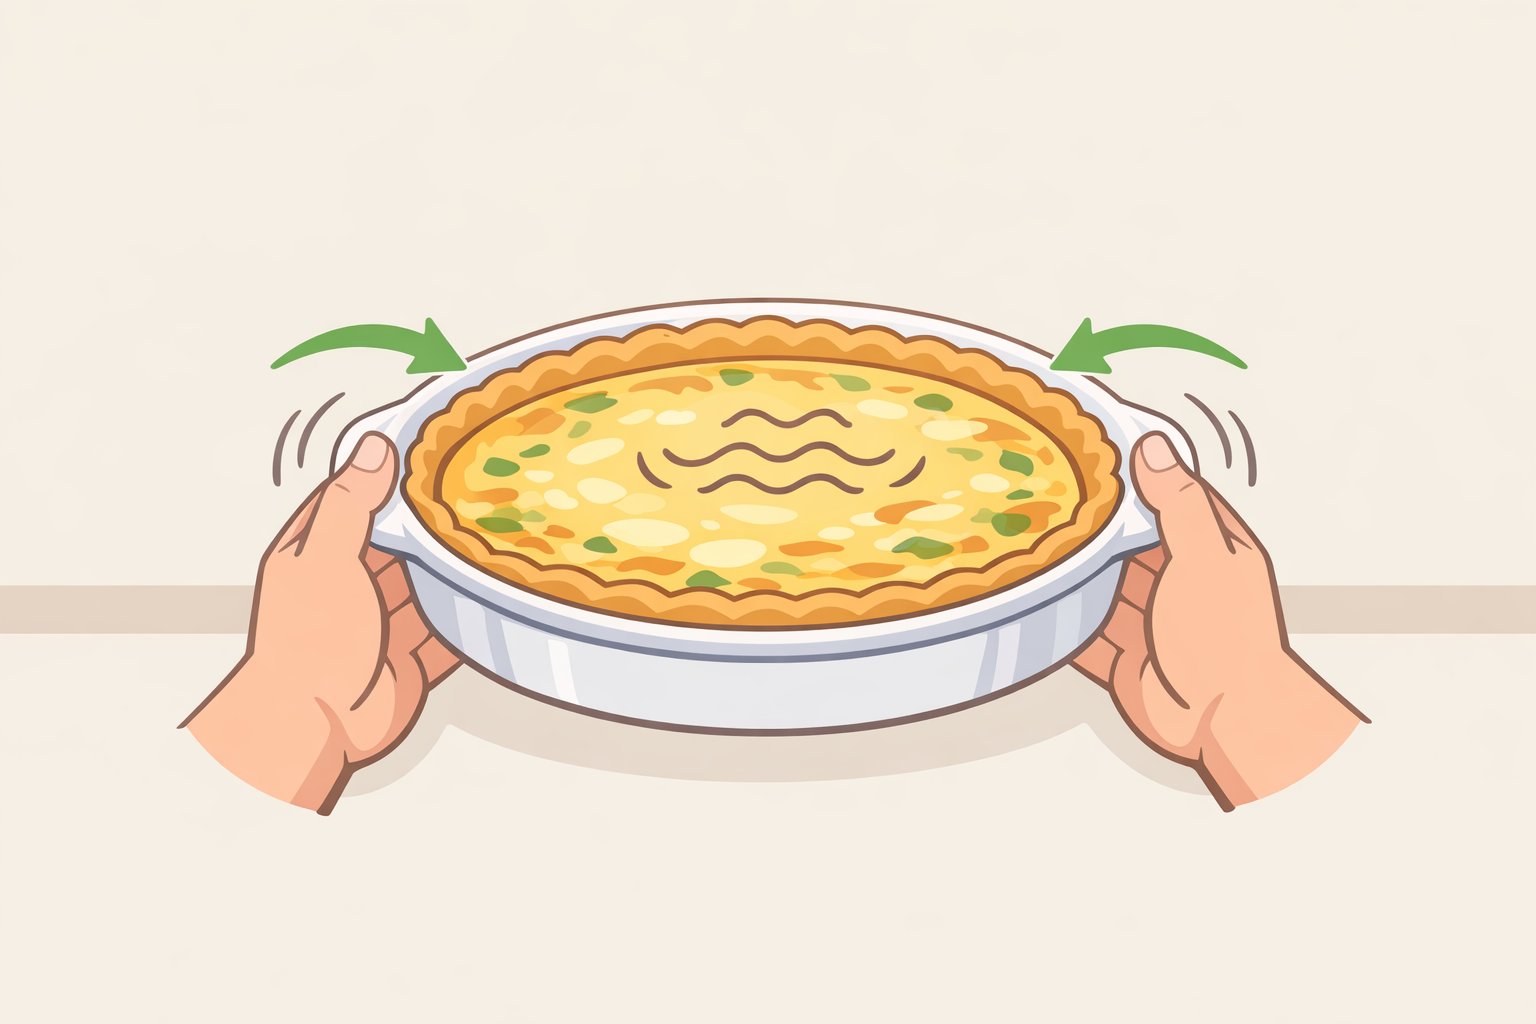
- The quiche is done when the outer two-thirds of the surface are fully set, with no movement and no shine of uncooked egg, and the center 1 to 2 inches wobbles slightly when you gently shake the dish. That wobble should look like a just-set pudding, not free liquid. Carryover heat finishes the center off the rack.
- Rest for a minimum of 10 minutes before slicing.
The jiggle test: Solid around the edges, slight movement only at the very center. If the whole surface moves freely, give it 5 more minutes and check again. If the surface is puffed and cracked and nothing moves at all, it's overcooked. Still edible, but denser and less silky.
If crust edges brown before the custard sets: Lay a loose sheet of foil over the dish without sealing it and continue baking. This slows surface browning without trapping steam.
Final checkpoint before slicing
A properly made potato-crusted quiche should show three things before you cut into it: crust edges that are deep golden brown with visible crispness, a surface that's fully set with no wet sheen, and clean release when you run a knife around the perimeter.
Once sliced, wedges should hold their shape without crumbling, with a clean edge on the potato crust, no pool of liquid on the plate, and a custard that's smooth and slightly creamy rather than grainy or rubbery. The crust base should have some snap to it, not feel soft or spongy under the filling.
If slices crumble: the crust was under-pressed going in. If liquid pools on the plate: either the add-ins weren't cooked dry, or the custard went past the wobble window.
What you can change without breaking it
The baseline is strict about a few things and flexible about most others.
Potato type: Russets are the tested default. Yukon Golds work but tend to produce a softer shell in testing. Waxy varieties red and fingerling generally don't form a coherent crust and aren't a reliable swap.
Dairy: Heavy cream gives the richest, most stable custard in testing. Half-and-half is a solid substitute for a lighter result. Going below that, to whole milk or lower-fat options, tends to produce a noticeably thinner custard. Skim milk has given the least reliable results in testing and is worth avoiding for this application.
Cheese: Hard, aged cheeses are the safe range: Gruyère, sharp cheddar, Comté, Parmesan. Fresh or semi-soft cheeses that release water as they melt fresh mozzarella, burrata can compromise the set. A tablespoon of ricotta stirred into the custard for richness is fine. A thick layer of it is not.
Cheese quantity: Around 2 oz, roughly ½ cup grated, is a reasonable starting point for a 9-inch quiche. Double it and the custard-to-cheese ratio tilts toward dense. Scale up gradually if you're testing.
Wet vegetables: Around ¾ cup of cooked add-ins is the practical limit before the filling-to-custard ratio starts affecting both set and slice integrity. The question isn't just how much you add but whether each vegetable is genuinely dry before it goes in. Spinach releases its liquid quickly; mushrooms take considerably longer. When nothing more is pooling in the pan between stirs, they're ready.
Dish type: A standard 9-inch pie dish works well. Cast iron tends to produce a crispier base due to more aggressive bottom-heat conduction and is worth using if you have one. Ceramic and glass are fine but need the full par-bake time. Avoid springform pans; the gap at the base lets custard leak before it sets.
Troubleshooting, make-ahead, and storage
Common problems:
- Crust won't release: Grease coverage was incomplete. Run a thin offset spatula around the edge and under the base while still warm. Slices release more cleanly than trying to lift the whole quiche at once.
- Bottom stays soft: Either the potatoes weren't dried enough, or the par-bake was cut short. Place the dish directly on the bottom rack for an additional 5 minutes. Cast iron tends to reduce this problem on future attempts.
- Slices crumble: Under-pressed crust during assembly. The shreds need to be compacted into a bonded shell, not just distributed evenly.
Make-ahead: Par-bake the crust the day before. Let it cool completely, then store it loosely tented at room temperature. Covering it while warm traps steam and softens the crust you just worked to crisp. Refrigerate the custard and cooked add-ins separately in covered containers. Assemble and do the final bake the next day. For prep more than a day out, refrigerate the par-baked shell as well. Let it come to room temperature before adding the filling, or add 3 to 5 minutes to the final bake to account for the cold start.
Storage and reheating:
- Refrigerate covered for up to four days, though texture is noticeably better in the first two. Reheat slices uncovered on a sheet tray in a 325°F oven for 10 to 12 minutes so the crust surface re-crisps rather than steams. Microwave reheating is faster but softens the potato crust noticeably; use it when speed matters more than texture.
- Fully cooled individual slices freeze reasonably well when wrapped tightly. Reheat from frozen, uncovered on a sheet tray, at 350°F for 20 to 25 minutes.
- Quiche is best served warm or at room temperature. Straight from the refrigerator, the custard firms up and the flavors mute. If you're not reheating, let it sit out for 20 minutes before serving.
The baseline to remember
Three decisions determine whether this works: dry the potato shreds until they're genuinely dry, pre-cook any wet add-ins until nothing more releases into the pan, and pull the quiche while the center still wobbles. Get those right, and the method holds up across variations.
The first run is really calibration. Once you've seen what a properly dried potato crust looks like in your specific dish, and what the right wobble looks like in your specific oven, you have a reliable reference point. From there, the next logical experiments are low-risk and worth trying: swap Gruyère for sharp cheddar or Comté, try a cast-iron skillet if you haven't already, or test half-and-half against cream to see which texture you prefer. Each one changes one variable against a known baseline, which is how you build a quiche you actually want to make again.