School is out, and summer is in session! And nothing says summertime more than making s'mores. It's one of those quintessential summer bucket list activities that's a fun treat for kids and adults alike.
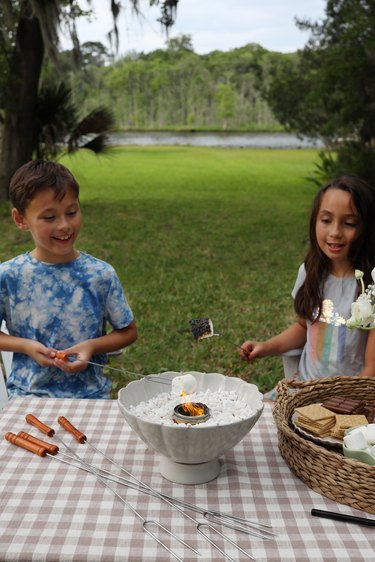
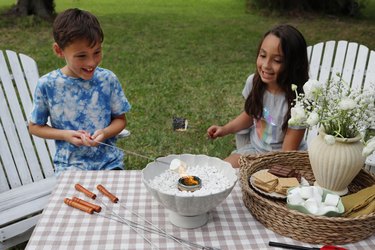
You don't even need to build a big bonfire to make 'em. Instead, you can turn any planter or bowl into a mini fire pit that can fit right on your table. Not only is it super portable but it also creates a fun centerpiece that everyone can gather around.
Video of the Day
This DIY s'mores fire pit comes together in less than 10 minutes, and you can use it all season long to enjoy summer's best dessert!
Video: S'mores Fire Pit
Things You'll Need
Ceramic/stone planter or bowl
Decorative rocks or pebbles
Food-safe chafing fuel can
Lighter
Skewers
Marshmallows
Graham crackers
Chocolate bars
1. Choose a planter
Use a planter or bowl that is heat-safe, such as ceramic, stone, or terra cotta. You could also use a glass or metal vessel. Avoid anything made of plastic or wood, as it could melt or catch fire. A wide-mouth vessel that has a diameter of at least 6 inches or more works best.

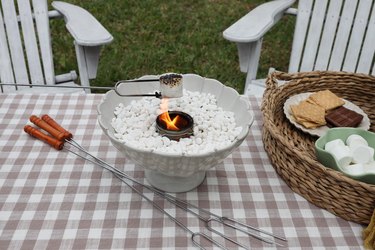
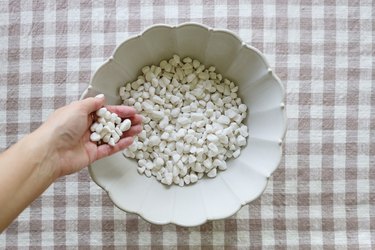
2. Fill the planter with rocks
Fill the planter or bowl about three-quarters of the way with small rocks or pebbles.
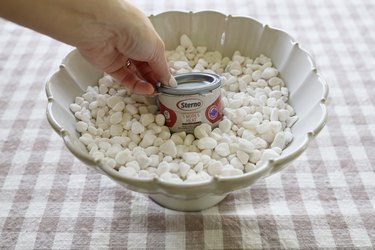
3. Nestle in the fuel can
Create a small well in the center of the rocks or pebbles and nestle the chafing fuel can inside.
Tip
Be sure to look for a chafing fuel can that is food-safe, as many of them contain chemicals that are not suitable for cooking food directly. I used a specific type of nontoxic chafing fuel that's designed for making s'mores.
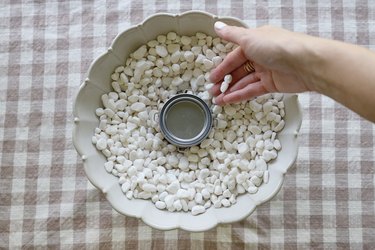
4. Secure the fuel can
Add more rocks or pebbles around the chafing fuel can (leave about 1/2 inch of the can exposed) and press the rocks down firmly to secure the can in place.
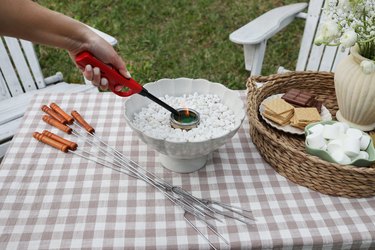
5. Light the fuel
Remove the lid from the fuel can and use a lighter to carefully ignite the chafing fuel. The fuel can that I used says it has approximately 45 minutes of burn time, so be sure to time your marshmallow roasting accordingly.
Warning
Avoid touching the fuel can while it's lit. Allow it to cool sufficiently after extinguishing. Some fuel cans (such as the one I used) come with a handy chip on the side that tells you when it's cool enough to handle.
6. Roast the marshmallows
Insert a skewer through the center of a marshmallow and hold it directly over the flame. Rotate it several times to allow the flame to cook it evenly. A minute or so is all it takes to lightly toast it, or you can roast it a little longer if you prefer a crispier marshmallow with blackened bits.

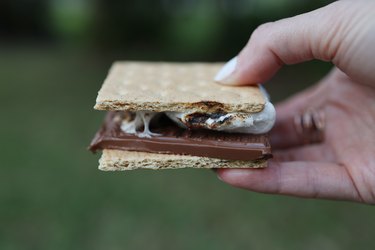
7. Assemble the s'mores
Now for the best part: eating the s'mores! Place a square of chocolate on top of a graham cracker, place the roasted marshmallow on top of the chocolate, and press another graham cracker on top of the marshmallow to smoosh it down and create a delicious, ooey-gooey s'mores sandwich.
They're fun to make, and even more fun to eat!