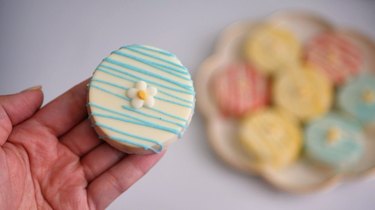
These chocolate-covered Oreos may look super fancy, but they're actually easy to make with an Oreo cookie mold. With just two ingredients and a little creativity, you can customize these no-bake cookie treats to your liking.
The key to effortlessly releasing the chocolate-covered Oreos from the mold is to allow them to set in the fridge for about 30 minutes. Once chilled, they'll pop out without any trouble. If you accidentally chip the chocolate coating, don't fret; just use some colored melted chocolate to drizzle over the area.
Video of the Day
Video of the Day
Things You'll Need
9 to 12 Oreos
16 oz white chocolate
Vegetable oil
3 food gel colors
Optional: sprinkles, sugar flowers, or chocolate flowers
1. Melt chocolate

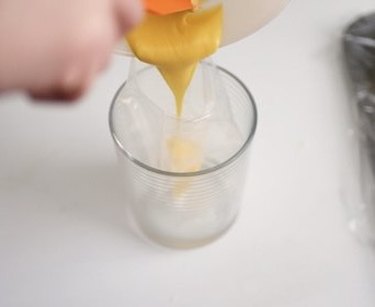
Melt the white chocolate according to package directions.
Tip
I like to use a mini fondue pot to boil some water, then use a heat-safe bowl or cup set over the pot to melt my chocolate and keep it warm.
2. Gather Oreos

Gather the quantity of Oreos you'd like so they're ready to put into the mold.
3. Add chocolate to mold
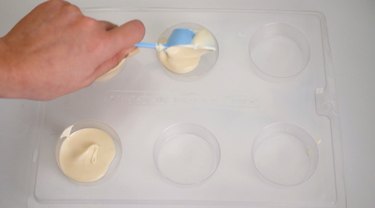
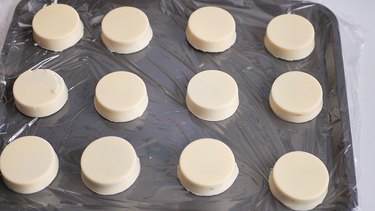
Add about 1 tablespoon of melted chocolate to each cup in the mold. This chocolate will form the top of the Oreo after it gets flipped out of the mold.
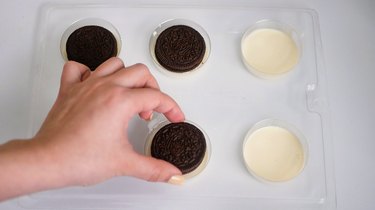
Place an Oreo onto the chocolate in each cup, and press gently. You want the cookie to be set in the chocolate but not so deep that it shows through the chocolate when the finished cookies are right side up.
5. Add more chocolate
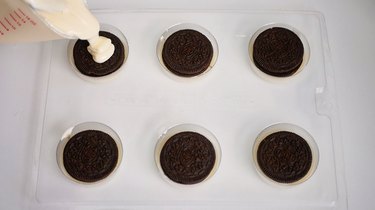
Cover each cookie with more melted chocolate. Tap the mold to help the chocolate settle and release air bubbles. Add more chocolate if you see empty spots, but be careful not to overfill.
Move the mold the fridge and chill for about 30 minutes, or until the chocolate is fully set.
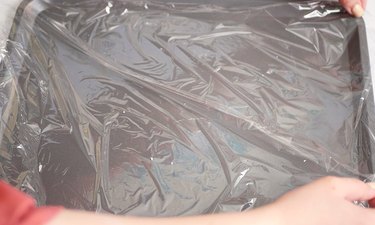
While the chocolate is chilling, line a baking sheet or tray with parchment paper or plastic wrap.
6. Prepare decorating chocolate
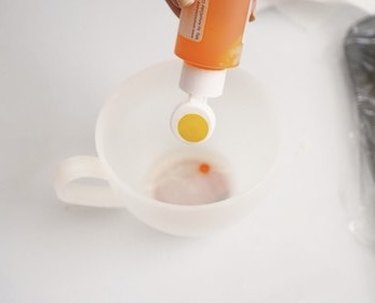
Combine a few drops of vegetable oil with 1 or 2 drops of gel food coloring. Pour in about ¼ of the remaining melted chocolate and mix until the colors are fully incorporated. Repeat to make more colors, as desired.
Pour each colored chocolate into its own piping bag.
Remove the chocolate-covered Oreos from the mold and set on the parchment- or plastic-lined tray.
8. Decorate
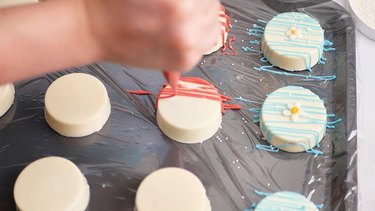
Drizzle the dyed chocolate back and forth over the chocolate-covered cookies. Add sprinkles, sugar flowers, or chocolate flowers, if desired.
Tip
If you have sugar flowers, chocolate flowers, or sprinkles you’d like to use, add them before the chocolate drizzle hardens.
For any chipped chocolate corners or air bubble gaps, use your colored chocolate to drizzle. Adding sprinkles or other decorations will also hide any imperfections.