Some things are just essential parts of summer. A frozen treat on a hot afternoon, a cooling tip to the beach, the smell of wildflowers baking in the heat, and—of course—food that's hot off the grill, as often as it can be managed. But what if you don't have a grill, or have no place to put one? Apartment and condo dwellers, in particular, might have to do without. If that's your position, how do you get your grill on? Don't worry, we've got you. Here are six ways to grill without an actual grill, along with some flavor-boosting chef tips.
A Ridged Grill Pan
Video of the Day
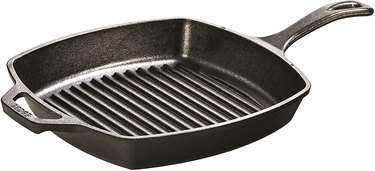
Lodge Cast Iron Grill Pan, 10.5-inch, Square
Video of the Day
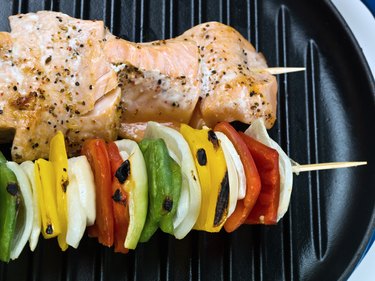
One of the simplest and most reliable methods of indoor grilling is to use a grill pan. It's essentially a skillet, but with ridges that raise your food from the cooking surface. It replicates two important benefits of grilling: It gives you beautiful grill marks and allows fat to drip away from richly marbled steaks and chops. There are lots of grill pans with nonstick coatings, but in this case—unless you face physical challenges that make the weight forbidding—you want cast iron, like this classic offering from Lodge.
A grill pan works best when you preheat it at medium-high heat until it just barely shimmers with smoke. Nonstick surfaces in general won't stand up to that kind of treatment, but cast iron loves it. When you slap your chops or skewers down onto the preheated Lodge, you'll be rewarded with the instant sizzle of grill marks being scorched onto your food, and the heavy iron will retain the heat until it's cooked. You can also get essentially the same product as an oblong griddle or grill pan that covers two burners. Either way, give it a quick wash when you're done, and then wipe it with a light coat of oil while it's still warm to prevent rust. Lodge ironware is pre-seasoned at the factory, so it's ready to use right away.
A Cast Iron Skillet
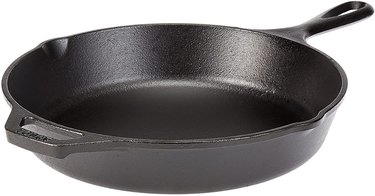
Lodge 10.25-Inch Cast Iron Skillet
Grill marks are pretty, but Barbecue Hall of Famer Craig "Meathead" Goldwyn argues that they actually short-change you and your steak. Deep browning helps create some of the complex flavors you love about grilled meat, so why restrict them to a few stripes along the surface? For the fullest flavor, you'd ideally have the entire surface of your steak or chop seared to a rich brown, and nothing does that better than a cast iron skillet.
As with the grill pan, start by heating the pan itself at medium-high temperature. Blot your meat dry with a clean paper towel, add any last-minute seasonings, and slap it into the preheated pan. The meat will stick at first, but that's fine. Once it is fully seared it will release from the pan, and you can turn it over and brown the second side as well. Tell your friends it's "pan-grilled" or "pan-seared," and they'll think you're brilliant.
Chef’s Tips for Grilling on Cast Iron:
- It's easy to overcook thin supermarket steaks or chops (anything 1/2 inch or less) using this method. Putting your meats in the freezer for 30 minutes ahead of time will chill them enough to let you brown them thoroughly without overcooking.
- Thick steaks (1 to 2 inches or more) have the opposite problem: They'll brown perfectly well before they're cooked through. You can finish them in the oven after the initial sear, but there's a better option: Cook the steaks to within a few degrees of your preferred doneness either in the oven or a lower-temperature pan, then let them rest for a few minutes. Finish them with a hard sear in the cast iron pan, and serve immediately.
- Make a quick pan sauce by "deglazing" the hot skillet with a splash of water, wine, beer, broth or other flavorful liquid after you remove the meat. As you stir vigorously, the flavorful browned-on juices will emulsify with your liquid and any fat left in the pan, giving you a thin but tasty sauce to drizzle over the meat and side dishes.
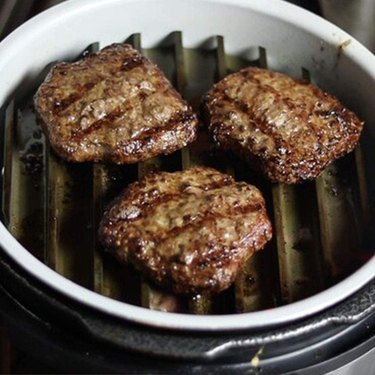
A Smokeless Indoor Grill
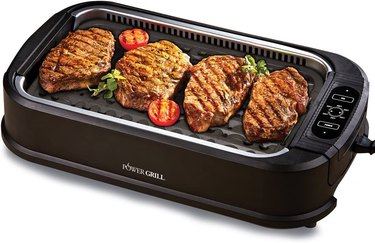
Power XL Electric Indoor Smokeless Grill
Of course, there are also purpose-built indoor grills that use electric heating elements to replicate the outdoor grilling experience. The best of them, like this Power XL model, combine high heat for searing (up to 450 degrees Fahrenheit, in this instance) along with durable ceramic-coated grates for long-term service. The Power XL's cooking surface is approximately the same as a 9- by 13-inch cake pan, so there's room for lots of steaks and burgers or even a whole butterflied chicken.
The big selling point here is that the grill's "smokeless" design captures most of the smoke that escapes when you're cooking, so your stove's vent hood won't have to work overtime to keep your air breathable. There's also a glass lid you can use (or not) to keep fat splatters from getting everywhere. The grilling plate is also removable, so once it cools, it's easy to clean. What's not to like?
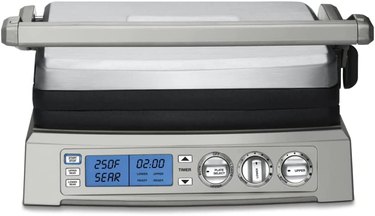
A Contact Grill
Cuisinart Griddler Elite
Contact grills were first popularized by boxer George Foreman, and the brand bearing his name still makes many of the most popular models. They use heated plates in the base and lid, which press against the food and cook it rapidly without flipping (hence the term "contact grill"). You can buy contact grills that are disposable and dirt cheap, if that's what you want, but we really appreciate the versatility of this offering from Cuisinart.
First things first: It's really good at grilling. At 240 square inches, its cooking surface is much larger than with similar grills (plenty big enough to cook for a party) and it gets all the way up to 500 degrees Fahrenheit for an excellent sear. It's also got dual-zone heating, so you can blast steaks on one side while cooking delicate fish or shrimp (or side dishes) on the other side. Just as importantly, when you aren't grilling, it's arguably the most versatile indoor grill. The grilling plates are reversible (grilling ridges on one side, flat griddle on the other) so you can use either or both at one time, and it can be used open or closed. You can even get optional Belgian waffle plates for it (sold separately). If you have limited space, the Griddler gives you maximum value for the inches it takes up.
Your Oven's Broiler or Countertop Broiler
Cuisinart COB-1010 Toaster Oven Broiler
Most homes have a perfect alternative to the grill already built-in: Your oven's broiler. It's basically an upside-down grill, with the heat coming from above. Instructions will vary, depending on your oven, but usually, you should adjust the rack so your food is 6 to 8 inches from the broiler element. Crank up the broiler with the broiler pan in place (to preheat), and then add your food once it's ready. When the first side is well-browned, flip your food with long tongs and brown the second side.
If your oven doesn't have a broiler, or if it doesn't work properly (or if you don't want to heat up your whole kitchen for one steak or chop), many countertop ovens work very effectively as a mini-broiler. This one from Cuisinart is a good example, providing a very serviceable broiler capable of cooking meals for two to four people. The only downside? Whether you're using your oven or a countertop broiler, spatters of hot fat are going to generate a lot of smoke. Make sure your vent hood is cranked up and the windows are open before you start.

An Air Fryer
Cosori Pro II 5.8 Quart Air Fryer
Air fryers have been super trendy over the past couple of years, and if you've recently bought one, you'll be happy to know that it can "grill" a lot of foods pretty well. A quick search online will show you a lot of recipes for making barbecue chicken in your air fryer, and it will turn out a reasonably acceptable steak, chop or burger as well. If you don't have one yet, this large-capacity offering from Cosori is a great choice. The extra-large basket holds enough food for a family meal (up to a 5-pound chicken!) and it cooks quickly and evenly.
If you really want to get grill-worthy results from your air fryer, though, you'll want to splurge on a Sear 'n' Sizzle insert (pictured below) from grilling accessories company Grill Grates. Competition cooks use Grill Grates to get the best grill marks, and now the company makes a special version that's just the right size to fit your air fryer or one of the popular air fryer/pressure cooker combos. The heavy-duty aluminum grill is 8 3/4 inches in diameter, so it will fit any cooker with a 9-inch basket or pot. Once preheated, it'll deliver top-quality grill marks. Even better, the drippings will carbonize when they hit the flat bottom of the Sear 'n' Sizzle, generating smoke that gives your foods a surprisingly good grilled flavor.
All of these options will cook your foods well, especially with a bit of practice, but they won't completely replicate the full flavor and look of grilled foods. A few more chef tips to bridge that gap include:
- Using a dry brine (salt, applied an hour or more before cooking) to season your meat or poultry, and help keep it juicy after cooking.
- Applying a dry spice rub or marinade to crank up the flavor.
- Using ingredients such as smoked salt, smoked paprika, chipotle powder or even liquid smoke to help impart that whiff of smoke flavor you lose when you don't have a grill. Be sure to use a light hand, especially with liquid smoke, because too much will overpower the flavors of your foods.
- Using a "smoking gun" (you've seen them on cooking shows) to add real smoke flavor to your foods. The original from Polyscience is probably still the best, but if that's not in your budget there are lower-priced models suitable for moderate use.
- Use a kitchen torch to apply a bit of char to the edges of your meats once they're done. It will add flavor and give that "really grilled" look, but with minimal risk of overcooking your food.
- Got your heart set on grill marks? Heat a metal skewer directly on a burner of your stove, then press it against the food's surface repeatedly to make parallel marks. You'll probably need to reheat it a time or two in order to create the full effect. Just remember it'll get hot, so hold onto it with a dry kitchen towel or a heatproof glove.