Sure, single-use products are convenient, but items that are used for only a few minutes can have an impact on our environment that lasts many years. There are countless disposable products in our lives these days, but we can make a huge environmental difference by slowly and surely eliminating these things from our daily routine.
At first glance, throwaway duster cloths seem to be harmless. However, when thousands of users are throwing them away daily, they can quickly become another unnecessary waste product. It doesn't take much time to create a reusable duster cloth that will last years and years, and even a beginner can master this project. Plus, it's a wonderful way to use flannel scraps so they won't end up in the landfill. That's a win-win situation in our book!
Video of the Day

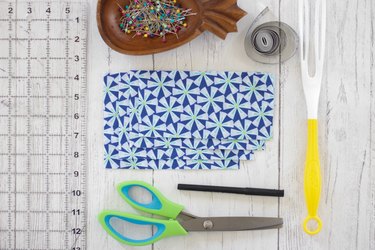
Things You'll Need
Two pieces of 5 x 7-inch flannel cut on the bias
Two pieces of 4 1/2 x 7-inch flannel cut on the bias
Two pieces of 4 x 7-inch flannel cut on the bias
Two pieces of 3 1/2 x 7-inch flannel cut on the bias
Ruler
Marking pen
Straight pins
Pinking shears
Swiffer duster handle
Tip
To cut on the bias means to cut the fabric on a 45-degree angle to the selvage edge. The beauty of cutting the fabric this way is that it won't fray.
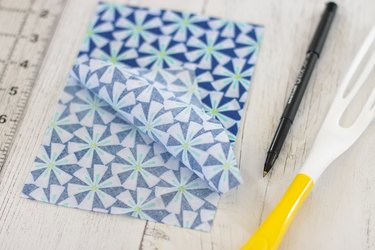
Step 1
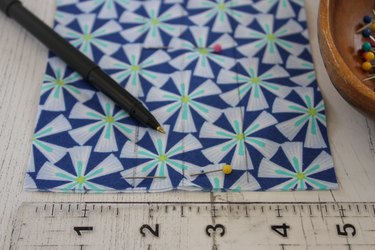
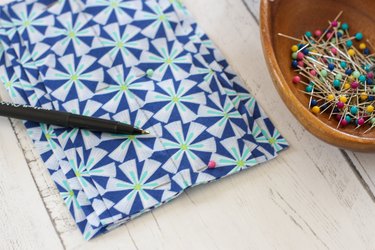
Place the 5 x 7-inch pieces of flannel together with the wrong sides facing each other. Use a marking pen and ruler to draw a line down the center. Draw two more lines that are 3/4 inch on either side of the center line. Pin in place.
Step 2
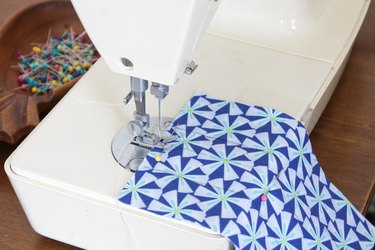
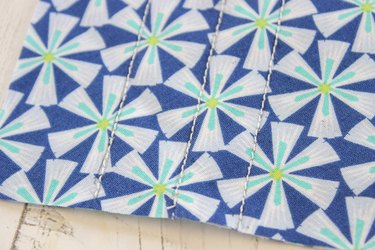
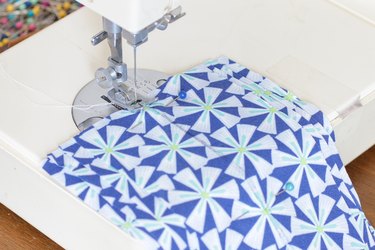
Sew with a straight stitch along each marked line. Be sure to remove the pins as you sew.
Step 3
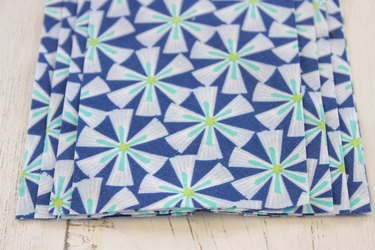
Place the 5 x 7-inch piece flat on your surface. Center the 4 1/2 x 7-inch piece on top. Then, center the 4 x 7-inch piece on top of that. Finally, center the 3 1/2 x 7-inch piece on the very top. Flip over the stack and do the same thing on the other side, stacking the fabrics widest on the bottom to narrowest on the top. You'll have eight layers total when you're finished stacking.
Step 4
Draw a line down the center of the fabric stack and pin in place. Sew along the line through all of the layers and remove the pins as you sew.
Step 5
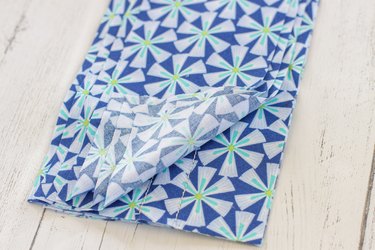
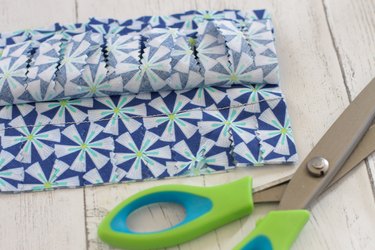
Use pinking shears to cut slits that are perpendicular to the seam and as close to the stitching as possible. Be careful not to cut the stitching on the center piece.

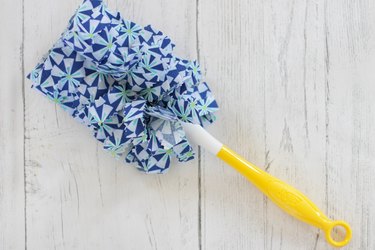
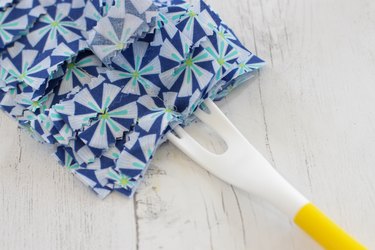
Step 6
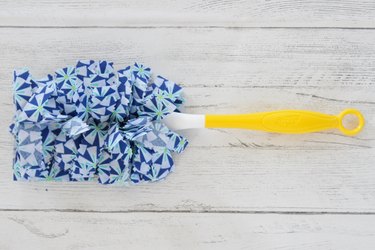
Insert the handle into the pockets created in the center piece. Fluff the duster and now you're ready to dust to your heart's content. When you finish, just remove the duster cloth, toss it in the washer and dryer and it will be even fluffier on your next cleaning day.
Happy dusting!