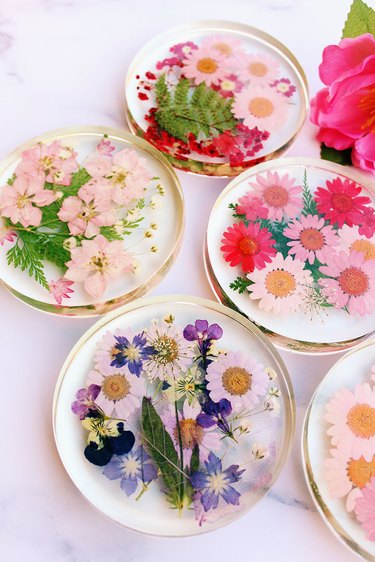
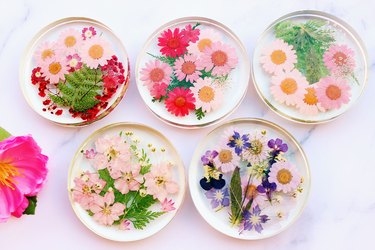
Flowers always brighten everyone's mood, and these coasters made with pressed flowers will definitely add some cheer to your table — even before the drinks are served. The flowers are encased in clear resin, so they look they are floating in glass. These coasters are so beautiful, they would also be perfect as gifts, or even favors for bridal showers and weddings.
Video of the Day
Things You'll Need
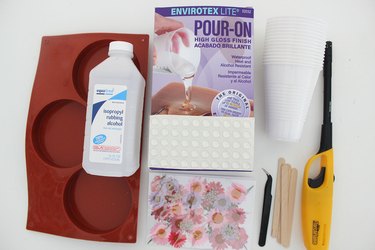
Pressed flowers
4-inch round disk silicone mold
Rubbing alcohol
Resin mix
Plastic cups
Wooden stir sticks
Butane lighter
Tweezers
Adhesive rubber pads
Step 1: Press Flowers
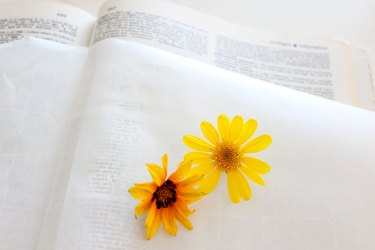
You can purchase dried, pressed flowers at the crafts store or online, but if you wish to press your own flowers, place them between parchment paper in a heavy book like a dictionary. Close the book and place additional books on top to put extra weight on the flowers. Let them dry and flatten for 7 to 10 days. Flowers that are already flat, e.g., daisies, work better than fuller buds like roses.
Video of the Day
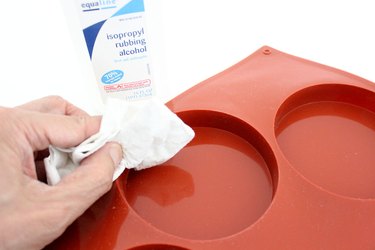
Step 2: Clean the Silicone Mold
For this project, you'll need a 4-inch diameter round disk silicone mold. Wash it well in soap and water and allow to dry thoroughly. Then remove any additional residue with a lint-free paper towel and rubbing alcohol.
Step 3: Mix Resin
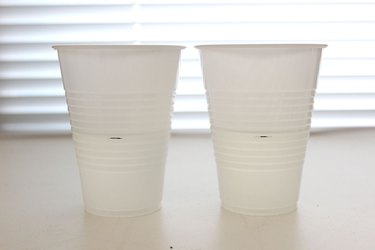
Resin typically comes in two parts — the resin and the hardener. Mixing the two parts creates a clear, glass-like surface when it hardens. (Different brands of resin have varying instructions in terms of resin and hardener ratios. The brand I used required a 1 to 1 ratio, so this tutorial reflects that. Check the specific instructions for the brand of resin you select.) Pour an equal amount of resin and hardener in two separate plastic cups. I marked a black line on both to guide my measuring.
Pour the contents of the two cups into a third, mixing with a wooden stir stick for two minutes. (Again, check the instructions for your specific brand of resin.) Be sure to scrape the sides and bottoms of the cup while stirring.
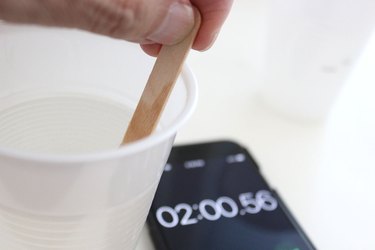
Then pour the mixture into a fourth, clean cup and mix for an additional minute with a new stir stick.

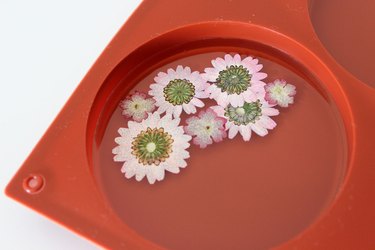
Step 4: Pour First Layer of Resin
We'll pour the resin in two layers so that the pressed flowers are encased between the layers. Pour the resin in the molds about a third of the way.

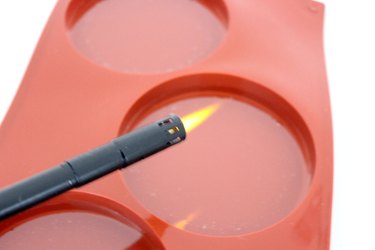
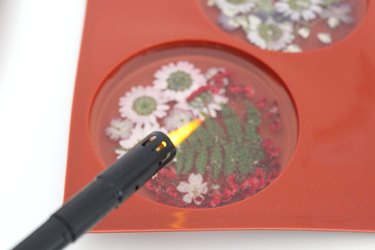
Step 5: Remove Bubbles
Air bubbles created while mixing will be evident in the resin, and more bubbles will begin forming in the mold. To degas the bubbles, run the flame of a butane lighter about two inches above the surface of the resin. Carbon dioxide, not heat, is what degasses the bubbles, so another method is to blow on the resin with a straw. Even after you remove the bubbles, more will form in the first 15 minutes, so be vigilant and degas as they form.
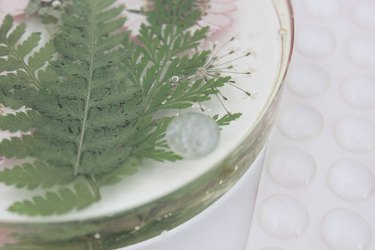
Step 6: Add Pressed Flowers
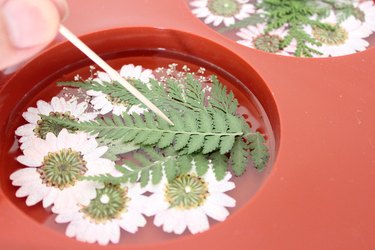
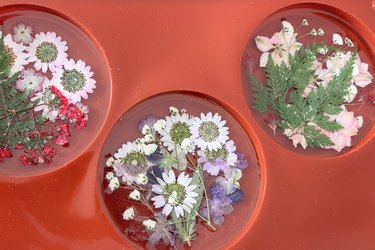
After the resin has sat in the mold for about 15 minutes, it's time to add the flowers. Trying to maneuver the delicate pressed flowers with your fingers can be difficult, so lift them up individually with tweezers.

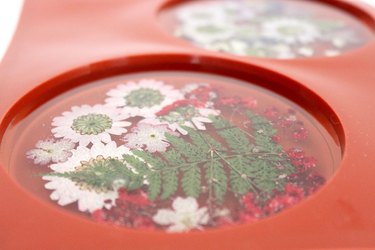
Arrange the flowers upside down on the resin, as the bottom of the mold will actually be the top of the coaster.
Position the larger pieces and greenery on top of the flowers, as these will be on the bottom of the coasters when flipped over. This way, they won't block the flowers in front.

All the pressed flowers need to make contact with the resin so they are locked in place when the resin hardens. Use a toothpick to press down any flowers or leaves that aren't touching resin.
Let the resin harden for about four hours to allow the flowers to set.
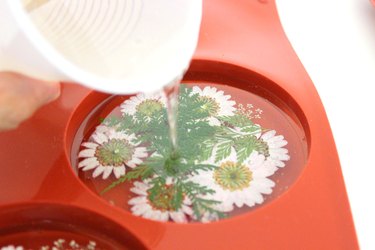
Step 7: Pour the Second Layer of Resin
Mix another batch of resin as you did before. Pour the resin into the molds on top of the first layer with the flowers. You don't need to go all the way to the top of the mold, just far enough to completely cover the flowers.
Remove any bubbles that form in this second layer of resin with your butane lighter.
Let the resin cure for a full 24 hours.
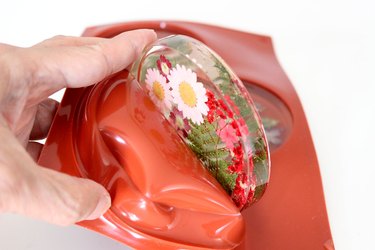
Step 8: Remove Coasters from Molds
After 24 hours, peel the molds back and remove the coasters. They will pop right out. This will be the first time you'll see your flower designs right side up, so take a moment to marvel at the beauty.
Step 9: Apply Rubber Pads
To protect tabletops and keep the coasters from sliding around, place three or four clear rubber pads with adhesive backing on the bottom of the coasters.
You'll want to make sets of these coasters for everyone on your gift list.