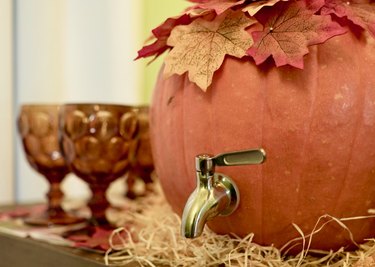
After you see this fall-tastic DIY pumpkin keg, your holiday table spread just won't seem complete without it. If this little guy doesn't steal the scene at your next potluck, Halloween party, or Oktoberfest gathering, I don't know what will.
Best of all, turning a pumpkin into a keg is actually way easier than turning one into a jack-o'-lantern. There's no artistic carving required! All you'll need is this step-by-step tutorial, a pumpkin, a couple of tools, a beverage spigot, and a little bit of autumn cheer.
Video of the Day
ehow may earn compensation through affiliate links in this tutorial.
Things You'll Need
Pumpkin of desired size
Sharp knife
Metal scoop
Beverage spigot (with 16-mm.-diameter connector)
Electric drill with 16-mm. Forstner bit
Fabric/paper leaves or other fall-themed adornments (optional)
Pushpins (optional)
1. Remove the top of the pumpkin
Use a knife to cut out a circle around the stem of your pumpkin. Lift off the stem and top of the pumpkin but don't throw it out, as you'll be using it for your keg's lid.

2. Remove the pumpkin seeds and guts
Using a heavy metal scooper or large spoon, scrape out all of the stringy pumpkin guts and pumpkin seeds.

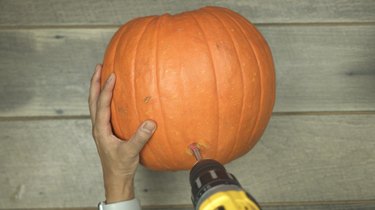
3. Drill a hole for the keg tap
Attach a 16- millimeter Forstner bit to an electric drill.
Tip
If you don't have an electric drill, use a pen to trace around the spigot to create a circular cutting guide on the pumpkin. Use a small bladed or serrated knife to cut a hole slightly smaller than the circle you traced in order to ensure a tight fit.
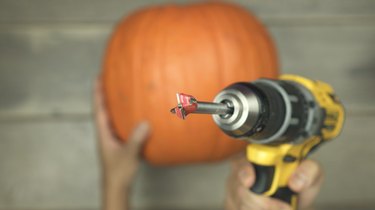
Drill a hole a few inches from the bottom of the pumpkin. You want to drill it as low as you can without the spout being angled too far downward.
4. Attach the keg tap
Insert the spigot through the hole.
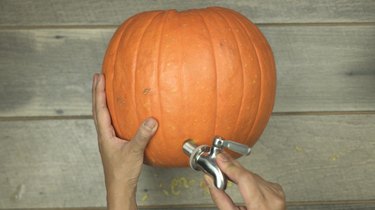
Fasten it to the inside of the pumpkin by attaching the silicone gasket and nut to the open end of the spigot. If your pumpkin walls exceed the entire length of the spigot, you'll have to carve down the area around the hole from the inside of the pumpkin to reveal enough of the threaded end of the spigot to screw on and tighten the nut.
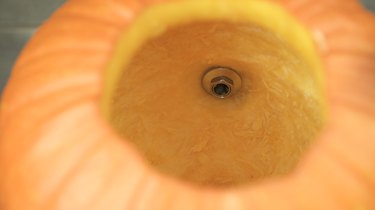
It should look like this from the inside:
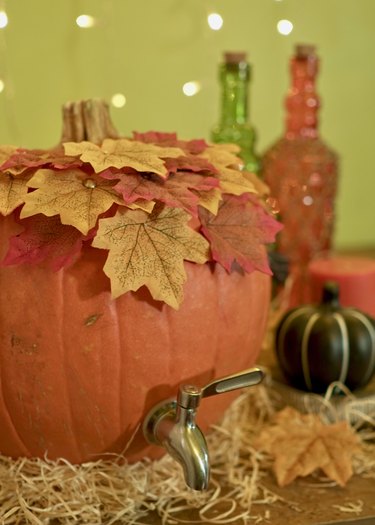
5. Decorate the keg
Your keg is now ready to use, but if you'd like to gussy up your gourd like we did, use pushpins to adorn it with various fall leaves or other decor items. Let your imagination run wild!

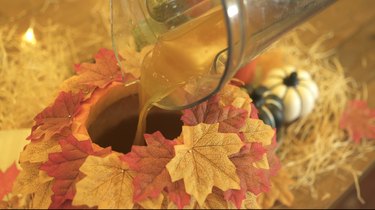
6. Fill the keg
Fill the keg with your favorite fall beverage. Since the keg is made from a pumpkin, it's going to lend a hint of pumpkin flavor to whatever you fill it with. We suggest using a beverage that will complement the pumpkin flavor. After you've filled the pumpkin, cover it with the stem.
Tip
Some ideas for keg-friendly beverages include apple juice, hard apple cider, or pumpkin ale.
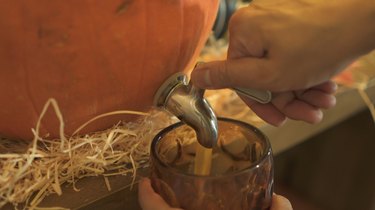
7. Display the keg
You're ready to proudly display your DIY pumpkin keg for all your guests to enjoy at your fall parties!
Tip
Place the keg at the edge of a table or lift it on top of a cake stand to allow for easy drink dispensing.
Don't be surprised if your guests nab this fun idea for their own fall soirées!
Warning
To ensure maximum freshness, make your pumpkin keg on the same day of the event and fill it with your beverage of choice right before serving. Excess moisture in your pumpkin will make it prone to quick spoilage/molding. Discard the pumpkin as soon as your event is over.