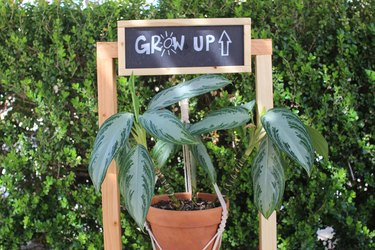
It's really amazing what you can make out of scrap wood laying around. This tutorial will show you how to create this insanely gorgeous beginner's woodworking project that is perfect for your outdoor space. Did I mention you can customize the sign since it features a DIY chalkboard? I don't think you're ready...

Video of the Day
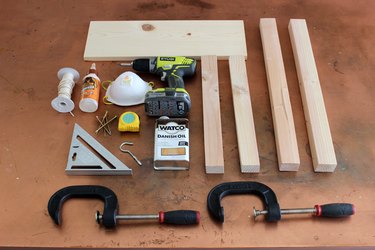
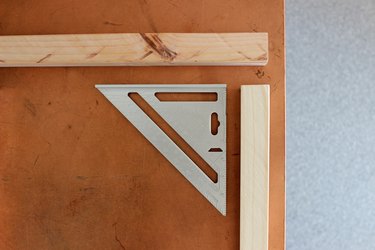
Things You'll Need
2 longer wood pieces for the sides (mine were 40")
2 shorter wood pieces for the top and bottom (mine were 17")
1 base wood piece, 2 inches longer and wider on all sides than your planter frame
Wood glue
Screws
Power drill
Quick square
Shellac, paint, sealant or stain
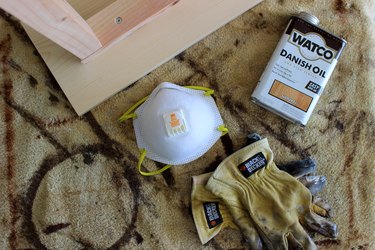
Proper ventilation or mask when finishing
Clamps, optional to help hold wood down
A hook
Plant
Pot
Hanger
Scrap piece of wood, rectangular
Chalkboard paint
Chalk or chalk marker
Step 1: Prep Your Wood
The measurements above are the measurements I used for my personal space. Feel free to alter any of them to fit your preference. The base doesn't need to be any specific measurement, but you do want at least two inches all the way around to keep it from wobbling.
Video of the Day
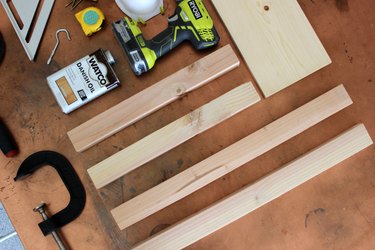
Cut your wood down to size and give it a nice sanding! Depending on the look you want here, feel free to get creative and leave it a bit worn, or sand it to be silky smooth for a nice coat of paint.
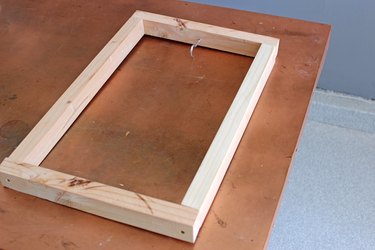
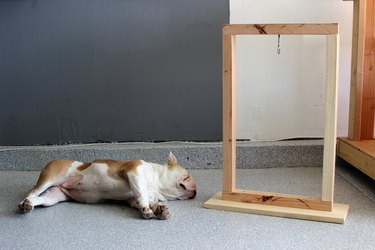
Step 2: Assemble the Planter Frame
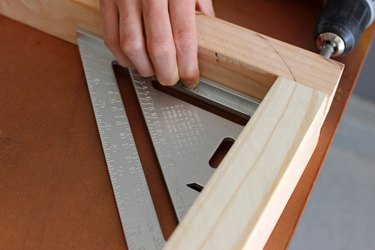
Lay out your frame pieces and place them together to form a rectangle, with the short pieces on the outside.
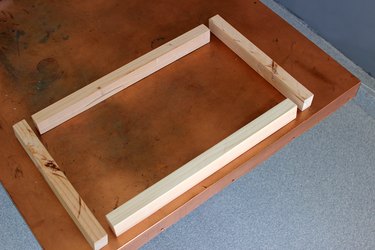
Use your quick square to make sure the wood is flush and at the 90 perfect angle.
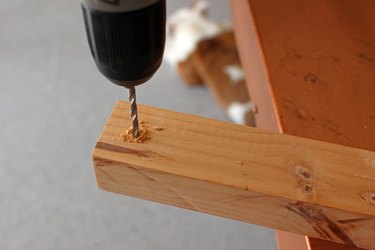
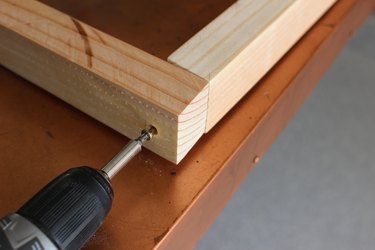
Pre-drill holes if your wood is a little thick. If you don't, the wood has a tendency to spin as you work your way through into the longer pieces, so be careful.
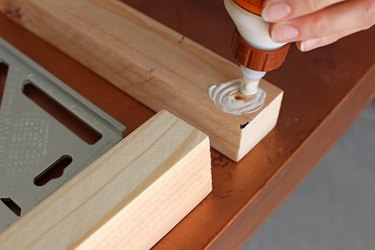
Dab some wood glue around the holes.
Drill your screw through the top of one of the shorter pieces into one of the longer side pieces.
Repeat that to every corner until you've completed your frame.
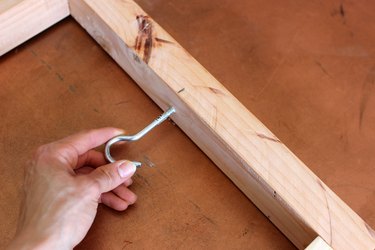
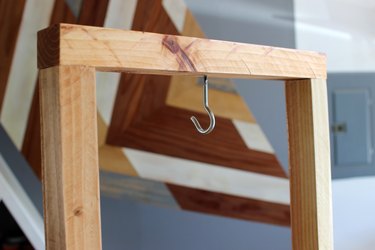
Step 3: Add Your Hook
Be sure to use the proper weight-bearing hook for the plant you intend to hang. Once you find the correct one, screw that in the middle inside of the top of the planter.
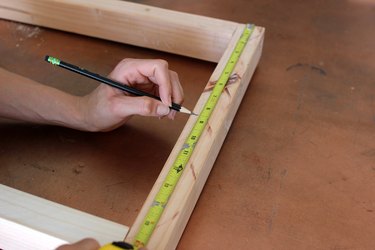
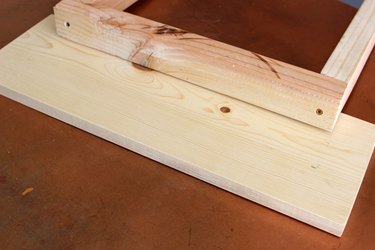
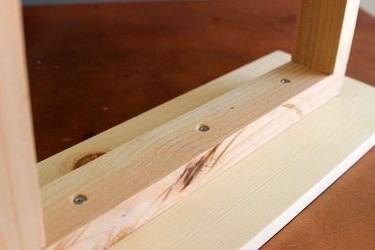
Step 4: Attach the Planter Base
Align the frame on the center of the planter base piece (my base is 7 inches x 20 inches, which enough support for a smaller hanger like mine).
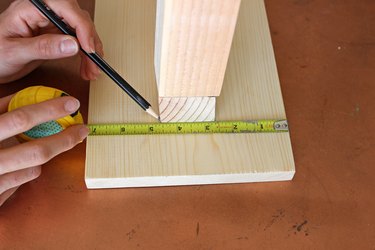
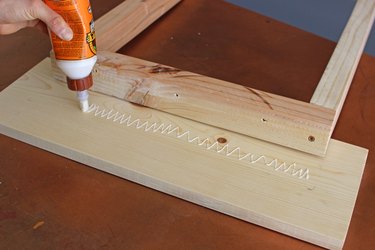
Lightly trace the frame as a reference point for the wood glue.
Add your wood glue.
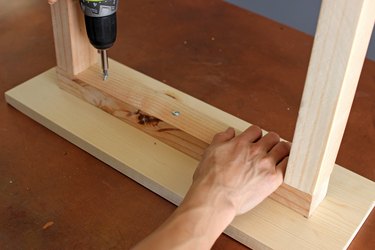
You can clamp down the frame piece before screwing it in, but since mine was small, I simply held it down with my hand.
Step 5: Shellac, Stain or Paint
You can leave this plain or get crazy with your choice of color. Either way, it's best to treat your wood in one way or another. You can get a simple weather-proofing sealant spray or you can use a Danish Oil like I did.
The Danish Oil really brought out the glow in the scrap wood I decided to use and I love that it's a simple wipe-on application.
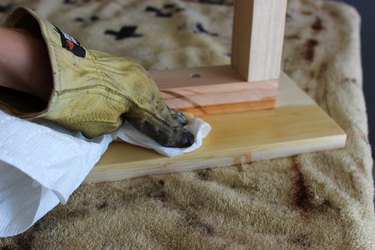
My assistant wasn't much help but I love the natural tone of it!
DIY Chalkboard Sign
You may choose to simply paint a coat of chalkboard paint onto your scrap wood rectangle and cut this step short. However, I wanted to make mine a bit more detailed, so I DIY'ed a mini chalkboard.
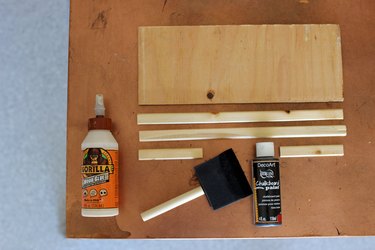
Things You'll Need
Scrap piece of wood, your size of choice
Skinnier wood pieces for trim, your size of choice
Wood glue
Chalkboard paint
Paint brush
Nail
Hammer
Step 1: Cut & Paint
Cut out your preferred size sign wood piece that will fit your planter. I used a piece of scrap wood I had on hand.
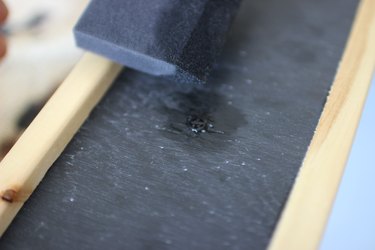
Paint your wood with the chalkboard paint, per the instructions on your bottle.
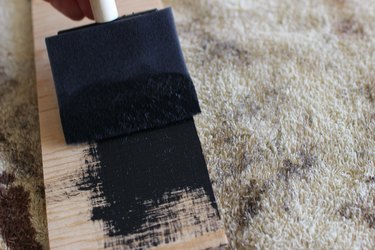
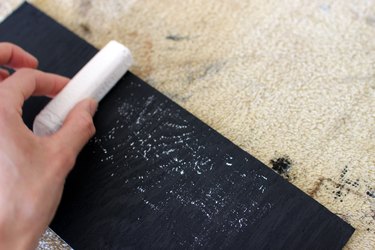
My bottle suggested to rub chalk dust over to "prep" the board, so be sure to read your instructions thoroughly.
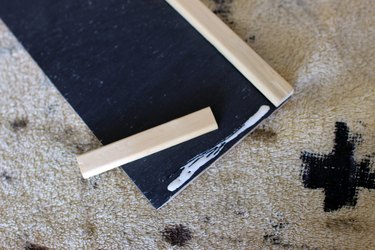
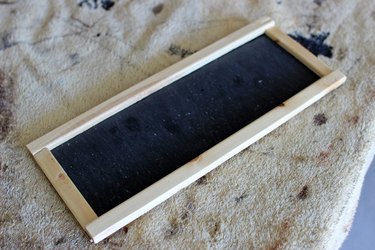
You don't have to frame yours, but I had so much scrap wood on hand–why not? I cut down four thinner wood pieces on my miter saw to outline the chalkboard and used wood glue to secure them down.
Step 2: Attach Sign & Decorate
Screw right through the middle of the sign to attach it to where you want it on the hanger. You can also paint the screw with chalkboard paint so it blends in.
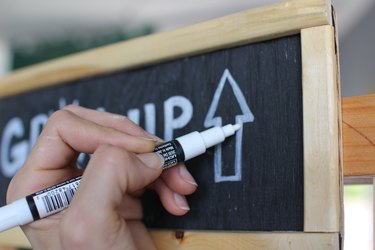
Go ahead and customize it with your choice of word or phrase using a piece of chalk or a chalk marker.
Step 3: Add Your Plant
If you've followed any of my other DIY's here on eHow, you know I like to take things a step further. You can use a simple Dollar Store hanger to hold your plant, but I had a leftover macrame plant hanger that I made, so I decided to use that to hold my plant instead.
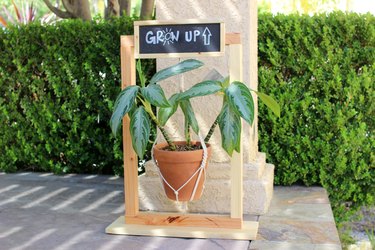
The macrame added such an adorable touch. I love that you can change out the chalkboard sign message to fit any occasion. Happy DIY'ing!