Things You'll Need
Balsa wood block approximately 5 inches long
Pencil
Craft knife or pocket knife
Sandpaper
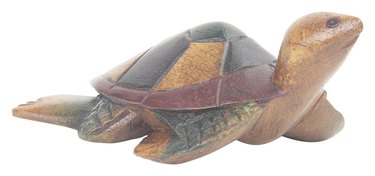
Make a wood carving of a turtle by creating all its distinctive features, such as the shell and its body parts. Choose a softwood for the project, especially if you are a beginner wood carver. Basswood or balsa wood are types of wood so soft that plastic knives can cut into them. Sculpt the turtle along the grain, or the wood growth, for easy carving and protection of its fragile parts.
Step 1
Draw a basic turtle sketch on all sides of your balsa wood block. Each flat area needs a drawing of the appropriate viewpoint of your three-dimensional turtle. With a five-inch piece of wood, the head and neck is roughly two inches with the shell making up most of the carving.
Video of the Day
Step 2
Carve the area between shell and head using a craft knife or pocket knife. Cut away a wedge between these areas. Carve away from the body taking only small slices at a time, no more than 1/8-inch thick.
Step 3
Shape the shell into a dome by removing wood in a circular fashion all around the top center of the block. Carve a triangular tail on the opposite end from the head. Remove the area underneath the head to form a neck from below. Remove the middle areas underneath the shell to form four feet, which stand at four bottom corners of the shell.
Step 4
Carve around the head to shape it into a round snake-like form with a long neck that is approximately at a 45-degree angle from the shell. Refine each part of the turtle slowly. Form legs that are sturdy cylinder shapes with flat bottoms.
Step 5
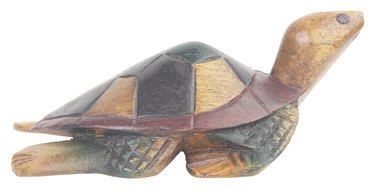
Refine the shell so it peaks in the center. Turn the turtle around to look at if from all angles. Check your progress and continue carving your turtle. Use the tip of your knife to poke out eyes side-by-side at the front of the turtle. Draw a line to form the mouth with the tip of your knife.
Step 6
Cut out 1/2-inch squares on your turtle's shell with the tip of the knife. Carve out toes on each foot. Sand the turtle all over to create a smooth surface.
Tip
Use beeswax wood finish to complete the turtle or paint it with acrylic paints. The wood can also be left natural.
Work slowly to refine the turtle from all angles.
Use a photo reference to help you sculpt the turtle.
Warning
Always carve away from the body to prevent cutting yourself.
Young children should not work on this craft.
Video of the Day