eHow may earn compensation through affiliate links in this article.
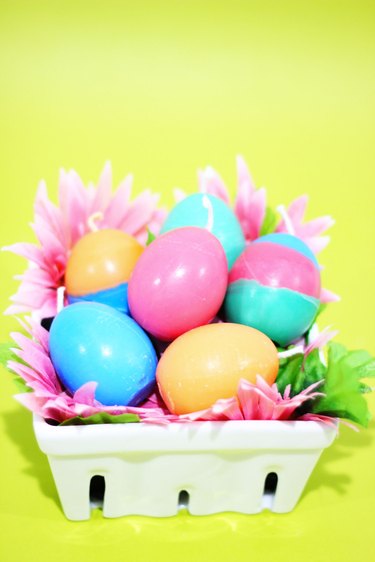
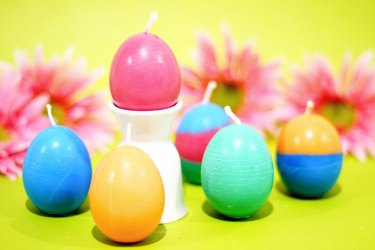
Look what's hatching for Easter. These colorful candles in the shape of eggs add a delightful touch to any springtime display. Molded in actual egg shells and dyed with crayons, they're surprisingly easy to make. And the moment you crack the shell open to reveal the candle inside, it's like magic. Even the Easter Bunny would be impressed.
Video of the Day
Video of the Day
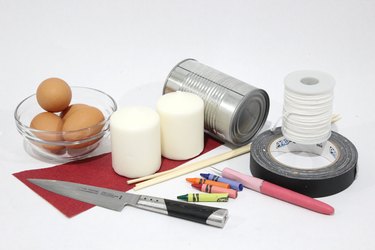
Things You'll Need
Eggs
Candle wick
Scissors
Pillar candles or wax
Knife
Crayons
Tape
Clothespins
Tin cans
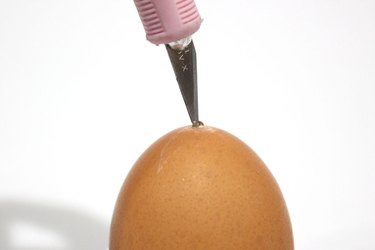
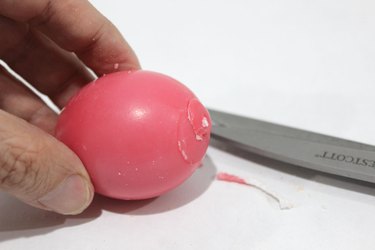
Step 1: Hollow Out the Egg
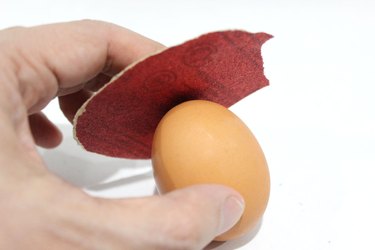
With medium grit sandpaper (the one used in this example is 120 grit), gently sand the two ends of the egg. Sanding the ends makes them a little thinner so it's easier to poke holes through the shell.
Holding the egg gently with one hand, place the tip of a hobby knife on the narrow end, and twist the blade back and forth until it pokes into the shell. Then rotate the blade to enlarge the hole so it is approximately the diameter of your candle wick.
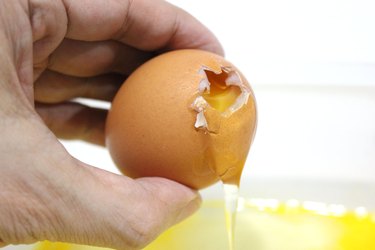
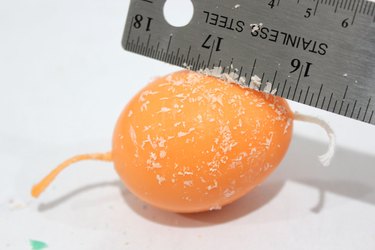
Turn the egg over to its wider end, and repeat the process to poke a hole through the shell. You will want a larger hole for this end for pouring the wax, so expand the opening with the knife to about one-half inch. Don't worry, the opening does not need to look pretty. Then shake the egg over a container, and the yolk and whites will spill out (you can save them for omelettes). Wash the empty shell with soap and hot water, and allow to dry completely overnight.
Step 2: Insert the Candle Wick
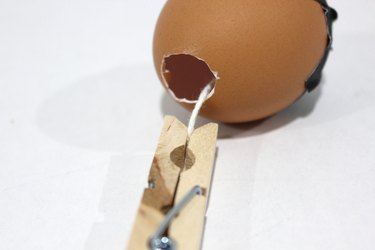
Cut a piece of candle wick so it is about two to three inches longer than the length of the egg. You can purchase candle wick in spools at the crafts store. Insert the wick in the smaller hole at the narrow end first, using the tip of the hobby knife to help push in the wick.
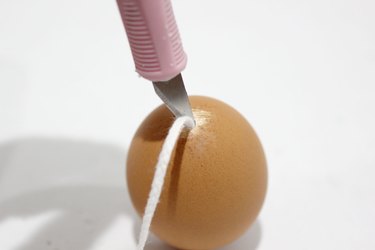
Keep pushing the wick in with the knife until you are able to grab it from the larger hole on the other side. The wick should extend about an inch from either end.
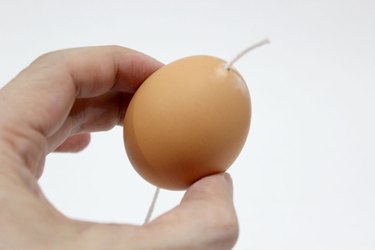
Step 3: Block the Small Opening
Because the wax will be poured into the large opening, the smaller opening at the other end needs to be blocked so wax does not leak through. With sticky tape such as duct tape or gaffer's tape, cover the hole securely. Overlap several pieces of tape to get a tight seal.
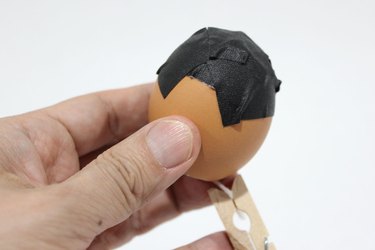
Clip a clothespin to the wick coming out of the wider end so the wick does not slip back inside the shell. The clothespin also comes in handy later when we fill the shell with melted wax.
Step 4: Prepare the Wax
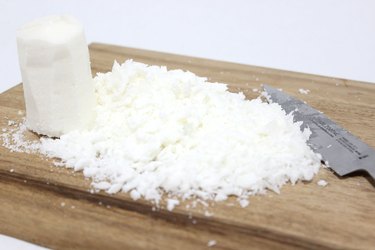
Paraffin wax for candle making is available in blocks at the crafts store, but it's just as easy, and sometimes even cheaper, to use the wax from existing pillar candles. If using pillar candles like we did in this example, make sure they are white or natural colored. With a knife, cut down the sides of the candle like you are coring an apple. The wax from the candle will crumble into smaller pieces.
Step 5: Cut Up the Crayons
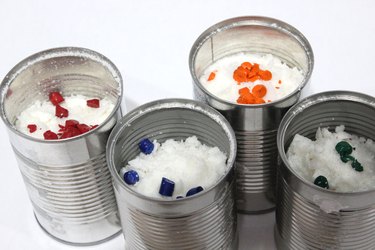
Wax crayons are an easy way to dye the wax. Choose the colors you want, and cut off about one inch of each crayon. Cut this section into little pieces.

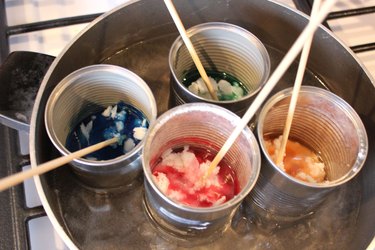
Then place the wax and the crayons in tin cans for melting. Fill the cans up about three-quarters full of wax.
Step 6: Melt the Wax
Place the cans in a pot of water. Make sure there is not so much water that the cans float. Heat the water to a simmer, stirring the contents of each can with a wood skewer until the wax is completely melted.
Step 7: Pour Wax into the Shells
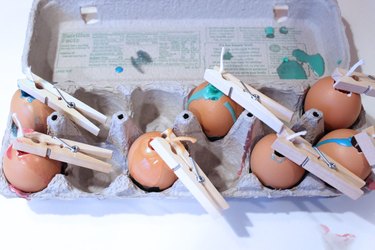
Place the prepared egg shells in an egg carton to help hold them steady. Using a potholder, pour the melted wax into the shell up to the very top. Unless you have the steady hands of a surgeon, expect to have some of the wax spill over on the side.
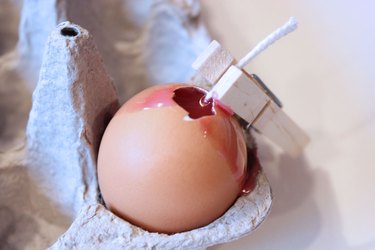
Use the clothespins to hold the wicks steady over the center of the openings. As the wax hardens, the wax will contract, and a divot will appear at the top. You will need to add more melted wax to the top two or three times to fill in this hole. Place the shells filled with wax in the refrigerator to set overnight.
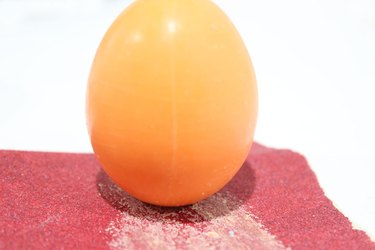
Step 8: Crack Open the Egg
Crack open the shell with a tablespoon to reveal the egg candle. The shell separates very easily from the wax.
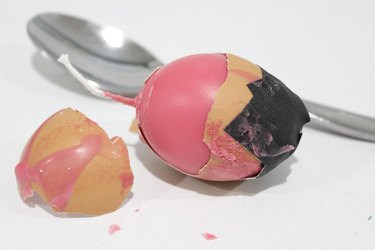
Trim the excess wick from the bottom of the candle.
If any film residue from the egg remains on the wax, gently scrape it off with the edge of a credit card or a metal ruler. You can then warm up the surface of the candle with a hair dryer and give it a final polish with your fingertips.
Step 9: Flatten the Bottom
To help the egg candle stand on its own, rub the bottom end against sandpaper to create a flat surface.
Warning
Never leave a burning candle unattended, and keep children away from open flames. Candles should be placed on level surfaces away from flammable objects.
Step 10: Experiment with Layers
To create candles with two or more layers of colors, fill the shell part way with one color, let it harden, and then add another color of wax. This technique is more time-consuming, but it yields eggs-travagant results.

These candles are so adorable, you may want to display them well past Easter.

They also make great gifts or party favors. You can even hide them for an Easter egg hunt for grown-ups.