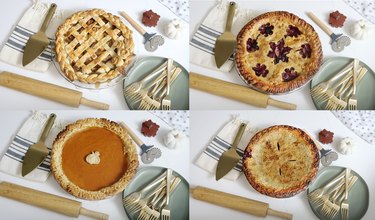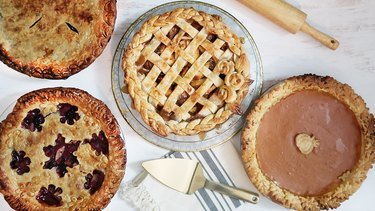
The secret to a beautiful pie is easier than you think. It's all in what you do with the crusts. Here are 11 easy-as-pie ways to design and decorate everyone's favorite holiday dessert. You can make any of these with either homemade or store-bought pie crust. Happy baking!
Video: Decorative Pie Crusts Tutorial
Video of the Day
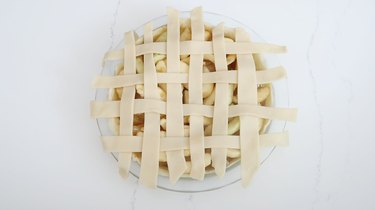
1. How to Make a Lattice Pie Crust
Use a pastry wheel (or pizza cutter) to cut long strips of dough. You can cut thin strips, thick strips, or a mixture of both. Place the vertical strips on the pie first. Fold back the tip of every other vertical strip, lay a horizontal strip across them, and then fold the vertical strips back over top. Continue weaving the horizontal strips across the pie, alternating rows in an over-under pattern.
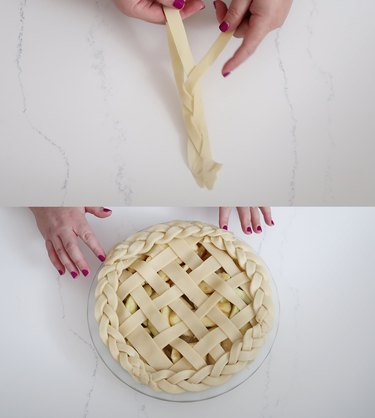
2. How to Make a Braided Pie Crust
Cut three long strips of dough and pinch the ends together. Braid the three strands just as you would if you were braiding hair. Pinch the open ends together and then place the braid on the pie, curving it around to fit the shape of the pie. You'll likely need to create three to four separate braids to cover the entire circumference of the pie.
3. How to Make Pie Crust Roses
Use a glass or mug to cut out three circles of dough. Overlap the three circles together and then roll them up tightly. Slice the roll in the center and then spread out the layers of dough to create "petals."
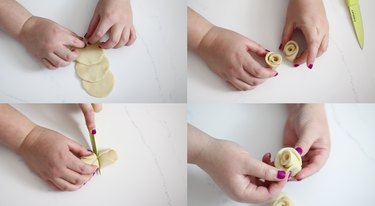
To make the roses look more authentic, cut out a few freehand leaves and place them on the sides of the roses.

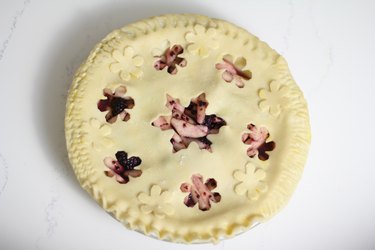
4. How to Make a Pie Crust With Snowflake Cutouts
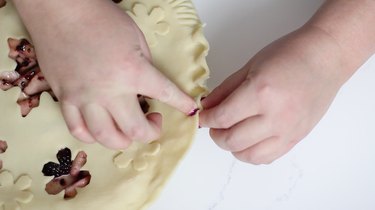
Use a large snowflake cookie cutter to cut out a snowflake in the center of the crust. Create a snow flurry effect by cutting out smaller snowflakes around the large one. Place the snowflake cutouts around the negative space of the pie to create texture.
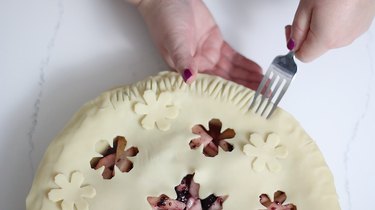
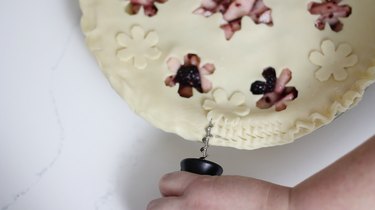
5. How to Crimp Pie Crust
Press the tines of a fork diagonally into the edge of the pie crust. Now press the tines going in the opposite direction, overlapping them slightly with the previous indentation. Continue alternating the directions and overlapping the design around the edge of the pie.
6. How to Make a Fluted Edge on Pie Crust
Press your thumb on one hand in an outward direction on the edge of the pie crust while simultaneously pressing your thumb and forefinger on your other hand in an inward direction to create an U-shaped impression.
7. How to Make a Corkscrew Edge on Pie Crust
Lay the tip of a corkscrew flat on the edge of the pie and press it firmly into the dough to create a corkscrew indentation. Continue around the entire edge of the pie, leaving a slight space in between each corkscrew shape.
8. How to Make a Roped Edge on Pie Crust
Press the side of your forefinger into the edge of the pie crust to create an indentation. Continue pressing the side of your forefinger into the dough, leaving a small space in between each impression.

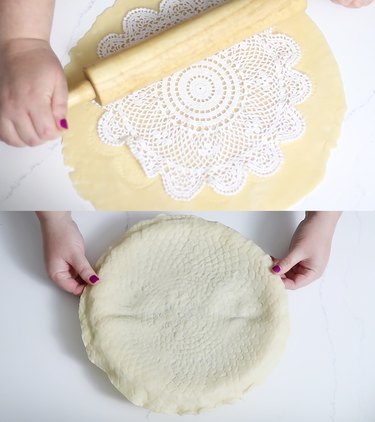
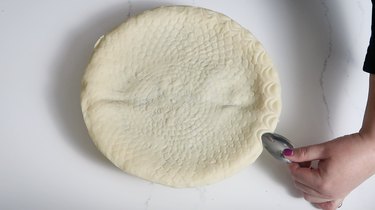
9. How to Make Lace Pie Crust
Lay a clean crocheted doily or fabric lace face down on top of the pie crust. Press the fabric firmly into the crust and then lightly roll a rolling pin on top a few times to further work the design of the fabric into the dough. Peel the fabric off carefully. Be sure to cut a few slits in the crust to adequately ventilate the pie.
10. How to Make a Scalloped Edge on Pie Crust
Hold a spoon backwards and press the tip of it into the edge of the pie crust. Now place the tip of the spoon just underneath the indentation you just made and press again to create a double U-shape. Continue around the edge of the pie making double U-shapes.
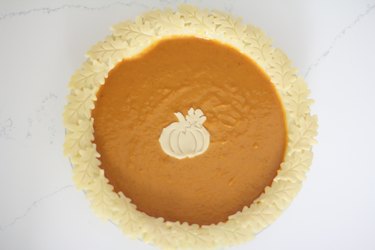
11. How to Make a Pie Crust With Harvest Cutouts
Use pie cutters in harvest shapes — pumpkins, leaves, acorns — to cut out dough. Arrange the cutouts on the pie. For example, on a pumpkin pie, place a pumpkin cutout in the center and autumn leaves around the entire edge of the pie.
Have fun experimenting and try combining a few of the techniques on the same pie!