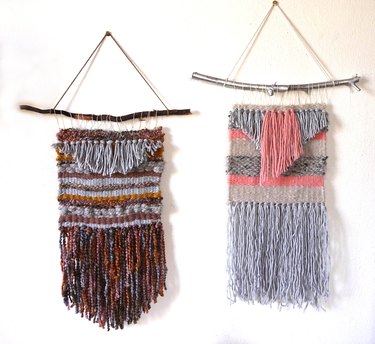
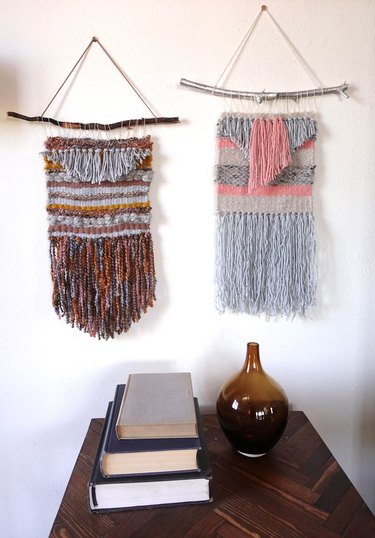
If you're interested in learning how to make woven projects, making a wall hanging is a fun way to familiarize yourself with the basics. Specifically, you'll learn how to create stripes of plain ("tabby") weave, how to add simple fringe ("rya"), how to change yarns, and how to remove your project from the loom. You'll soon discover that even the most basic skills can yield a stunning, one-of-a-kind work of fiber art. The wall hangings featured here follow a basic formula (explained below) that's easily customizable, so you can create a simple yet gorgeous wall hanging that's entirely your own.
Video of the Day
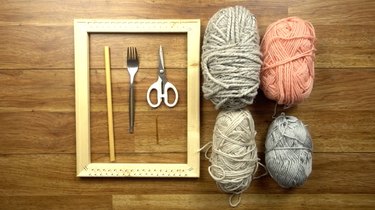
Things You'll Need
Frame loom (check out our tutorial on how to make your own)
Weaving fork (a regular fork will do)
Dowel, chopstick, or knitting needle
Tapestry needle
Very sharp scissors
Very strong yarn or twine for warp (cotton or acrylic recommended)
Yarn of various fibers and weights in coordinating colors
Tree branch/stick for hanging (painted or natural)
Tip
If you're brand new to weaving, please visit our DIY Simple Weaving Loom Tutorial before proceeding. This tutorial will show you how to make the frame loom pictured here (at a fraction of the cost of purchasing one!) as well as define the weaving terminology used throughout this tutorial.
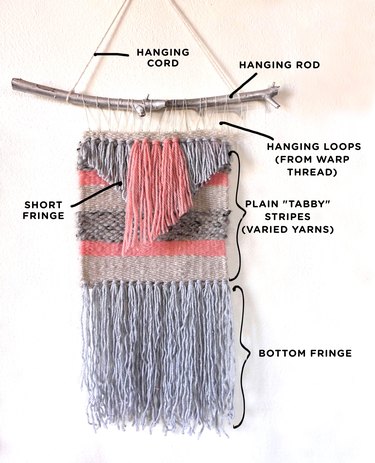
Anatomy of a Simple Wall Hanging
Of course, there are countless ways to design a wall hanging, but if you're not sure where to start, here's a basic, no-fail template that'll help you create a piece you'll be proud to display.
Let's get started!
Step 1: Warp Your Loom
Using very strong yarn or twine, warp your loom so that the threads are 1/4 inch apart for a total of 4 warp threads per inch. The DIY frame loom pictured here has two rows of nails with a 1/4-inch space (widthwise) in between. Since this simple wall hanging requires 4 warp threads per inch, you will bring the thread up and around every other nail, using the nails in between as spacers. Please carefully examine the image below for clarification. (Note that if you wrapped your thread around every single nail instead of every other nail, you would have twice the amount of warp threads, giving you 8 warp threads per inch. To see an example of a loom warped this way, see our DIY frame loom tutorial.)
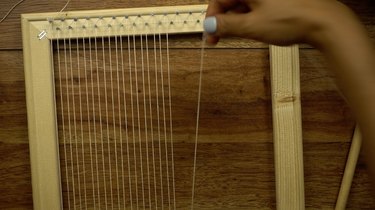
If your frame loom is of a different variety from the one shown, your warping method will be different. Please research how to warp your particular loom to give you 4 warp threads per inch.
Step 2: Add a Spacer (Optional)
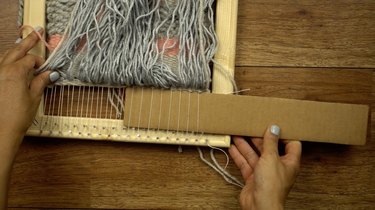
Adding a spacer of some sort will make it easier for you to keep a straight edge at the bottom of your wall hanging, as well as ensure that you have enough loose warp threads to easily tie off when you're finished weaving. For this project, we've used a piece of cardboard 2 inches in width. You can make yours wider if you'd like (it will make finishing your project even easier), but we'd recommend that it's no less than 2 inches wide.
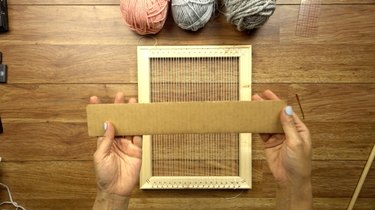
Insert the spacer by weaving it through your warp threads (one over, one under), then pushing it as far down as it will go.
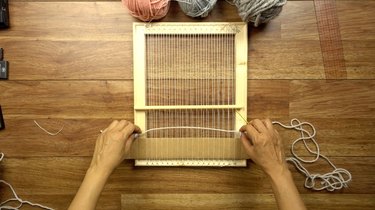
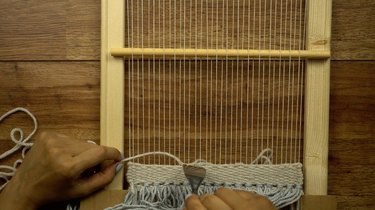
Step 3: Insert Shed Stick (Optional, but Recommended)
This next step (and tool) is not required, but it will definitely make your project a lot easier. A shed stick (we use a 1/4-inch dowel) is a great tool to have because it will make your work fly by faster. What's more, you can use any household item such as a chopstick or knitting needle, that's a little bit longer than the width of your project.
To use a shed stick for this particular project, simply weave the stick over one, under one across all warp threads. The tension caused by inserting it between the warp threads will hold the shed stick in place.
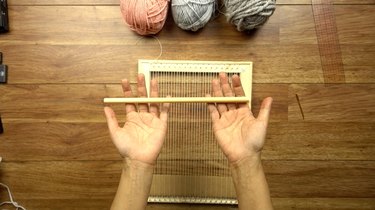
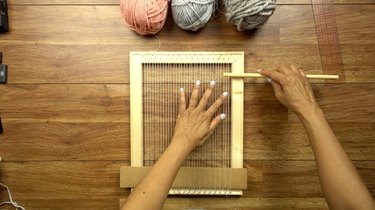
By weaving the stick through all of the warp threads, you've separating them into into two sets -- one set on top of the stick, and one set below the stick -- with a space in sets. As stated earlier, that space in between (pictured below) is called the "shed."
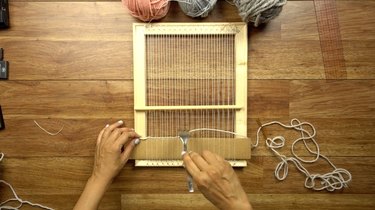
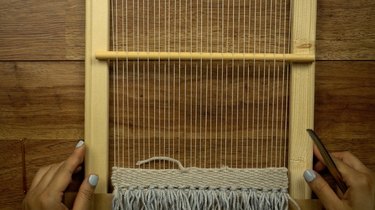
Step 4: Weave Foundation Rows
Before adding your bottom row of fringe, you're going to weave three or four foundation rows of plain weave. The tension that these rows create will help hold your fringe row in place.
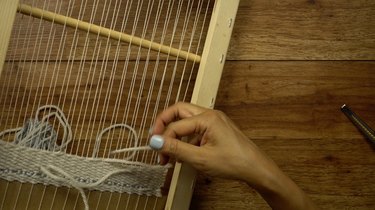
Thread your tapestry needle with about 2 yards of yarn, then pull down your shed stick to bring the "shed" (the space between the two sets of warp threads) lower to the first weft row you're about to weave.
Draw your needle through the shed from the left side of warp threads and out the other side. Make sure to leave a tail (about 6 inches long) hanging from the loom. This tail will be woven into the back of the project at the end.
Create an arc with the thread. This will ensure that you don't create too tight of a weave.
Use your fork to push down the arc firmly against the cardboard spacer. In weaving parlance, this is called "beating down" the weft. Beat down evenly across the row.
To prepare to weave in the opposite direction, push the shed stick back up toward the top of the loom. The warp threads should now be closer together.
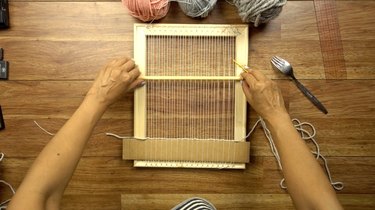
Heading in the opposite direction, use your tapestry needle to pick up and pass underneath every warp thread that was previously NOT lifted by the shed stick in the preceding row. That is, you're going to pass the weft under the opposite set of warp threads from the previous row. You'll know which set to pick up, as they're the threads that will be resting slightly lower than the rest, as the shed stick will still be separating the thread sets above. When you pull the yarn through to the other side, don't pull too tightly. Pulling too tightly can cause the side edges of your wall hanging to pull in toward the center instead of remaining straight. That said, always keep an eye on your edges to make sure that they remain even.
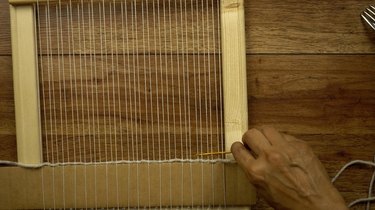
Once again, create an arc, then use your fork to beat down the row. Repeat this entire step for a few more rows.

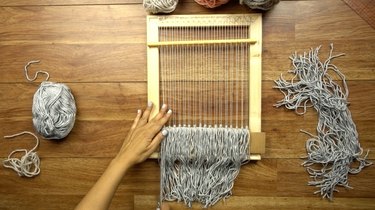
Step 5: Add "Rya" (i.e. Fringe)
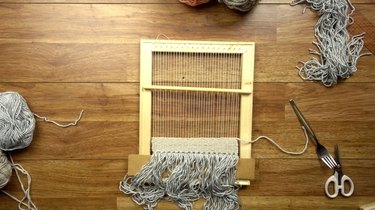
Before adding your fringe row (known as "rya"), you'll have to cut a bunch of yarn in equal lengths. The quickest way to do this is to wrap yarn around a book that's the length of the rya you'd like to create.
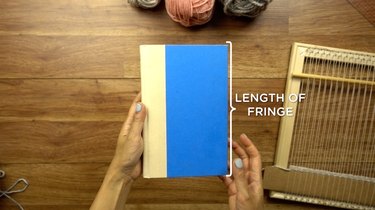
The number of times you wind the yarn around the book depends on how thick you'd like to make your fringe. If you're unsure, divide your number of warp threads by two, and multiply that number by three. (If you have an odd number of warp threads, subtract one from the total.) Each rya knot will consist of three pieces of thread, and each knot will be tied to two warp threads. If you'd like thicker fringe, use more than three pieces of thread per knot. You can also choose to add multiple rya rows for fuller fringe.
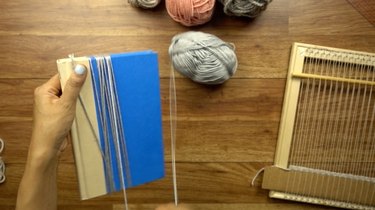
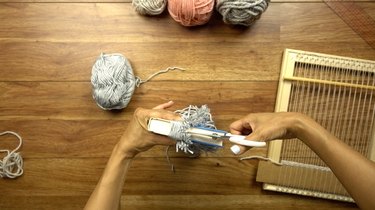
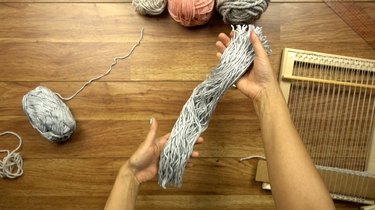
After you're done winding, cut the yarn off the book as shown below.
Take three pieces of the yarn you've just cut, grasp them at the center, and (starting from either from the left or right side) lay them atop the first two warp threads.
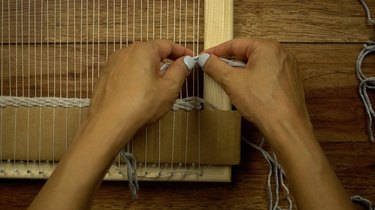
Separate the two warp threads as shown.
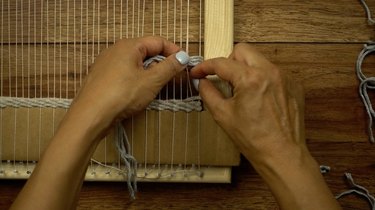
Now, wrap the right tails of the 3 pieces of yarn behind the right warp thread and draw them through the center of the two warp threads.

Repeat for the left tails on the left warp thread. Then pull all tails together first upwards and downwards to tighten.
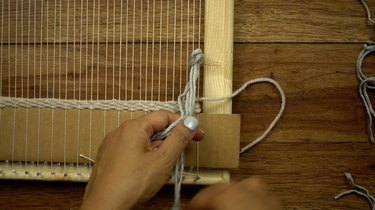
You've now created your first rya knot. Repeat across all warp threads to finish your entire rya row.
Tip
If you have an odd number of warp threads, one of the rya knots will be attached to three instead of two warp threads. To do this, simply place the center of the three pieces of yarn on top of three rather than two threads, then proceed as shown above -- wrapping the right tails around the 3rd warp thread and out between the 2nd and 3rd warp threads. Then, wrap the left tails around the 1st warp thread and draw them out between the 1st and 2nd warp threads. We recommend you choose the centermost warp threads as placement for this knot to give your work a more balanced appearance.
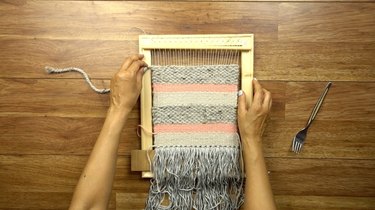
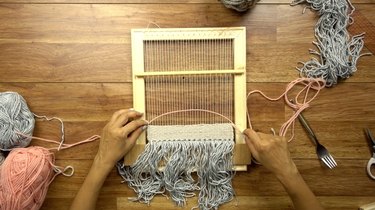
Step 6: Weave Simple Stripes
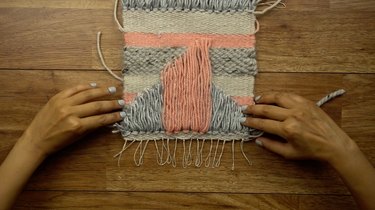
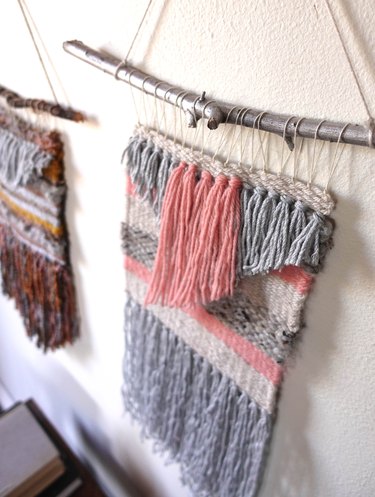
Now it's time to create the body of your wall hanging, consisting of easy-to-weave stripes using a variety of different yarns and/or materials (like fluffy wool roving, lace, ribbon, etc.).
As a beginner, you don't need to learn more complicated weaving techniques or patterns to create a multi-textured piece. Simply weaving a series of plain "tabby" rows with varied yarns and materials will create a stunning hanging. The more varied the yarns you use in terms of texture, fiber, size, and color, the more visually interesting your hanging will be. In our example, we've woven two sets of stripes using three types of yarn: a worsted weight acrylic, a worsted weight wool, and a bulky weight wool and acrylic blend. For basic instructions on how to change yarns mid row or at the beginning of a row, see "Basic Yarn Changing Techniques" below.

Stop weaving once your piece is approximately 3 inches below the very top of your warp threads. You'll need that extra warp for tying off and hanging.
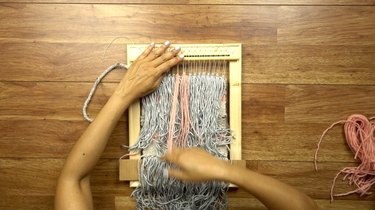
Step 7: Add Short Fringe (Optional)
If you'd like to add additional fringe within the body of your wall hanging, you could do so at any point -- either in the middle of, or above your stripes -- or both. It's totally up to you! We chose to place fringe at the top, first adding an entire row of the same color used for the bottom fringe, then adding some additional rya knots (centered) above that row in a contrasting color.
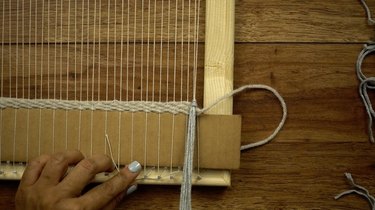
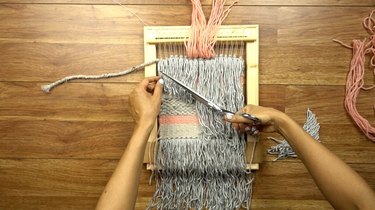
You'll probably want to trim any additional rya you've added, so that it doesn't cover up too much of that lovely weaving work that you've done in the previous step. Using a very sharp pair of scissors (the larger the better for this job), cut the rya straight across or at an angle to your desired length(s). We chose a V-shape for the silver row, and cut the pink rya at an angle. Be creative!
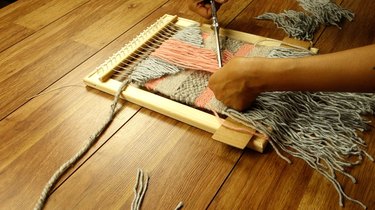
Regardless of where you place your rya, you should always follow your rya rows with a few rows of plain weave to lock the knots in place.
Make sure to leave at least 2 1/2 inches of warp (3 is ideal) above the body of your hanging. These warp threads will be used to hang your woven masterpiece upon the hanging rod, so you'll want to have enough for you to easily tie off.
Step 8: Remove From Loom and Secure
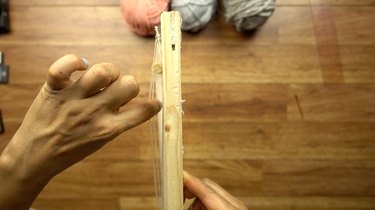
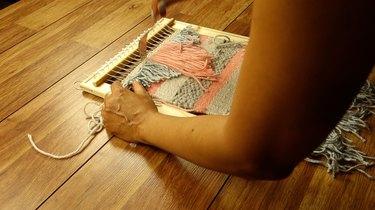
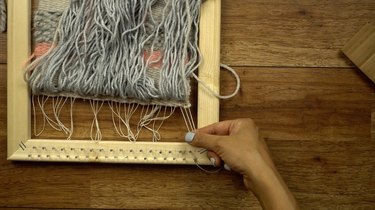
Snip the single warp thread tied to the last nail at the bottom, then carefully slide the cardboard spacer out.
Gently unhook the bottom warp threads from the nails.

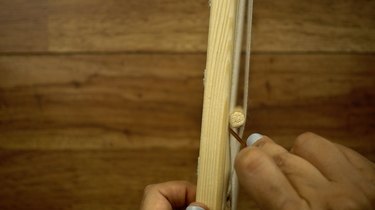
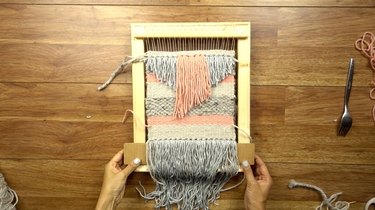
To secure your weft threads, take each (looped) pair of warp threads and tie a simple knot -- pushing them up close to the first row of weft before tightening to help keep the weft in place. Note that there will be three warp threads at the right end instead of two (see below). Simply tie all three together.
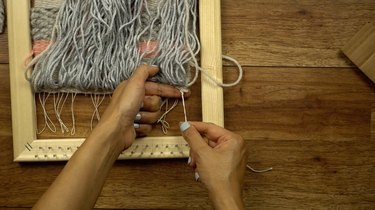
Continue until each pair of warp threads are tied. Once the bottom edge has been knotted and secured, repeat this entire step for the top edge.
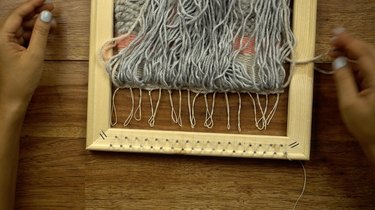
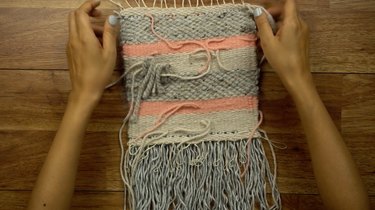
Once you've removed and tied off the top edge, it will look like this:
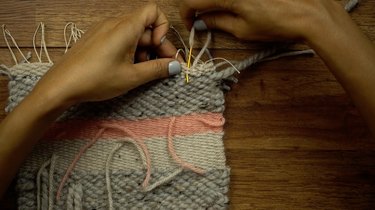
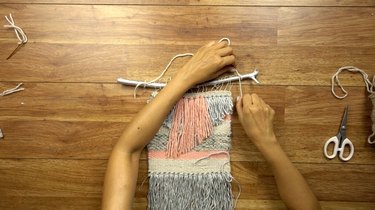
Step 9: Weave in Yarn Tails
You're work is almost ready to hang! You'll just need to take care of all those loose tails hanging from behind and along the left and right edges where you dropped off and picked up weaving.
Simply thread a loose tail onto the needle.
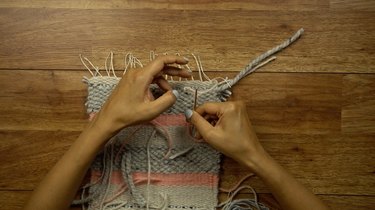
Insert into two or three stitches at the back of the work, and draw through. If desired, you can switch directions and draw the tail through another set of stitches for extra security, but it shouldn't be necessary.
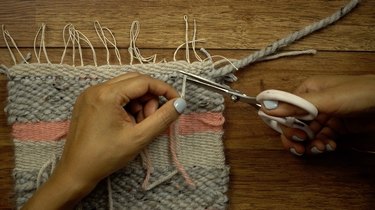
Snip the tail close to the work, then move on to the next tail until they're all neatly tucked away.
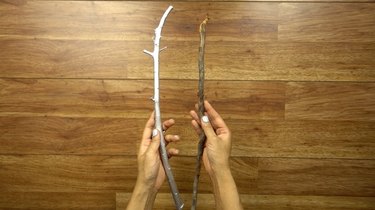
Step 10: Hang It Up
For this project, we've used a thin tree branch as a hanging rod, but you can use a dowel or metal pipe if you'd like. Insert it through the knotted loops (consisting of the warp threads) at the top. Since there will be three warp threads knotted at the top left (instead of two), simply cut the third thread off close to the knot.
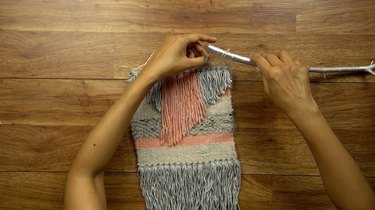
Center the hanging on the branch. Finally, add a hanging cord by taking a piece of yarn (about a foot or more in length) and tie the ends to the left and right of the branch ends.
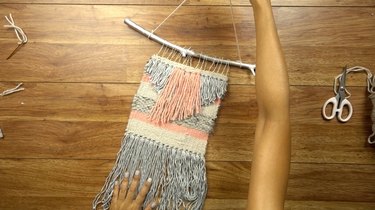
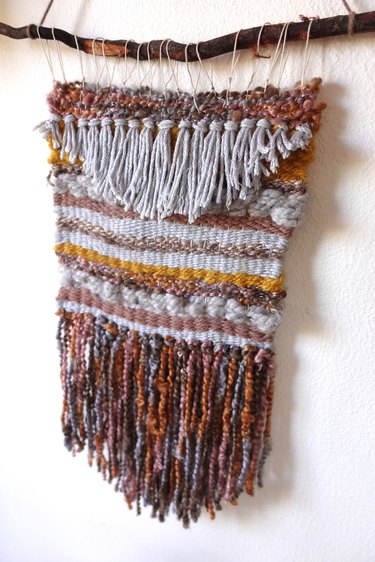
Your hand-woven artwork is finished and ready to display!
Basic Yarn Changing Techniques
Changing Yarn Mid-Row
If you've run out of yarn before finishing a row, continue weaving until you have about 4 - 6 inches of excess, then let it drop off at the back.
Rethread your needle and insert it (from behind the loom) at the same point where your needle would have continued through if you hadn't run out.

Pull the new thread through, leaving another 4 inch tail at the back.
Now simply continue weaving the row as before -- creating an arc as you normally would and beating it down with the fork.
Changing Yarn Between Rows
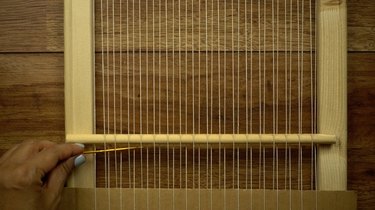
Creating horizontal stripes in weaving is as easy as dropping one yarn at the end of a row, then starting again at the beginning of the next row with another piece of yarn. In the image below, I've finished one stripe of cream-colored yarn and have left the remainder hanging from the edge.
To create the pink stripe, I've simply started another row.
Just make sure that you leave a 4 to 6 inch tail at the beginning and at the end of each piece of yarn used to make it easy for you to thread and weave in the loose tails when finishing up your project.
This simple wall hanging is based on a project featured in the course "Weaving For Beginners" taught by Annabel Wrigley on Creativebug.com.