Things You'll Need
2-foot length of 1-inch PVC pipe
2 1-inch PVC caps
2 6-inch lengths of 1-inch PVC pipe
2 3-inch lengths of 1-inch PVC pipe
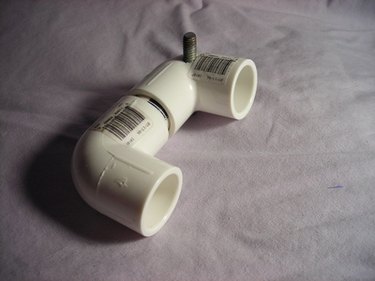
4 1-inch PVC elbow joints
PVC primer
PVC cement
Drill
1/2-inch drill bit
1/4-inch drill bit
4 anchor screws with washers
Pencil
Screwdriver
PVC pipe has a wide variety of applications. You typically use PVC in basements and walls for water pipes, but you can use the product to create furniture or other aesthetic elements. Creating a hand rail out of PVC requires mounting the rail to the wall and stretching the pipe along the length of the stairs or ramp. The process is simple and secure. The only problem with PVC is the flexibility of the pipe. You will want to keep the length of the handrail to a minimum, using multiple sections as opposed to one long rail.
Step 1
Drill two 1/4-inch holes evenly spaced in each of the 6-inch pipes. The holes should pass through both sides of the pipe.
Video of the Day
Step 2
Drill out two of the 1/4-inch holes with a 1/2-inch drill bit on one side of each of the 6-inch pipes. You should be left with 1/2-inch holes on one side and 1/4-inch holes on the opposite side.
Step 3
Prime both ends of each 6-inch pipe with PVC primer. Apply PVC cement to both ends. Attach the cap to one end and the elbow joint to the other end. The elbow joint should be angled so that the opening is pointed in the same direction as the 1/2-inch holes.
Step 4
Mount one of the 6-inch pipes to the wall. Hold the pipe to the wall in the angle you desire and mark the location of the 1/4-inch holes on the wall with a pencil. Drill out the holes with the 1/4-inch drill bit. Feed the anchor screws through the holes in the PVC pipe and into the holes in the wall. Tighten down the screws with a screwdriver.
Step 5
Dry fit the unit. Attach a 1-inch PVC pipe to the elbow, another elbow to the 1-inch pipe, the 2-foot pipe to that elbow, another elbow to the 2-foot pipe, a 1-inch pipe to that, the last elbow to the 1-inch pipe, and then the last 6-inch pipe to the last elbow. This is how the rail will assemble. Trace the location of the 6-inch pipe on the wall with a pencil and disassemble the unit.
Step 6
Mark the locations for the 1/4-inch holes on the upper 6-inch pipe, basing the location on the trace marks you made from Step 5. Repeat Steps 3 and 4 for the upper 6-inch pipe.
Step 7
Assemble the pipe as you did in Step 5. Prime each end of the pipes, and apply pipe cement to the ends before attaching the pieces. Work with one piece at a time. The last piece will be the upper 1-inch pipe connecting the two last elbows.
Tip
You can sand and paint the unit once you have constructed it. Paint can cause the cement to weaken if you paint first.
Warning
You can modify the length of the main 2-foot pipe to suit your needs, but longer than three or four feet will cause the pipe to flex substantially.
Video of the Day