Things You'll Need
Concrete vibrator
Hammer
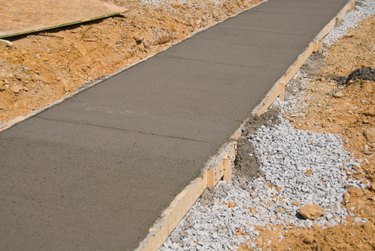
Cement is the mixture used to create concrete. Concrete is used for sidewalks, driveways, garden ornaments and numerous other landscape features. Air bubbles trapped in a cement mixture can cause pits, or pockets, in the finished concrete project. Air bubbles are caused by air becoming trapped below coarse sediment within the cement mixture. To prevent pits, or pockets, the air must be released from beneath the sediment and allowed to float to the surface.
Large Projects
Step 1
Pour your cement in layers. Each layer should be slightly thinner than the length of the tip on the concrete vibrator. For example, if the tip on the concrete vibrator is 10 inches long, the cement layers should be 8 to 9 inches thick.
Video of the Day
Step 2
Insert the tip of the concrete vibrator into the first layer of cement and turn it on. Let the vibrator work for 10 to 15 seconds, or until foam or paste begins to form around the vibrator's tip.
Step 3
Remove the tip of the the concrete vibrator and move it 15 to 18 inches from the first insertion. Put the tip into the cement and turn it on, allowing it to work for another 10 to 15 seconds.
Step 4
Repeat this process throughout your cement project. Overlap the concrete vibrator tip insertions so no insertion is further than 15 to 18 inches from a previous one.
Step 5
Pour a second layer of cement onto the first, fully vibrated layer of cement.
Step 6
Repeat Steps 2 through 4 for your second layer. Ensure that when you insert the tip of the concrete vibrator, the last inch or two of it penetrates the previous layer of cement. This will help the two layers adhere to one another.
Step 7
Repeat the process listed above for each layer of cement that you add.
Video of the Day
Small Projects
Step 1
Fill your cement mold or cement form as desired.
Step 2
Place once hand on each side of the mold or form, and gently shake it back and forth.
Step 3
Continue to shake it for several minutes, or until you see air bubbles reaching the surface of the cement.
Step 4
If you are using a wooden, metal or solid plastic mold or form, gently tap the sides of it with a hammer to vibrate the inner cement.
Step 5
Tap each location for a minute or two, or until you see air bubbles reaching the surface of the cement, then choose a second location several inches from the first one and repeat the process.
Step 6
Repeat Step 5 around the entire mold or form.
Tip
Fine cement has less of a chance of developing air bubbles than coarse cement.
Perform a slump test before pouring your cement. Fill a cup with the cement mixture and turn it upside-down on a paper plate. Remove the cup. Ideally, the cup should remain but the sides of the cement cup shape should bulge. The height of the cup shape should be 1/2 to 3/4 the height of the cup.
Warning
Remove air bubbles before the cement has dried. Once it's dried, you will not be able to remove air bubbles.
Immediately wash cement molds and tools used to pour your cement.