Things You'll Need
Bowl
1 cup water
1 tablespoon salt
2 tablespoons boric acid
Spoon
Heavy cotton string
Wire hanger
Double boiler
Paraffin wax chips
Thermometer
Tongs
Wax paper
Scissors
Newspaper
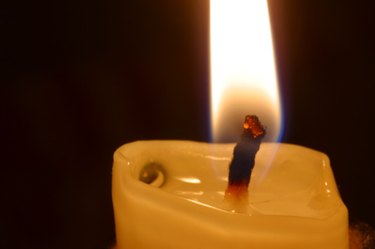
Making handmade wicks for use in candles is a simple process and can be done by beginning candle makers. Making your own wicks allows you to customize their length and thickness to match the size and type of candles you will be making. Once the wicks are formed and primed, they can be stored for use at a later date. When making candle wicks, it is a good idea to make a large batch so you will have a large supply on hand.
Step 1
Fill a bowl with 1 cup water. Add 1 tablespoon salt and 2 tablespoons boric acid to the water. Stir the solution with a spoon until the salt and boric acid have dissolved.
Video of the Day
Step 2
Decide how long you want the wick to be and add 6 inches. Cut 3 pieces of heavy cotton string equal to the calculated length. Place the pieces of string in the bowl and use the spoon to push them under the surface of the solution. Let the strings soak for at least 20 minutes.
Step 3
Remove the strings from the solution and hang them from the bottom of a wire hanger. Hang the hanger in a brightly lit, well ventilated room out of direct sunlight. Leave the wicks for one week to dry.
Step 4
Check the wicks to see if they are dry to the touch. Remove the wicks from the hanger if they are completely dry. Match up the ends of the dried wicks and braid them together to form a single, thick wick.
Step 5
Fill the bottom portion of a double boiler 1/2 full with water. Place the double boiler on an oven burner and turn it on medium. Add paraffin wax chips to the upper portion of the boiler. Watch the wax closely as it begins to melt.
Step 6
Use a thermometer to check the temperature of the melting wax. Place the thermometer in the wax and let it sit for 1 to 2 minutes before reading the temperature. The wax is ready once the wax is heated to a temperature between 70 and 158 degrees Fahrenheit. Remove the thermometer from the wax.
Step 7
Grasp the end of the wick with a pair of tongs. Dip the wick into the wax so all but the end in the tongs is submerged. Continue to grasp the wick's end with the tongs while you let it sit in the wax. Hold the wick in the wax until you see air bubbles rising to the surface of the wax. This should take about 30 seconds and signals that the wick is sufficiently coated.
Step 8
Pull the wick out of the wax and lay it flat on a piece of wax paper. Straighten the wick and allow it to sit for 5 to 10 minutes or until the wax has hardened. Trim the end of the wick that is not covered in wax with a pair of scissors. Store your wick by rolling it in newspaper and placing it in a cool, dark and dry place until ready for use.
Warning
Never leave melting wax unattended.
Video of the Day