Things You'll Need
Polymer clay
Clay knife
Textured roller
Cookie sheet
Oven

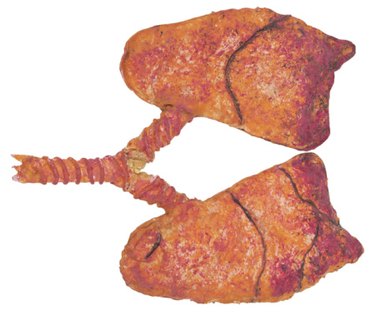
When you are teaching children about human anatomy, you can make the lesson more interesting and understandable by showing the kids a model of different body parts, such as lungs. Although you can buy a lung model from an educational supply store, you can save money by making your own lung model out of craft materials. This can allow you to demonstrate what lungs look like without using up your teaching budget in the process.
Step 1
Knead 1 lb. of red polymer clay for five minutes, which will push out any air bubbles that may be trapped inside the clay. When air is trapped in polymer clay it can cause the clay to break apart more readily once the clay is baked.
Video of the Day
Step 2
Cut the clay in half using a clay knife, then shape each half into an oval with your hands. Place the oval shapes next to each other, arranging the ovals so that they are slightly splayed out.
Step 3
Roll a fine grain-textured clay roller over the two ovals to make the ovals appear grainy and lumpy like actual lungs. You can find textured clay rollers at any craft store.
Step 4
Roll out 8 oz. of red polymer clay into a coil that is 1/2-inch wide and 6 inches long. Place the coil onto a cookie sheet, and lay the lung form on top of the coil, arranging the lung so that the coil sticks straight up through the center of the lungs. This will be the trachea.
Step 5
Bake the lung model in an oven at 200 degrees Fahrenheit for 20 minutes, then allow the model to cool for 30 minutes before using it as a display.
Video of the Day