Things You'll Need
pH-neutral cleaner
Sponge
Scrub brush
3.4 expanded metal lath
1-1/2 or 2-inch concrete nails
Hammer
Tin snips
Thinset mortar
Bucket
Notched trowel
Ceramic tiles
Tile spacers
Plywood board
Carpenter’s level
Silicone caulking
Grout
Grout float
Lint-free cloth

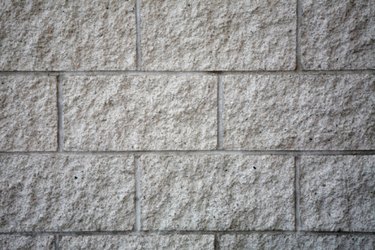
Tiling over painted block can be problematic due to the inability of the tile adhesive to stick directly to the painted blocks. Removing the paint is a long and tedious process, but by creating an intermediate surface between the painted blocks and the tiles, you can solve the adherence issue without the need for paint removal. This intermediate skim coat of mortar covers a metal lath nailed to the block surface. This lath holds the mortar in place against the painted block, allowing you to mount the ceramic tile to the mortar surface rather than to the block.
Step 1
Clean the surface of any dirt or debris with a pH-neutral cleanser and a sponge or scrub brush. Rinse the cleanser away with clean water then allow the wall to dry.
Video of the Day
Step 2
Nail 3.4 expanded metal lath to the blocks with 1 1/2 to 2 inch concrete nails. Hammer the nails through the lath into the blocks every 6 inches, overlapping the lath at the joints 6-inches on vertical seams or 2-inches on horizontal seams. Cut the lath where necessary with tin snips and bend the lath around corners, extending the lath 6-inches over adjacent walls before cutting and overlapping a new piece over the extended piece beginning at the corner's edge.
Step 3
Mix a batch of thinset mortar in a bucket using an electric drill with paddle attachment. Add water to the mortar while mixing, until it's the consistency of peanut butter. Spread the mortar over the walls using the flat of a notched trowel, pushing the mortar through the lath and onto the painted blocks. Cover the lath completely with the mortar, creating a new surface for the tile to adhere to. Allow the mortar to dry overnight.
Step 4
Mix a second batch of thinset and spread the material onto the walls in a 3-foot by 3-foor square section. Turn the notched trowel to a 45-degree angle and then go over the thinset with the notches to raise ridges in the spread thinset.
Step 5
Set the tile onto the ridged thinset, beginning 1/8-inch from the base of the tile surface and using tile spacers between adjacent tiles to keep the rows uniformly spaced. Use a slight twisting motion to set the tiles into place. Cover the spread thinset with the tiles then place a plywood board over the tiles and press the board down onto the tile faces to level the tile out. Check the level with a carpenter's level and make adjustments to tile height where necessary by pressing a tile further into the thinset, or pulling a tile free and adding height with additional thinset applied to the tile bottom.
Step 6
Move onto the next section of wall and apply additional thinset before placing more tiles into place. Continue to place the tiles by section until you've covered the area desired. Make sure the tiles rise high enough in the shower enclosure to extend higher than the water spray from the showerhead. Allow the mortar to dry overnight.
Step 7
Remove the tile spacers and spread grout into the joints between the tiles with a grout float. Fill the 1/8-inch space at the base of the tiles as well as the joints at the edges of the tiled space where the space meets the wall with silicone caulking to prevent water from leaking beneath the tile edges. Wipe any excess grout from the face of the tiles with a damp sponge. Wait two hours and wipe the tiles again with a lint-free cloth to remove any remaining grout. Allow the grout to dry 72 hours before using the shower enclosure.
Video of the Day