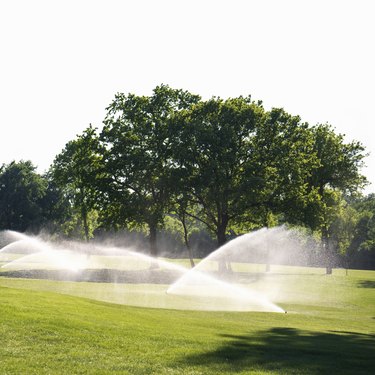
Adjusting Rain Bird sprinklers will not only help the lawn receive more water but will also decrease the amount of water wasted from spraying on sidewalks, driveways or anywhere that does not need water. Adjusting a Rain Bird sprinkler is easy, and it will prolong its use.
Adjusting Rain Bird Sprinkler Arc and Rotor Radius
Video of the Day
Adjusting Rain Bird sprinkler arc distance is a straightforward process. You make this adjustment with a large screwdriver that fits the arc adjustment slot located in the bottom center of the Rain Bird sprinkler head. Grip the nozzle turret and turn it to the fixed left stop. Holding it in place, insert the screwdriver into the arc adjustment slot and turn the screwdriver clockwise toward the plus sign to increase the arc. Conversely, rotate the screwdriver counterclockwise toward the minus sign to decrease the arc.
To increase or decrease the radius on a Rain Bird sprinkler head, you must adjust the rotor radius of the head. Adjusting the rotor radius on a Rain Bird sprinkler head is similar to the arc adjustment. Using a screwdriver large enough to grip the radius adjustment slot located at the top of the sprinkler head, rotate the screwdriver clockwise to reduce the radius and counterclockwise to increase it.
Adjusting a Rain Bird Sprinkler's Left and Right Stop
To adjust a Rain Bird sprinkler's left stop setting, locate the hard stop setting by rotating the sprinkler head all the way to the right and then turning it all the way back to the left. Once the sprinkler head stops on the left side, it has reached its hard stop and will not surpass that point. Use a pair of 12-inch tongue-and-groove pliers to grip the sprinkler head. Rotate the entire head clockwise, stopping at the desired point on the left side. If necessary, tape the teeth of the pliers to avoid causing damage while adjusting sprinkler heads.
After setting the left side, you can use a screwdriver to set the right stop setting. Rotate the turret all the way to the right and then turn back toward the left, stopping at the desired right stop point. Insert the screwdriver in the arch adjustment slot and turn counterclockwise to the left stop and back to the right while maintaining a firm grip on the turret.
Troubleshooting Rain Bird Sprinkler Heads
A sprinkler head is bound to experience problems from regular everyday use throughout its lifetime. Fortunately, you can solve many of these issues through troubleshooting. For example, when a Rain Bird sprinkler head cannot reach the expected distance, the issue could be the filter or nozzle. Usually, a simple cleaning can return the sprinkler to working order. However, if the problem persists, reducing the number of sprinkler heads in the zone or replacing the nozzle with one with a larger radius can solve the issue.
Sprinkler heads that don't produce enough water may require a cleaning. To remedy this, unscrew the nozzle and thoroughly clean the nozzle and screen. Sprinkler heads that don't pop up entirely from the ground may require a stem and cap cleaning or replacement of both parts. Another common issue with sprinkler heads is when they cannot produce the desired pattern. To fix this, unscrew the nozzle and flush it to remove debris.
Lastly, sprinkler heads that leak after the valve shuts off may indicate a blockage in the diaphragm or piston and must be flushed. However, if the problem persists, install a check valve.