Things You'll Need
Condensed air or vacuum
Bonding resin or epoxy glue
Applicator
Clamp
Silica sand
Razor scraper
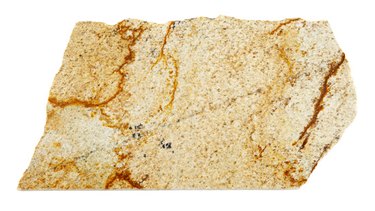
A solid, beautiful stone such as granite makes an ideal choice for home installation on countertops, walls and sometimes floors. The natural color variation of granite makes it a center of attention; when it is sealed properly, granite easily resists staining and water damage. However, any surface will crack or break under extreme circumstances, and if you find yourself facing a chipped tile or broken countertop, you know how unsightly it can be. Repairing the area is less expensive than replacing all of the granite, and if done correctly can provide a seamless look as if the granite was never damaged.
Step 1
Remove all loose or broken pieces of granite, including all dust. Use a can of condensed air or a vacuum to get all of the dust particles out. Keep all pieces that are large enough to glue back into place.
Video of the Day
Step 2
Dry-fit the pieces back together so that you know where they go. Lay them out on a flat surface near your work area in the order that they should be reinstalled and facing the proper direction, so you can simply grab each one and put it in place when you need it.
Step 3
Apply a stone-bonding resin or stone epoxy to the largest piece of broken granite. Spread a thick layer over the entire surface, using the applicator supplied with the adhesive or using a small putty knife. Follow all specific adhesive directions, as some may require mixing and others may require a setting-up time before you can put the granite back together.
Step 4
Set the small pieces against the larger one in the order that they should go to fit back into place along the granite surface. Press the pieces firmly into place along the glued area of the largest granite piece.
Step 5
Spread more adhesive over the newly attached pieces, then place the entire granite section back into its place on the surface. Clamp the piece firmly in place to hold it tight while the glue dries.
Step 6
Fill in any holes or gaps between the granite and the repair work with silica sand. This light-colored sand will look like a natural vein in the granite. Trace the filled-in area with adhesive, then allow the adhesive to dry per product recommendations before continuing.
Step 7
Remove the clamp and inspect the surface. If necessary, apply more glue and wait for it to dry. Scrape excess glue from the surface of the granite with a razor scraper; be careful to use the flat edge of the scraper so you don't damage the granite.
Tip
Use a clear adhesive whenever possible. Some adhesives come with pigment to allow you to match the color of the adhesive to the granite as closely as possible. Practice with the pigment to get the right shade, and mix it in before applying the adhesive to the granite.
Warning
Some adhesives are dangerous if exposed to the skin. Follow all product warnings and wear protective gloves as necessary.
Video of the Day