Things You'll Need
15-pound builder’s felt
Pry bar
Utility knife
Pneumatic or wood floor nailer
Brad nailer
Hammer tacker
Floor staples
10-foot straight edge
Belt sander
Trowel
Pry bar
Chisel
Hacksaw
Circular saw
Mallet or hammer
Tapping block
Patching compound
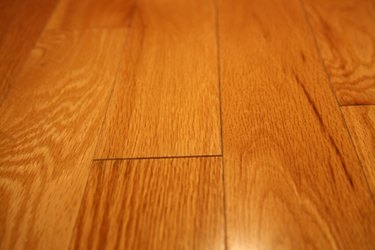
Installing wood flooring requires a proper subfloor. If your subfloor is already hardwood, but you want to improve the look of your home with new material, it is possible to lay engineered hardwood over the existing floor with proper preparation and traditional installation techniques. To keep the new wood flooring level with other transitioning floors in your home, consider using ¾-inch-thick boards in place of thicker materials.
Step 1
Walk across the subfloor to check for squeaks. If areas of the subfloor are loose, secure them with nails or screws. Use a pneumatic nailer or power drill to attach the subfloor. Do not use nails or screws longer than ¾ inch.
Video of the Day
Step 2
Analyze the floor's level, using a 10-foot straight edge. Sweep the straight edge across the floor and mark any areas not level. Sand humps with a belt sander and fill any depressions with a troweled-on patching compound. Sand any areas that you filled in once the compound is dry.
Step 3
Cut caulk or adhesive between the baseboard and wall with a utility knife. Slip a chisel between the wall and baseboard and hit the back of the chisel with a hammer. This will loosen the baseboard from the wall. Use the pry bar to remove the baseboards. Repeat this process, removing all baseboards.
Step 4
Lay a piece of the new floor next to the door casing to determine if casings need to be trimmed. If the board does not fit flush under the casing, cut the casing with a hacksaw using the height of the floor as a guide. Either leave the flooring under the casing and trim or mark the area with a pencil or marker and make the cut. Repeat this step for all door casings and closets.
Step 5
Roll 15-pound builder's felt starting at the longest wall of the room. The felt will unravel in sections several feet wide. Butt seams next to one another and staple together every 4 feet, securing it to the subfloor. Trim the felt within ½ inch of each wall with a utility knife.
Step 6
Beginning at the longest wall, put ½-inch thick spacers between the wall and the first row of flooring. Turn the grooved edge of the plank toward the spacers. Secure the first row of planks traveling lengthwise along the wall. Check for flush by placing a straight edge against the tongue of the flooring. Adjust the flooring until it lines up. Secure the row in place with a brad nailer. Adjust the brad nailer settings to that the brads are slightly below the floor surface. Nail each board every 8 inches within 1 inch of the wall. Nail on the side of the board and not the top to avoid exposing nail heads or brads to the naked eye when done.
Step 7
Load the brad nailer with 1/2-inch brads. Nail brads at a 45-degree angle into the tongue of the first row, every 4 inches until the row is nailed into the subfloor. Attach the groove of the next row to the tongue of the first row, ensuring a snug fit. Tap the planks into place gently with a mallet or using a tapping block and hammer. Once the second row is in, toenail and repeat the process for each subsequent row for the room.
Step 8
Remove the spacers and install the baseboard trim. Fill all face-nailed holes or exposed metal with colored putty.
Tip
Power tools can be rented from local home improvement or hardware stores if you do not have them on hand.
To prevent damaging walls, place a piece of plywood between the wall and pry bar when removing baseboards.
Allow wood flooring to acclimate to a room for 72 hours before installing.
Video of the Day