Things You'll Need
Safety glasses
Screwdriver kit
Wire stripping tool
Electricians pliers
Voltage tester
Electrical apparatus box
Wire nuts (6, or as needed))
Working on electrical wires should be done with caution. Overextending circuits can lead to electrical problems and fires. Extending circuits can can be done successfully by the homeowner, but research and common sense should be used. In some municipalities or counties, a permit and inspection may be required. Understanding the limitations of wire size and the amount of load placed on a circuit is necessary. Besides that, basic electrical skills and tools are all that are needed.
Step 1
Go to the main breaker box and identify the breaker that feeds the cable you want to extend. Put on your safety glasses. Turn the breaker off. Go to a receptacle that feeds from the cable and test it using the voltage tester to verify that the voltage is off.
Video of the Day
Step 2
Go to the end of the cable you want to extend. Identify the size of its conductors by reading the numbers on the outer insulation. Install an electrical apparatus box if one is not already installed. Identify the size of the extension cable using the same method. Verify the size of the extension cable is the same size or smaller than the feeder cable.
Step 3
Place the end of the extension cable into the apparatus box. Prepare the ends of the feeder cable by stripping the insulation off each conductor about three quarters of an inch using a wire stripping tool. Prepare the extension cable in the same manner.
Step 4
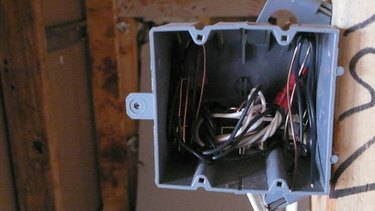
Identify the bare ground wires in each cable and twist them tightly around each other clockwise using the electrician's pliers, leaving them about two inches long. Identify the conductors of each cable by color. Twist the bare ends of the matching colors of each cable together tightly, clockwise by using the electrician's pliers.
Step 5
Verify that all wires are twisted together according to color and are tightly wound. Place a wire nut on each splice by twisting it clockwise. Verify there is no uninsulated wire showing in the area below where the conductors enter the wire nut.
Warning
Always work on wires with the power turned off.
Video of the Day