Things You'll Need
Small pocket screwdriver
Wire strippers
Honeywell RTH7500 thermostats are designed to fit a variety of heating, ventilating and air conditioning (HVAC) applications. You also gain the added benefits of increased efficiency and comfort from the thermostat's digital programmable features. Honeywell RTH7500 thermostats are easily wired with a small screwdriver and basic information about your HVAC system.
Step 1
Turn off the electricity to your equipment (such as a boiler, furnace or air-conditioner) at your electric service panel.
Video of the Day
Step 2
Refer to your equipment's installation instructions for the correct low-voltage thermostat wiring requirements and terminals. Each piece of equipment may have different thermostat requirements and wiring diagrams.
Step 3
Match equipment letter terminals to corresponding Honeywell RTH7500 letter terminals. Do not rely on wire colors. Typically, "Y" on a conventional forced-air furnace with air conditioning corresponds to a Y on the thermostat but is connected by the blue wire, not the yellow wire.
Step 4
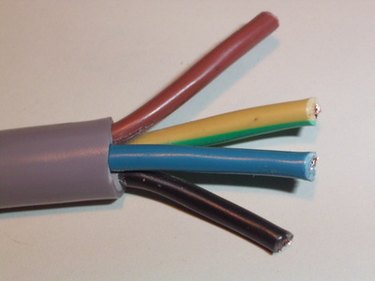
Label each thermostat wire at the thermostat location with the appropriate terminal letter designation using the labels provided with the Honeywell RTH7500. The following represents a typical forced-air heating and air conditioning system: The red thermostat wire connects to the "R" terminal on the RTH7500; the white wire connects to the "W" terminal; the green wire connects to the "G" terminal; and the blue wire connects to the "Y" terminal. Refer to your equipment's installation instructions, as your system may differ.
Step 5
Strip 1/4 inch of insulation from each wire using the wire strippers.
Step 6
Match each labeled wire to the same letter on the Honeywell RTH7500 thermostat.
Step 7
Connect the wires one at a time by loosening the thermostat screw terminal, inserting the wire and tightening the screw. Ensure a tight connection with a slight tug.
Tip
Use the labels included in the Honeywell RTH7500 package to ensure correct wire locations. Check and make sure the individual thermostat wires have no cracks or breaks in the insulation. Exposed wire can create the potential for future system problems.
Warning
An incorrectly wired thermostat can damage your system's controls and result in expensive repairs. Refer to your HVAC equipment's installation instructions for proper wiring requirements.
Video of the Day