Things You'll Need
Wire strippers
Needle nosed pliers
Wire cutters
Alignment pliers
Screwdriver
Electrical tester
AC tester
Power drill
Hammer
12-gauge 20 amp wire
Jigsaw
GFCI Electrical box set (ground fault circuit interrupt)
Level
Line fisher or clothes hanger
If you plan on installing an island in your kitchen, you can improve your design by adding an electrical outlet. This will provide added functionality. It is important to know specific recommendations and specifications for kitchen electrical outlet wiring in order to complete the job safely. If at any point you get in over your head, contact a licensed electrician so that you can be sure that your electrical work is done correctly.
Step 1
Hold the electrical box on your kitchen island where it will be placed and outline it. Use a power drill to make a hole in the outline of the electrical box line and cut out the rest of the hole with a jigsaw. Use a level to make sure that the electrical box is perfectly vertical.
Video of the Day
Step 2
Use a tape measure to estimate how much wire you will need to run from your kitchen island to the nearest electrical box for your kitchen circuit. If your kitchen has more than one circuit, identify which circuit has the least amount of outlets or appliances that are used on a regular basis. Leave an extra 2 to 3 feet of wiring in case you need to make additional bends or underestimated the necessary length of the circuit. Use an electrical schematic or blueprint of your house to find the nearest electrical box.
Step 3
Drill a hole through the bottom of the kitchen floor and subfloor so that you can feed wire through the floor to the circuit breaker. Use a wire fisher to run electrical wire from the electrical box hole in the kitchen island to the basement of the house. Feed the electrical wire through the hole. Drill holes through any joists that need to have the wire passed through in order to reach the electric box.
Step 4
Shut off the power to your circuit breaker by flipping the switch on the main breaker power source. This will shut off all electricity coming into your house while you connect the wire from the kitchen island outlet to an existing circuit within the kitchen. Use an AC wire tester on existing live wires in order to check whether or not the electricity has been properly turned off.
Step 5
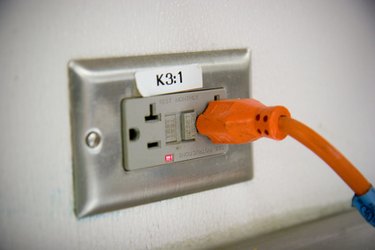
Strip both ends of the wire so that 7 inches are exposed. Use the strip gauge on the back side of the GFCI outlet, which tells how much insulation to remove from the individual wires, which will usually be 1 to 2 inches.
Step 6
Drill holes for the electrical box to be screwed into the kitchen island. Insert the wires through the electrical box so that at least 6 inches are coming out of the box. Screw in the electrical box to the kitchen island. Insert the black wire to the brass side of the outlet and tighten the screw with a screwdriver. Insert the stripped white wire to the silver colored screw and tighten with a screwdriver. Attach the ground wire, which is usually green or green-striped, to the ground nut on the outlet and screw in the ground wire with a screwdriver.
Step 7
Screw in the mounting screws for the outlet into the top and bottom of the electrical outlet box.
Step 8
Contact a licensed electrician to connect the other end of the 12-gauge wire leading from the outlet to the electrical box so that the kitchen island outlet is connected to the electrical circuit. Using a professional electrician will ensure that the job is done correctly, safely and up to code. The electrician can also check the rest of your work and help to answer any site specific questions that may have come up as a result of working on the project yourself.
Step 9
Turn the power to your outlet on and test the connection at the circuit's electric box with an AC tester. Also test the outlet for connectivity by using an outlet tester. Test the GFCI by plugging in the outlet tester and pushing in the red button on the front of the socket. Push the black button. The testing lights should turn off and on.
Step 10
Screw in the a plate to cover the outlet.
Video of the Day
- OutletSetup: Electrical Outlet Setup and Wiring
- Make My Own House: Diagram Electrical Wiring
- Installing Electrical Boxes and Receptacles: Rex Cauldwell: 1996
- Ask The Electrician: Installing Kitchen Outlet Wiring
- Check This House: Kitchen GFCI Receptacle and Other Electrical Requirements
- HomeTime: Installing Outlets
- This Old House: How to Add Electrical Outlets
- Charles and Hudson: Installing Electrical Outlets
- Lowes For Pros: A Well-Wired Kitchen