Things You'll Need
2 chalk lines
Chalk
Pencil
1-by-3-inch furring strips
Screws
Drill
Ceiling tiles
Straight edge
Utility knife
Staples
Staple gun
Circular saw
Safety glasses
Gloves
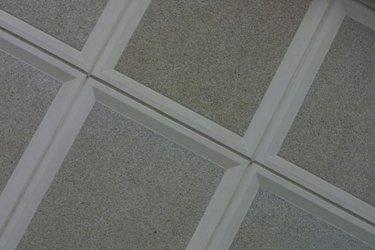
If you're planning to install 12-by-12-inch ceiling tiles in your home, you'll usually need to install furring strips beforehand so that you can attach the tiles to the ceiling. In most cases, furring strips are attached directly to the ceiling joists or over drywall.
Step 1
Measure each wall of the room. Find the center of each wall, and mark it with a piece of chalk or a pencil. Run a chalk line on the ceiling, stretching from the midpoint on one wall to the midpoint on its parallel wall. Repeat the process with the other two walls of the room. The chalk lines should create an "+" on the ceiling, marking its center.
Video of the Day
Step 2
Center a 1-by-3-inch furring strip across the joists in the center of the ceiling. Screw it into the ceiling joist with a drill. Draw an "+" in the spot on the strip that corresponds with the "+" the chalk lines formed. Run a row of furring strips in line with the initial furring strip across the rest of the ceiling from one end of the room to the other. Screw them into place as your work.
Step 3
Hold the edge of a ceiling tile against the central line in the "+" symbol you drew. Mark the spot where the opposite edge of the tile sits on the ceiling with a pencil. Center a furring strip over this mark. Screw the furring strip into place across the joists. Position the tile again against the central line in the "+" symbol to make sure the second furring strip is positioned correctly. Run a row of furring strips in line with the second furring strip from one end of the room to the other. Screw the furring strips to the joists as you run them.
Step 4
Measure the distance between the first row of furring strips and the second. Place a third row of furring strips this distance from the second row. Screw the row into place. Repeat the process until rows of furring strips cover the entire ceiling. Install a final row of furring strips flush against each wall.
Step 5
Measure the distance between the center of the second to last furring strip and the wall. Cut a row of ceiling tiles to this width using a straight edge and a utility knife. Staple the tiles into place through the tongue of the tile along the edge of the wall. Repeat the process around the perimeter of the entire room, creating a border.
Step 6
Apply the rest of the full-sized ceiling tiles in the center of the room, once the border tiles are in place. Staple the edge of each tile to the corresponding furring strip to hold the tiles in place.
Tip
Furring strips should be laid across, not parallel, to the ceiling joists.
Use a level when you're installing the furring strips to make sure the strips are creating an even ceiling surface. Your ceiling will only be as level as your furring strips.
You can cut furring strips to length using a circular saw, if needed.
Warning
Always use protective gear, such as safety glasses and gloves, when completing home improvement projects.
Video of the Day
- Armstrong: Ceiling Tile Installation Guide
- Ace Hardware: Installing Ceiling Tile
- North American Retail Hardware Association: Installing Ceiling Tile
- Rustic Girls: Ceiling Tiles Installation Guide
- USG Ceiling: Ceiling Systems: Planning and Installation Guide
- Home Depot. Home Improvement 1-2-3. 2003: Installing Ceiling Tile