Things You'll Need
Handsaw
Bucket
File
PVC shut-off valve
PVC coupling
PVC cement
Small length of PVC pipe

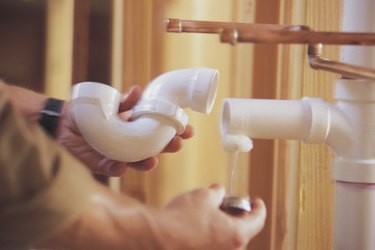
Next to copper, plumbers most often use polyvinyl chloride, or PVC, pipes to make residential water lines. Like copper, PVC is clean and durable, and it is even easier to install. You simply spread glue at both ends of a joint, and the glue partially melts the plastic to form a permanent seal in less than a minute. You can cut PVC with a handsaw, so when you have to replace a plastic shut-off valve, you don't have a complicated task before you, as long as you have an alternate way to temporarily stop the water.
Step 1
Turn off the water to the line in which the valve you want to replace is installed. If the valve supplies a fixture, like a water heater, you can turn off the valve that controls the main water supply for your house. If you are replacing your main water valve, contact your water company for instructions on how to turn off the water at the street.
Video of the Day
Step 2
Cut through the pipe about 2 inches from one end of the shut-off valve with a handsaw. PVC is not much harder than wood, so you can use any saw that will cut through wood. If the valve is in the house, put a bucket under the pipe to catch the water that spills out as you cut.
Step 3
Make a similar cut about 2 inches from the other end of the valve and remove the valve.
Step 4
Let the water completely drain from the pipes, then smooth the edges of the pipes with a file and bevel them so they will fit inside new fittings.
Step 5
Install a new shut-off valve on the end of one of the pipes and a PVC coupling on the end of the other one. Glue them on one at a time by spreading PVC cement on the end of the pipe and on the inside of one end of the fitting with the applicator that comes in the can of glue. Completely cover the surfaces with glue, then immediately push the fitting onto the pipe.
Step 6
Cut a length of PVC pipe of the same diameter as the water line that stretches from the fitting to the coupling, with a 1-inch overlap on either end. Glue one end to the valve. Spread glue on the inside of the coupling and the outside of the other end of the pipe, then bend both ends of the junction up and away from each other until you can get the pipe into the fitting. Release the pressure and pull the other way until the pipe slides into the coupling.
Step 7
Open the new valve and turn on the water. After you have verified that there aren't any leaks, you can either shut the valve or leave it open.
Tip
If the pipes are rigid and won't bend, use a compression coupling instead of one that glues on. It has nuts that you can tighten with slip-lock pliers and you can set it in place without bending the pipes away from each other.
PVC glue works even if the pipes aren't dry, or you can't completely shut off the water and a small amount is still flowing.
Warning
Work quickly after you spread the glue. It sets in less then 30 seconds.
Video of the Day