Things You'll Need
Protective, long-sleeved clothing
Apron
Rubber gloves
Eye goggles
Measuring cup
Stainless steel pot or double boiler
Wooden spoon
Thermometer
40 oz. extra virgin organic olive oil
5 oz. organic palm oil
5 oz. extra virgin organic coconut oil (should be raw)
16 oz. distilled water
6.7 oz. sodium hydroxide (lye)
Ceramic or stoneware bowl
Hand-held stick blender
2 oz. fragrant essential oil
Soap dye (optional)
Non-stick cooking spray or cellophane wrap
Wooden crate/box or soap mold(s)
Knife
Elevated, or "footed" baking rack
Soap crafters often ask how to improve their soap's lather. This is particularly true in the early/intermediate stages of homemade soap making. The key to crafting soaps that yield a rich lather lies in two areas: the types of oils used, and the ratio in which they are added. Certain oils contain higher degrees of vegetable lipids, or fatty acids. The more concentrated the lipids, the better the oils will saponify, or turn to soap when exposed to water and sodium hydroxide (lye). To make soap that lathers better, use a ratio of 4/5 base oil (usually olive oil) to 1/5 richer oils that saponify well. Among the best oils for this purpose are castor oil, palm oil, avocado oil and coconut oil. You can add any combination of these to a base oil in a soap recipe, as long as they comprise a minimum of 1/5, or 20 percent of the total oil used. Sodium lauryl sulfate is typically added to retail soaps to generate more lather, but is generally undesired in homemade soap due to its being a known allergen. Allow one month to make lye-based soap.
Step 1
Put on your safety gear and assemble all needed materials. Place the oils in your pot or double boiler and gradually bring them to a temperature of about 135 degrees F, stirring occasionally. Move the pot away from the heat and shut off the stove.
Video of the Day
Step 2
Pour the water into the bowl. With extreme care, slowly pour the lye into the water. Take your time with this step.
Step 3
Slowly add the lye blend to the oils in the pot. Stir briskly, but without splashing, for 10 minutes. Remove the spoon and blend for five minutes more with the stick blender. Stop at "trace," or when streaks of the mixture rest momentarily on the surface when you lift the blender out during stirring.
Step 4
Add any additional ingredients such as essential oils or colorants to the hot soap and stir to blend them in evenly. Line a wooden crate, box or large soap mold with cellophane wrap. Pour or scoop the soap into the mold, cover with the ends of the wrap tightly, and permit the cellophane-wrapped soap to cure for up to two days.
Step 5
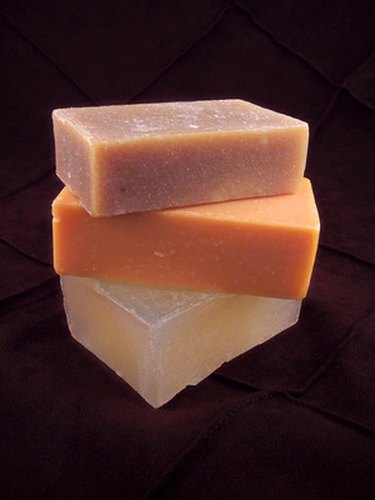
Unwrap and unmold your soap. It should still be soft, but will finish curing upon drying completely outside of the mold. Cut the soap into bars with a large knife.
Step 6
Place the soap bars on a slightly elevated baking rack for at least 30 days in a low-humidity area. Once the bars harden thoroughly, they should yield just below 5 lbs. of soap.
Tip
Make sure your working area is ventilated with plenty of fresh air circulating in the room. Keep children and pets away while using lye. Place any unused lye in a secure location well out of their reach.
Warning
Never add water directly to lye. Slowly add the lye instead to the water. Avoid splashing to lessen the chance of acquiring disfiguring burns. Measure the water and the lye in separate containers. They become superheated quickly on their own when combined, and can cause serious harm to you if you are not careful.
Video of the Day