Things You'll Need
Motorized soil tamper
2 x 4 lumber
Wooden stakes
Tape measure
Concrete edger
Bull float
Concrete finishing broom
Concrete slabs can be prepared and poured by the average do-it-yourselfer. Several things must be done in order to obtain a successful project completion, however, such as securing a level spot for the slab, leveling and squaring the form work, and pouring and finishing the concrete in a timely manner. You can expect to prepare and pour a concrete slab in one to two days, depending on the size and scope of the project.
Step 1
Level and prepare the surface onto which the slab will be poured. The dirt should not be topsoil, but rather compacting soil that will stiffen and resist movement, such as red clay. Use a motorized soil tamper to compact the soil, and make sure that the grade is no more than five degrees off level in any direction.
Video of the Day
Step 2
Form the slab using 2 x 4 or 2 x 6 lumber. You can choose how thick you want the slab, but generally, a four-inch slab is substantial enough. Attach all lumber at the corners using three-inch wood screws, and square the slab box using the 3-4-5 right-angled- triangle method. Imagine that one corner is a right-angle triangle, with the outer edge of the corner being the 90-degree angle of the triangle. Measure up from that corner three feet, and, beginning back at the corner, measure down on the opposite side of the angle four feet. Pulling a tape measure from the three-feet mark to the four-feet mark to form the long side of the triangle should measure five feet. If not, then adjust the two perpendicular sides of the form until the marks are five feet apart.
Step 3
Drive 2 x 4 stakes on the outside of the forms, and attach the forms to the stakes. Level the forms by raising them up and attaching them to the wooden stakes. Leveling will require that you begin on the highest corner and work your way around. Use a four- foot level to check the forms.
Step 4
Fill in any gaps beneath the form boards that were raised using plywood or cut 2 x 4s. You will need to do this to make sure that concrete doesn't run under the boards when it is poured. You can also pile dirt on the outside of the wooden forms in order to help stabilize the boards, as well as to prevent concrete from running under the boards.
Step 5
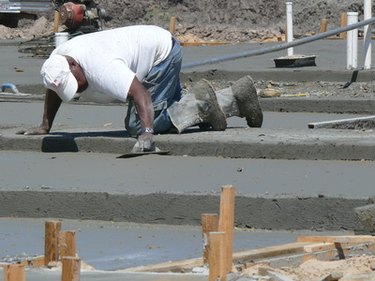
Pour fiber-reinforced concrete to the top of the wooden forms, and smooth the concrete using an aluminum bull float--a flat finishing plate with a long handle used to smooth concrete. Use an edger to round the concrete edges between the forms and the concrete, and, after the concrete has set for one to two hours, place a broom finish on the concrete by gently pulling a push broom across the surface. This will raise the sand in the concrete and prevent dangerous, slippery conditions on the concrete.
Tip
Use nylon string attached across two corners as a reference to keep your forms straight.
Video of the Day