Things You'll Need
Ruler
School jacket
Stencil
Pencil
Pattern paper (optional)
Tracing paper (optional)
Tailor's chalk
Embroidery thread
Rotary cutter
Cutting mat
1/4 yard of fabric such as felt or chenille
Temporary adhesive (optional)
Sticky stabilizer (optional)
Embroidery machine
Sewing machine
Double-sided fusible
Iron
Teflon sheet
Customizing your letterman jacket with your initials or school emblems can instantly personalize your jacket. Implementing embroidery techniques used for customizing patches and incorporating stencils will expedite your project. Position your letterman patch on your jacket for all to see, and you will have your own unique style on campus.
Drafting Your Patch's Pattern
Step 1
Measure the width and length of the area on your jacket where your patch will be stitched. Use a letter stencil for an initial or school name. It is important for your stencil's dimensions to fit in the jacket's designated area and be compatible with your embroidery machine's preset parameters, which cannot be adjusted.
Video of the Day
Step 2
Trace your stencil's outline on your pattern paper or tracing pad. Use your ruler to make any sizing adjustments. Your letter will need two separate patterns. One for the top layer and one for the bottom layer.
Step 3
Create your school's initial by mixing a contrast felt border for your bottom layer and a textured fabric such as chenille for your top layer. You can also opt to incorporate your school colors.
Step 4
Cut out your patterns. Mark your fabric with tailor's chalk to indicate your embroidery stitch. You can opt to select a thread color to frame the letter's top layer and a second color to frame the outer layer.
Step 5
Cut out your fabric's top layer. If you are using a rotary cutter to cut felt, make sure you have a cutting mat to protect your work table surface. Do not cut out the bottom layer. You will need the full piece of fabric with the outer layer tracing in order to hoop your fabric to your machine's hoop attachment for embroidery in a later step.
Creating Your Letterman Patch
Step 1
Spray a light coat of temporary adhesive to the top letter and apply it to the bottom layer. You can also use a sheet of sticky stabilizer according to your fabric's weight to stabilize the patch during embroidery.
Step 2
Hoop your bottom layer's fabric onto your embroidery machine's hoop attachment. Make sure the fabric is taut and the top layer letter is centered to keep the fabric from shifting during the embroidery process.
Step 3
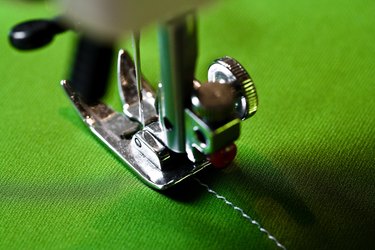
Embroider the top layer with your selected embroidery stitch. It is best to use a tight stitch to frame your letter. Cut any loose threads once the letter's embroidered border is complete.
Step 4
Embroider the outer layer. Select a tight stitch to frame the border, as well. Cut any loose threads.
Step 5
Use your rotary cutter to cut your letterman jacket's patch. Take your time, as it's important to avoid cutting into the embroidery thread.
Step 6
Trace your letter lightly on your double-sided fusible. Cut out the fusible tracing.
Step 7
Remove one side of the protective sheet from your double-sided fusible. Read your manufacturer's instructions. Most fusibles require your iron to be on a high cotton setting. Iron it to the back of your patch.
Step 8
Remove the second protective sheet. Position it on your jacket. Cover your patch with a Teflon sheet to protect it from the high iron setting, especially if you used a textured surface for your letter's top layer. Apply pressure with your iron until your patch adheres to your letterman jacket.
Video of the Day